Guild Wars 2 Twilight Arbor explorable mode dungeon guide. This guide will cover all the paths with the best path selection for Deadly Bloom farming. Twilight arbor explorable dungeon is a level 55 dungeon with three paths. Two of the paths are moderately difficult while the third one is severely overtuned, in both boss difficulty and trash difficulty. This dungeon is designed with anti-zerg mechanics in mind with only two waypoints (you don’t unlock the final waypoint until you kill the third boss) and volatile blossoms along the path to slow you down.
Navigation
- Introduction
- Shared path (Greater Nightmare Vine)
- Path 1 (Malrona, Fyonna, Nightmare Tree w/ Leurent)
- Path 2 (Leurent elite guards, Leurent, Nightmare tree w/ Vevina)
- Path 3 (The Defiler, Vevina, Nightmare tree w/Fyonna)
Introduction
Path selection
Killing the first boss (Greater Nightmare Vines), will open up an NPC dialogue with path selection. You have the choice of Forward or Up. If you chose the Up path here, you will be locked onto the “Spider path”. If you chose Forward here, you will be presented with another dialog box in the room up ahead with another set of Forward/Up options.
If you chose Forward here (both selections Forward/Forward), you will be on the most difficult path of the dungeon (we nicknamed the "Pain path”. If you chose Up here, you will end up on the “Bees path”
| Choice | Path | Difficulty |
|---|---|---|
| Up | #1 – Spider Path | Very easy bosses, trash is a bit difficult (farmable \~ 30 min) |
| Forward/Forward | #2 – Pain path | Difficult trash and difficult bosses (do it once for achievement, \~1-2 hrs) |
| Forward/Up | #3- Bees path | Easy trash but bosses a bit harder compared to path 1 (farmable \~ 35 min) |
Deadly Bloom farming
You are farming Deadly Bloom tokens because you either need it for legendary weapons (500 tokens) or want it for the awesome dungeon armor and weapon this dungeon provides (cheapest piece costs 180 tokens while the most expensive piece costs 330 tokens). Keep in mind while farming tokens that you get 30 tokens for completing a path for the first time of the day and any subsequent clear of the same path reward you with only 20 tokens until the daily reset (5 PM PST, 8PM EST).
For this reason, it is better to do path 1 and 3 daily so at least you get 60 tokens per day. It is not recommended to do path 2 as it is time consuming and have high repair bill costs.
Experienced groups can clear this dungeon 25-30 minutes (path 1 or 3) while groups with inexperienced players are expected to spend \~2 hrs in learning the fights for the first time.
Dealing with Blossoms
Blossoms at first are extremely annoying to deal with as they spread a poison cloud if you get close and they put a Poison debuff on you (reduces your healing in addition to ticking away your HP). For this reason, you should always have some kind of condition remover to deal with the Poison debuff. You can also use these blossoms to aid you as they have very low HP. If you ever get downed (especially in fights like Greater Nightmare Vine boss), tab target to them and shoot at them to rally instantly.
To quickly get through the blossoms area, you can use Swiftness + dodge rolls across and kill blossoms if you are downed. You can use use invisibility to sneak past some blossoms.
Shared (path 1, 2 &3)
As mentioned earlier, all three paths shared the same first boss, Greater Nightmare Vine and do not differ until you defeat this boss. .
Nightmare Hounds & Nightmare Husks
All visitors to the dungeon are greeted with a set of 4-5 Nightmare Hounds. These hounds are fairly deadly as they can pounce on you and pin you down on the ground (which makes rezzing downed people a pain). In addition, there are Volatile Blossoms in the room with a very quick respawn timer that can quickly poison the entire hallway. Inexperienced groups will wipe a couple times at this trash before they can get past through.
The best strat I found for dealing with these hounds is to actually have everyone stand right before the Blossoms start and then have two people go in. One person will be on Blossom duty, clearing any blossoms that respawn while the other person go in and tag the dogs to draw them out. The dogs will likely leash and go back and forth a bit so it is essential that the path is cleared of Blossoms. If you get lucky, you can split them and get only one or two to come out while the rest leash.
The next room has four Nightmare Husks (one patrolling) and these Husks are much easier to deal with since the room is clean of blossoms. The only thing you need to pay attention is their knockdown (they have a jumping animation shortly before it).
Greater Nightmare Vine (video below)
Greater Nightmare Vine is the first boss you will encounter and he is a tough one. It is actually advisable to have melee on this fight as the blossoms do not seem to target the melees as much if there are ranged characters shooting at them.
| Mechanics | Strategy |
|---|---|
| Nightmare Vines | You need to kill the Nightmare Vines that spawn in front of the Greater Nightmare Vine ASAP so that ranged characters can get a shot to whack on the boss. Ignore the ones in the back. Vines seems to spawn based on boss’s HP. |
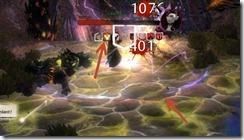
| Red circles | Both the boss and the Nightmare Vine adds will shoot red circles that literally carpet an area. Projectile reflects do not seem to work here. Ranged characters need to spread out while melee characters can stand right under the vines to DPS them (watch out for blossoms) |
| Downed people | Rezzing people here is risky as there is a high chance for both the rezzer and the down person to get targeted by red circles. Rez them if you can but dodge immediately if the red circles show up. |
To spawn the boss, you will need to kill 5 Nightmare Vines that spawns. All Nightmare vines, including the boss, have a very long ranged mortar type attack that will literally carpet an area with red circles. Do not stack on each other, instead, spread out as much as possible. If the ranged characters are keeping the vines occupied, melee characters can run in and DPS the vines right underneath them. Melees need to watch out for blossoms and tab target to find a nearby blossom if they are downed.
Projectile reflects do not work on those attacks, you just need to dodge roll through them to a safe spot. Keep in mind that they have an extremely long range. The only safe spot is near the entry to the room where you are out of combat and can heal up (won’t work if you have the poison condition on you).
Vine 1 will spawn first, 2 &3 pops up when you kill 1. Killing 2 will spawn 4 while killing 3 will spawn 5. Killing 4 will spawn 6 . Once you have 5 Vines killed, the Greater Nightmare Vine boss will spawn.
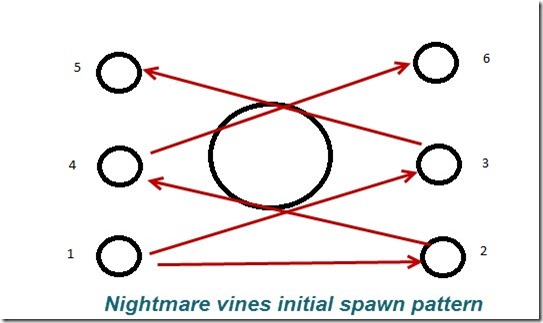
Once the boss spawns, ignore the vines in the back that were not killed and just focus on the boss . The first 20 seconds of so is a good burn phase as you can just focus on the boss without worrying about having additional vine adds spawning.
Vine spawning while the boss is alive seems to be based on the boss’s HP.
- At 70-80% of the boss’s HP will get a vine at the #1 position to spawn, kill it quickly before moving back to the boss.
- At 40-50% you will get a vine to spawn at the #2 position.
- At 20%, you will get two vines to spawn at the 4 &5 position, it is advisable to ignore them and just focus on the boss.
If you wipe on this boss, the next time you face him you might get 4-5 Nightmare Vines as well. If this happens, burn the vines in front of the boss (i.e. 1, 2, 3, 4) and ignore the ones in the back.
Path 1 – Up
This path is nicknamed the Spider path due to the large amount of spiders and spiderlings you have to fight through. What you need to keep in mind while doing this path is to never run ahead as there are triggers that will spawn spiders on your group. This is especially the case when you enter large empty rooms as there are often multiple groups of spiders that can spawn.
Trash before Malrona
Malrona’s room isn’t far from the Nightmare Vines. Once the NPC opens the path for you, you will immediately face 2-3 silver spiders. It is advised that the group do not rush into her room. Instead, everyone stay in the hallway leading to her room and have one person go in and spawn the spiders to bring them back. This will allow you to funnel all the spiders and spiderlings into the hallway for easy AoEing.
There are several types of those silver level spiders.
- Undergrowth Stonetouch – Paralysis – kill this one first if possible
- Undergrowth Recluse – Poison – kill those ones next after Stonetouch
- Undergrowth Webber – Immobilize
- Undergrowth Bloodfang – Drains life
Malrona (Video below)
Malrona will spawn after you defeat all those spider waves. She is actually the toughest boss on this path and not very melee friendly.
| Mechanics | Strategy |
|---|---|
| Conal venom spray | Don’t stand in front of her, venom spray has a short range and easily avoided |
| Poison circles | These circles are deadly (will often one shot you) but you have about 2-3 seconds to dodge out of it before the attack land. Circle also seem to be near her position so if you stay at max range you won’t get that many circles. |
Malrona’s mechanics are rather simple – frontal venom spray and poison circles that she throws out. Venom spray is easy to dodge unless you are standing right in front of her but her poison circles are rather deadly .
It is difficult to melee on this boss as she turns erratically and the poison circles she throws out are often next to her. The safest way to DPS Malrona down is to go ranged and just stay at max range and kite her around the room. This will allow you to avoid most of the venom spray and decrease the amount of poison circles you need to dodge out.
Trash before Fyonna
There are more nasty trash up ahead before you get to fight Fyonna, who is a push over. What get most groups is the 3 Nightmare Vines that spawn up ahead in the narrow passage. There isn’t a lot of room to move around to dodge the red circles. Fight at max range if possible, kill the vine that is the closest.
Note that trash here can be skipped if you just run through them.
Fyonna (Video below)
Fyonna, the Countess of Spiders, is a standard tank and spank fight with some spiderling adds that dies easily. Do not fight her where she stands; instead, pull her to the narrow hallway before her room so people don’t run around into the eggs in that room .
If anyone get close to the eggs (pets and clones are ok), the egg will explode, spawning a silver level spider. If you fight Fyonna in her room and everyone is just running around, you will spawn a bunch of silver spiders and result in a wipe.
Trash before Nightmare Tree
The trash after Fyonna is fairly easy. You will encounter a group of 4 patrolling Nightmare Court Knight, Nightmare Court Duelist, Nightmare Court Cultists. Killing the Knight is a #1 priority as he has a knockdown combo that can pin a group member down and finish them off. After you burn down the Knight, kill off the Duelist and then the two Cultists.
Once you get past the patrol, there are a bunch of archers down below that you can either fight or skip by running through them (swiftness + dodge roll here helps to get past the blossoms)
Finally, after making through the archers, you will face two Nightmake Court Warders, one silver and one gold. Burn down the silver one first as it has less HP and avoid their knockdown combos.
Nightmare Tree & Leurent
This path has the easiest Nightmare Tree. There isn’t much to do here except stand at the entrance of the room and just burn the boss down while killing any Sylvari Mortar Turrets nearby. Do not melee on this fight as the tree have a nasty stomp in melee range.
Path 2 – Forward/Forward
This is the toughest path in this dungeon and not recommended unless you are working on the achievement. Both the bosses and the trash here are extremely difficult (multiple Nightmare Court Knights doing knockdown combos). The last boss is fairly overtuned compared to other paths and will require a good amount of time to kill it.
Tip on Nightmare Court Knights and Warders
Nightmare Court Knights/Warders should always be killed first. Mesmers can turn them into a Moa bird for 10 seconds and it is useful when you are facing more than one Nightmare Court Knight at a time. Stability (immune to knockdowns) is good to have but sometimes it may be hard to time it.
Trash before Leurent’s Elite Guards
Most of the trash here can be skipped if you take a right and go into the water. You will need pull a champion level (gold) Nightmare Court Warder guarding the bridge into Leurent’s Elite Guards.
Leurent’s Elite Guard
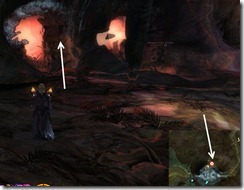
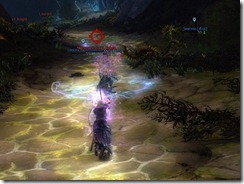
This is the easiest boss fight in the entire path. You will be facing 4 Nightmare Court Archers. They are all protected by a glassy bubble that will one shot you if you try to run in. Instead, look for the gear symbol on your map, it is rotating in a clockwise pattern around the room can can teleport you inside the bubbles to melee them. Alternatively, ranged characters might be able to just damage the archers from the outside without having to mess around with the bubbles.
To your left, immediately before the first archer, you will see this portal thingie, running into it will take you into where the gear system appears on the minimap. If all the melee characters time it just right, they can all take the portal at the same time and end up at the same archer to kill.
Whatever you do, don’t go to the middle of the room and run around blindly. You will get shot by all four archers and go into the downed state fairly quick.
Leurent
Leurent is surrounded by three Nightmare Court Knights right before the hallway to the final boss’s room and it would be a suicide to pull all four at the same time with their knockdown combos. Instead try to pull from a distance and leash all but one knight at a time . It will take some practice and it will be messy but you should be able to kill all three knights individually and get Leurent alone. Have one person stay back to rez the group if the pull goes wrong.
Leurent himself isn’t bad but he will immobilize you and do knockdown he gets close. You can cripple him and sort of kite him around. Leurent does have a fair bit of HP.
Nightmare tree and Vevina
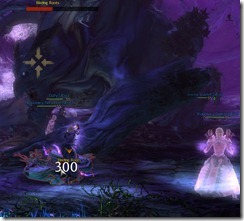
This version of the Nightmare Tree is the hardest as the tree will spawn Veteran Oakhearts with a lot of HP that immobilize you. Trying to kill them is futile as they will respawn almost instantly when killed. Luckily these things do move a bit slow and can be knocked back.
The strat that worked for us is basically kite the Veteran Oakhearts around while running circles around the tree and get as much DPS as you can. If you get rooted, kill the Binding Roots on your feet asap and move away from the incoming Oakhearts. You can use also use the hallways connected to this boss room to kite and just run past the Oakhearts when you reach the end of the hallway.
If you are lucky enough to not get any Oakhearts to follow you around, unload on the boss and do as much DPS as you can!
Path 3 – Forward/Up
This path has some rather easy trash but the second last and the last boss are bit more difficult (but doable). If you like good boss fights but hate killing trash, pick this path instead!
The Defiler
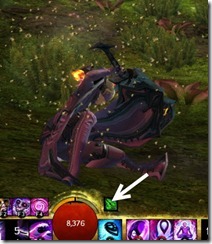
Defiler is the first boss you will encounter on this path after killing some Nightmare Husks. He comes with two Flametouched Husk adds that needs to be killed first but the rest of the fight is straightforward tank and spank. You do have to watch out for the blossoms and a green debuff on yourself.
This green debuff is actually not from the boss but from the bees you will encounter over the bridge. It ticks for small amounts of damage but you can remove it by dodge roll.
Bees
I personally find this part of the dungeon rather fun but some party members may have difficulty with it. If that is the case for your group, as long 3-4 people make it over, they can move forward to trigger the next part of the path and that will clear all the bees .
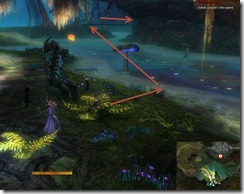
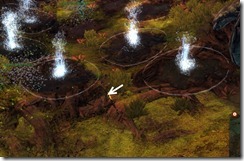
Taking the sap from the fountain will make you invisible and the bees will become friendly. The catch here is the water that sprouts from the ground. If you run into a white circle or had one spawn on you (the circles disappear and appear), your invis will be removed and the bees will attack you (they will one shot you).
The easiest way for me is to stick to the left wall and just be patient. Wait for the water circle to despawn and then move forward . If you just run ahead carelessly, you will get water circles spawn on top of you and break your invis. If that happens, keep running forward and you might make it to the other side.
Nightmare Pups
All the Nightmare Pups are normal mobs so you should have no problem killing them. Lay down some combo fields on the ground that cripple them and you can just AOE them down before they even get to you. The only way you can screw up this part is if you run ahead and trigger the blossoms.
Vevina (Video below)
Vevina is a semi tough boss. She is a mesmer and loves to throw down Chaos Storm (deals a lot of damage and put random conditions on you), Confusion (damage you each time you use an ability) and teleport around. Having condition removers here is very handy. If you can keep Leurent alive (i.e. Guardian and Elementalist heals), she will spend most of her time fighting Leurent and dies very quick.
| Mechanics | Strategy |
|---|---|
| Chaos Storm | Immediately dodge out of this circle ASAP. Spread out and don’t cluster together. Becareful when rezzing downed players. |
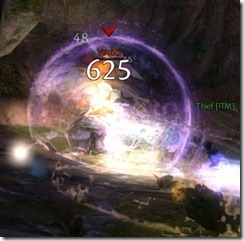
| Chaos Armor | Less frequent than Chaos storm, but if you see Vevina with a shield bubble on her, don’t attack her or you will get conditions applied to you |
| Confusion | Don’t attack if you have too many stacks on you, get it removed or wait for it to fall off. No sense in killing yourself. |
| Leurent | If you can keep Leurent alive, this fight is a lot quicker and easier. |
| Nightmare Husks | Kill them ASAP, especially if you want to keep Leurent alive. |
| Buffs (Boons) | Vevina gains buff during the fight, use skills that removes Boons if you have them. |
The fight starts with two Nightmare Husks and Vevina. Leurent is also present but as a friendly NPC. He starts off with very low HP and will most likely die (perm-death, not rezzable) within the first 30 seconds of the fight. If you have a guardian + elementalist group you can make this fight easier by having them use their heals on Leurent to keep him alive. Doing so will allow Leurent soak up a lot of the damage instead, making this fight considerably shorter (Guardian’s Tome of Courage is useful here)
Regardless of Leurent’s situation, your group need to watch out for Chaos Storm (can be hard to see, it is a pale red circle on the ground) and dodge out immediately. Do not cluster together and pay extra when rezzzing downed players. The Chaos Storms are targeted to individual players so if you stack together everyone will get hit.
Vevina will also gain buffs if she casts Chaos Storm on herself, these can be removed.
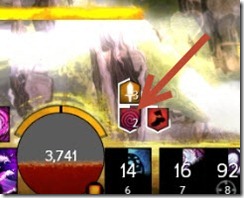
In addition to Chaos Storm, you also need to watch out for two other things: Confusion on yourself and Chaos Storm on Vevina. Confusion is a debuff with a red swirl that will damage attackers each time they use an ability. Chaos Storm is a bubble shield on Vevina that will apply conditions to attackers.Attacking Vevina with these on will cause players to damage themselves (turn off autoattack if necessary: ctrl + right click on the ability).
Nightmare Tree and Fyonna
This is a slightly difficult version of the Nightmare Tree compared to the Leurent version in path 1 but it is no where as difficult as the Vevina version in path 2.
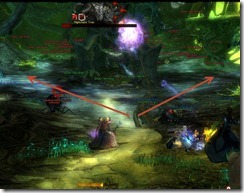
Nightmare Tree will periodically spawn spiders, both big ones (Undergrowth Recluse) and smaller spiderlings. They all spray poison so you will want to have condition removers handy. The strat here is to burn down the spiders as a group, clearing a safe zone in front of the boss and kill any spiders that spawn in this zone. Rest of the spiders in the back you can just ignore as long you stand right in front of the boss.
Once the spiders are cleared, go back on the boss, rinse and repeat for any additional spiders that spawn.

Archived Disqus comments
a guardian
great guide, I’d just like to add that block and blind skills are VERY useful on the forward/forward path, the guardian’s “Retreat” and Aegis come to mind here and also the consecration that gives stability, you can nullify most of the wombo-combo with a well timed block
Dulfy
thank you, I will make sure our guardian is aware of that hehe 😀
Nick
Heya, good guide! I’d just like to point out that in the vines room, there’s a ledge at the left side when you enter. After getting the boss to spawn, you can grp up there and pop in and out to whack the boss as the red circles dont seem to reach that far in.
Hyde
Thanks for the guide, nice to see a non video one for once, becoming rare these days!
Frustratedman
Very nice guide… thanks!\ Yesterday evening some guildmates and I tried the forward/forward path unaware of what pain in the axe it is. We ended up logging off without completing it at 3 am after 2 and a half hours of frustration. That path needs to be reworked because it’s simply not fun at all. While other dungeons can be difficult but in the end they are totally rewarding and fun and you end up with a big grin thinking “wow that was tough but we made it!”, the second path is just frustrating.\ The Nightmare Court Knights and Warders groups are too hard by themselves sometimes. Fighing them among the poisonous blossoms that spawn constantly at a high rate is just… ridiculous. Hope they fix this path because it can be very fun, but not how it is now.
Rohrmann
We did the “hardest” path yesterday and were surprised to see it not being that hard at all. We were two Warriors one Guardian one Engineer and one Necro and to be honest we cleared it fast than the other two paths. No wipe at all.\ Only real trouble were the knights/Leurent combination but you can pull them back to the entrance of the room in a way so that you only have to fight one or two at the same time(the others will lose aggro).\ Tree was pretty easy too just avoid the Oakhearts if they come close to you(you can forget about the roots until they do and just dispel them then and do ranged dps in the meantime)
Anyways thanks for the guide, helped a huge lot when first doing the dungeon =)
Isaac
I dont know if they fixed it but in the bees path as a necro you can use spectral walk and the bees cannot damage you and you can run past them to pugs to deactivate the bees for your party
Geekfox
Boss guide for forward/up path is no longer valid, since ANet changed the spider behaviors on June without mentioning it in the published notes.
There are several threads in the Dungeon section of the GW2 forums about this issue, as well as the updated guide in GW2 wiki.
Zonko
a worthy hint for the endboss-fight at forward/up:\ when the tree starts to shake, DODGE and almost no new spiders will spawn 😉\ otherwise this boss is nearly impossible though massive amount of spiders…
Alxi
You need to update the guide, it is 60 tokens for each path, not 30.
Pingback: Guild Wars 2 | Pearltrees ()