A guide to the GW2 Tribulation mode World 1 for Super Adventure Box.
World 1 Zone 1
Video guide (note this video currently does not show the shops for Tough Customer)
Start to Cloud save #1
This part is fairly easy as long you don’t touch any of the flowers. You cannot go forward so you will need to jump backwards and then hop onto the tree nearby while avoiding any flowers. Grab the monkey balloon at the top of the tree and the press #2 button to save at the cloud.


Cloud save #1 to Checkpoint 1
You can head straight towards the next area with the spike traps while avoiding flowers. Once you get to the next spike square though, you have to be careful to stick close to the spike square and not go too far to the right as there is a hidden trap to the right.


From the second spiked square head to the checkpoint but keep an eye for a directional hand that will turn into a missile and try to shoot you.


Checkpoint 1 to Cloud save #2
There are a ton of explosive flowers near the first monkey so you may die once or twice getting past him. From there on, you will want to hop from tree top to tree top and clear the monkeys if possible so the run back isn’t as painful if you die.
Under the first pair of monkeys is your first shop for Tough Customer but beware that if you do drop down to the shop, there isn’t a way to progress forward as the next area you need to go is blocked by spike traps. You will need to die and then run back and jump on that small tree.


From that small tree, you want to aim for that snake and then take a 90 degree turn to get on the slightly raised ground. The reason for this is that there is lava pit to your right.

Once you get to the monkey balloon for saving, becareful to not hang left as there is a spike trap there.

Once you have the balloon, it is a simple matter of climbing up the little hill with the checkpoint.

Cloud save #2 to Checkpoint 2
The next couple jumps are all fairly long so you will need to jump off the very edge or get some speed and jump while you are in the air.


Once you make those jumps, run up the slope while staying away from the flowers. You will need to jump to the next hill with the chest and spike ups by climbing to the right. Up top, you will need to jump over sections of the spike trap and then jump on the tall tree nearby.


Couple more long jumps and this should put you on the ledge near the checkpoint. From the ledge, you want to jump to the ground to access the checkpoint. This jump is very trick because if you didn’t jump far enough, you will get hit by traps and if you jump too far you will get nailed by spikes too. Aim for the location indicated by the red arrow and you should be fine to run to the checkpoint by staying close to the wall.


Checkpoint 3 to Checkpoint 4
This section is extremely tricky as you will need to jump really fast as the rocks will jump up when you approach them and attempt to knock you into your death.
There are two ways to do it, 1) running at full speed with no pause (shown in the video) or 2) roll into wall near each jumping rockand wait for the knockback to pass).
The worst jump for me this this jump where you need to aim at the wall so you jump as far away from that rock to the right as possible. If you picked option one you want jump in a sequence such that you stay away from each rock as much as possible or they will knock you into your death.


If you do make the jumps, beware of a spike trap on the right side of the checkpoint.

Checkpoint 4 to Cloud save #3
Floor is lava is the theme of the next section. You have to jump between block to block and then jump through the flowers in the spike trap area.


After you make it past, you will encounter a Tribulation cloud who will shoot missiles at you. Go left and grab the monkey balloon for the cloud save and then go to the top right corner and head into the maze.


Inside the maze you will encounter two set of traps. Make sure you have enough space between you and the first trap so you don’t get spiked midair due to low clearing. On the second set of traps, you have to becareful to not overjump and hit the trap on the wall.


Once you arrive at the end of the maze, hop on to the save cloud but make sure you don’t go on the raised platform as there is a nasty spike trap waiting for you.


Cloud save #3 to Checkpoint 5
Since there is a spike trap there, you will want to jump on the rocks in the wall and then head towards the spike square. Jump on the little rock inside the square and then make you way to the right side.


If you want the first honeycomb for Forbidden Honey achievement , then you will want to head left instead of right and hug the wall to avoid the trap next to it. This should bring you to the Queen Beedog with the honeycomb behind her.


Otherwise, you will want to jump on this rock and then make a hard jump to that tree which will take you to a ledge that goes all the way to the next checkpoint. Be super careful when you arrive at a gap in the wall as there is a spike trap there so don’t go in too much to the right when jumping over that section.


Once you get to the monkey section, jump on their trees and then to the ledge to the right of them and follow it before dropping on top of the checkpoint.

Checkpoint 5 to Checkpoint 6
From the checkpoint, jump on the outer edges of the ground next to it. The raised area contains a spiked trap.


Once you make it across the chasm to the other side, jump on the raised area as the ground in between them is filled with lava. Now, instead of of heading to the rock on the left, head right and stick to the raised area.


Jump on the little rock cropping but be careful around the corner and stick to the very outer edge. There is a spike trap that touches the outcropping at the corner but if you stay on the very edge you won’t trigger it. Jump off to the rasied ground after that rock.


From the raised ground, jump to the tip of that corner rock and then jump to the grassy area above it to avoid the trap.

Climb up the outcropping to the little monkey up top. Kill him and then follow the outcropping to the checkpoint.


Checkpoint 5 to boss
Don’t head to the boss yet, we are going to the second shop for Tough Customer. You will want to drop off the left side of the checkpoint so you land almost on top of the shop. Watch out for the flower next to it that will explode.

After you exited the shop, run around so you die and then respawn at the checkpoint to finish off the boss fight.
World 1 Zone 2
Video guide (note this video currently does not show the shops for Tough Customer)
Start to Cloud save#1
Floor is lava here so make sure you hop between the mushroom pads and then jump to that little raised hill. Move on to the raised hill quickly as the rock nearby will jump up and do a knockback.


Run to the rocks near the waterfall and jump on them to a tree nearby that will bring you to cloud save #1


Cloud save#1 to Checkpoint 1
For the next section, you will need to jump between tree roots and not touch the lava, which will instant kill you. Try stick to the left as much as you can and only go right if No clouds block your way.


There is an alcove with a blue bauble that is blocked off by a No cloud, when you see that area, you will need to go right and then head left again after you got past that area.You will come across some green leaves you can hop on that will lead you to the checkpoint.


Beware that the ground right before the checkpoint isn’t safe so make sure you are hopping between roots and not fooled to step on the ground to get to the checkpoint.

Checkpoint 1 to Cloud save #2
This next bit is a tricky and requires you to have good timing. You will need to hop on the roots to your left side as there is a spike trap to the right side of the area past the checkpoint.


Once you make it to the lava section, you will need to jump through two rocks and a big rocks that jumps to make it to the leaves on the other side. The best way to do is to jump to the #1 small rock, pause and then jump to #2small rock and immediately jump back to small rock #1 and then #2 and then past the big rock. Doing this will “fake” the big rock, he will jump but you will be safely back at #1 small rock and then if you do this part quickly he won’t have time to jump again before you get across. If this part sounds confusing, see video.


Past that section, go around the tree by jumping on the roots to the left. Then you will need to do a fast jump past 3 rocks. The one in the middle jumps so you will need to move fast before it has a chance to knock you off.


Once you make it to the other side, go around to grab the monkey balloon and kill the monkey nearby so he doesn’t knock you into lava.


With the monkey balloon, jump on the edge of the tree trunk and then hop on the little hill after it to get to the cloud save. You have to be super careful about running on the hill as there is a big spike trap to the left side.


Cloud save #2 to Checkpoint 2
From cloud save #2, jump to the root in front of you and then drop down to the two leaves below. You want to hit their inner side as there is a trap that triggers if you hit the outer edge.


From there, jump down on the lilypad and move through them quickly as the water will instant kill you. There is a trap on your right after the lilypads so go a bit left to avoid it.


You can now take two paths, white one leading to the third shop for the Tough Customer achievement or the red one for the path to the next checkpoint.

If you do visit the shop, you will probably need to die and respawn at the the cloud save and take the red path. Hop on that big root and then jump to the raised area. Then go up the slope. Don’t hug the left or right too much as there are traps on either side.


Once you get up that slope, the hug the wall to your right all the way to the checkpoint. There is a spike trap right in front of the checkpoint you can avoid if you hug the wall.


Checkpoint 2 to Cloud save #3
There is a trap right past the checkpoint on your left so hug right when you go out of the checkpoint.

If you want to reach the fourth shop for Tough Customer achievement, you will need to head right instead of straight up the big tree. Dodge past the jumping rock and keep going right until you see a lava filled area.


Jump on the big log to get across the lava to the shop.When you exit just run into the lava and go back to checkpoint so you can proceed to the cloud save.

If you want the second honeycomb for Forbidden Honey achievement , do the same as if you are heading towards the 4th shop but instead of heading right follow the yellow flowers and arrive at a corner with a hole you can enter.


The area around the Queen Beedog is trapped, there is a trap right on top of the slope and directly where Queen Beedog is standing, something to consider once you killed the Queen and going after the honeycomb. After you get the achievement, just die to the traps so you can run back faster.


This time, go up the big tree with lava at the bottom. Jump on the first few leaves and then drop down on the edge with the wood to grab the monkey balloon.

With the monkey on your hand, jump back onto the leaves and continue upward through the tree. Emerge from the tree and then go right on to the leaves. The cloud save isn’t too far and the leaves are trap free here.


Cloud save #3 to Cloud save #4
This big rock next to the save also jumps so you have to fake him again or just dodge jump if you know how. Alternatively, you can go from the left and dodge against the leaf that you need to jump on to avoid the knockback from the big rock before jumping directly on top of the leaf.

Past him is the canopy but watch you don’t go near to the tree trunks as they are trapped.


Make your way to the mushroom jump pad and then grab that monkey balloon before jumping back down.


Proceed towards the cloud save but watch for some traps on your right so jump to the left edge if possible.


Cloud save #4 to Checkpoint 3
Use the mushroom pad to get to the leaves at the top and then climb up the big trunk. After that drop down to the canopy and go left after the first set of leaves.


From there head towards the checkpoint but avoid some of the leaves on the left as they are trapped. The second fungus pad is also trapped on the left so make sure you jump to the edge.


Once you are near the checkpoint, make sure you don’t step on the leaf on the left as it is trapped.


Checkpoint 3 to Cloud save #5
The fifth shop for Tough Customer is on the right wall as you drop from the checkpoint. There is a shopkeeper outside but the shop itself is empty and trapped. It is also where you get candle upgrade.
You will need to jump very fast across the lilypads to reach the monkey balloon on the right and then jump back to the big tree. Watch for the trap at the area you start jumping to the lilypads.


Once you make it to the big tree, go around on the right and jump on the bottom mushroom pad which will shoot you to the top mushroom pad. From the top mushroom pad you can jump to the tree branch but you want to land a bit left as there is a trap on the right.


Cloud save #5 to Checkpoint 4
The tree right in front of the cloud save is trapped so don’t go near it. Instead jump around it.


Make the next couple jumps exactly as I drawn them as part of some leaves are trapped.


When you get to the last three leaves, go on the edge of the leaf closest to the waypoint to jump down as the middle of the leaf is trapped.The small rock at the checkpoint jumps so you will need to dodge it and hit the checkpoint.


Checkpoint 4 to boss
This area is mostly safe from traps, just go around on the ledges and jump on the x


The boss fight is fairly simple but beware of trap near the other mushroom pad shortcut and knockback from the boss.

World 1 Zone 3
Video guide (note this video currently does not show the shops for Tough Customer)
Start to Cloud save #1
Grab your monkey cloud right from from the starting area and heads towards the big trunk with the jump pads in it. Do the jumps like normal mode and then leap over to the big horizontal trunk. Note that there are now traps on the sides of the trunk so make sure you stay in the middle and do not wander off the sides.


Your passage to the next series of flower pads is blocked by No clouds so you will need to find another way up. Hop on the ledges and then jump on the platform with the big log. There are no traps on that platform so you can run around. From the log get up on the ledge.


From the ledge you can get to another set of flower pads to another platform, and then another set of flower pads to a ledge where you can jump on the small log with the cloud save #1.


Cloud save #1 to Checkpoint #1
Descend the log and then jump across the terrain. Raised areas are safe but the area in between is filled with lava. Jump on the flowers to get across the spiked area as the the other areas are all filled with area. From the flower make it to the next raised area and then to the checkpoint.


Checkpoint #1 to Cloud save #2
If you want the third and final honeycomb for the Forbidden Honey achievement , backtrack a tiny bit from the checkpoint and you will find a hole you can enter which lead you to a maze.


This maze is filled with lava traps so unless otherwise specified only assume that the yellow boards are safe but the ground between them is not. White arrows denote paths that are safe to walk while red dotted arrows means to jump.


Proceed as you would normally, note that the branch at the end has a trap so jump on that stump as soon as you can. The acid water here will instant kill you so don’t even try touching it.


The stump also have a spike trap cover most of the area so don’t go on it to reach the mushroom pad. Instead, jump left back to the main tree and then use it to get to a mushroom jump pad.


From the branch, avoid or kill the money and then jump to the branches on the left.


Go up, kill the monkey guarding the balloon and then proceed to cloud save #2
Cloud save #2 to Checkpoint 2
Follow the arrows and watch out for that trap. When you at the flowers, don’t drop down to the bottom. Instead, drop to the tree branch below it.


Follow the branches but make a detour to the flower and watch out for these two traps.


From there, hop on the mushroom pad and jump yourself to the ledge. The ledge isn’t safe either, so you want to hug the wall to avoid that trap.


Jump through a series of flower pads and don’t jump left to the ledge as there is a trap. Instead, jump right to avoid the trap. From there it is a worry free run to the next checkpoint.


Checkpoint 2 to Cloud save #3
There is a trap to the right of the checkpoint so avoid that and continue.

If you are going after the Tough Customer achievement, shops six and seven for Tougher Customer are right around this checkpoint behind the acid waterfall which will instant kill you if you touch it. The trick here is landing on lilypad below and then press jump and then forward. This should somehow allow you to get past waterfall without dying. It may take a few tries to get it right.


Don’t go too far on the branch as there is trap up ahead. Instead, jump on the flower pad and then to that lower log below. You will follow it and then hop on another branch to go up.

The next couple sections are mostly trap free and you should arrive at the cloud save without much issues unless you fail a jump and land in the acid water.


Shop eight for Tough Customer is right around this cloud save. Go up from the cloud save and jump on the ledge with the green bauble and that is where the shop is located.


Cloud save #3 to Checkpoint 3
Just on the chest and then head to the slanted trunk with three blue baubles. Take note of these two traps near the slanted trunk and avoid it. You will be chased by a Tribulation cloud but you should be okay as long you move fast.


From the slanted trunk, hop on a higher branch and rest of the path to the checkpoint should be mostly safe.


Checkpoint #3 to Cloud save #4
The next section is fairly trap light. On the section with the falling leaves, you will want to head right and then rest on a small branch sticking out. From there, jump to the leaf above it


From there, head to the vertical stump and then drop down to grab the monkey cloud.


Use the mushroom pads to get up but if you have trouble getting to the top mushroom consider jumping from the edge of the vertical trunk. Use that pad to boost you to the horizontal trunk. Once inside the horizontal trunk look for an exit to your left and jump up to the top of the trunk to save.


If you are going after shop nine for Tough Customer, then you will need to go back and drop on the other edges of the vertical stump with the monkey balloon. Drop down to a corner and you will find the shop.


Cloud save #4 to Checkpoint 4
For shop ten for Tough Customer, which is the shop that sells the elite Moto’s Breath. You will need to hop down on the left and then follow a series of jumps that lead you to the platform below the tree trunk. Throw a bomb at the crocodile and use him as a platform to get past him.


After you hop through some flowers, you will need to hop on this structure and make a very difficult jump. The easiest way I find was aiming at the tip pointed by the arrow, I have an easier time getting up by jumping to there.If you fail the jump here, you will fall into the acid and die.


From there, you will need to make a long leap to the next log across and then get up on a slanted log above it. I find it easier to aim on the inner side of the slanted log where the log touches the wall.


Rest of the section is basically jumping from mushroom jump pad to pad. At the very top, you will find a No cloud blocking your path but if you hop over quickly, you won’t be affected much by his knockback. If you have trouble with this, then consider using the jump pad to hop to the other side of the trunk. The shop is just at the bottom once you make it past the No cloud. From the shop you can just jump down to acid and respawn at the cloud save.


Back at the Cloud save, you will need to run to the side of the trunk and make that tricky jump to that platform. It is a long jump so either jump from the very edge or dodge jump if you know how. From that platform, drop down to lower platform and ledges and make you way.


Kill this toad as the rock in front of him jumps so you want to make it across quickly. Bomb the croc to make him a platform and then follow the arrows. There are a lot of traps here so you will need to jump in a specific pattern.


The final shop for Tough Customer is behind the crocodile but you can’t exactly reach him since he is covered in spikes. You need to backtrack abit and use the fungus attached to the tree to jump down to the shop.


King Toad Fight
King Toad fight will take some used to. The acid water instant kills you like rest of the zone so you will need to make sure hop off the lily pad quickly and jump to one of the rocks when you drop down. In addition, only the middle platform can be used as the other two are trapped with spikes.


There is also a monkey up top to the right that will throw coconuts at you to knock you off. You can try find a way to kill him but I couldn’t quite reach him from the checkpoint with bombs and slingshots.
Chain Sticks from W2Z2 (if you don’t know how to get it, consult this Major in Enhancement guide) works great for this fight as you can bring the King Toad’s HP down pretty quickly. If you are terrible at dodging his shockwaves (dodge towards him), buy lots of HP potions from the vendor before the King Toad fight as each shockwave you fail to avoid takes 1 heart away from you.
Archived Disqus comments
Odîum
tribulation world2 zone 3 completed *-*
Jiuzi
Will you also upload guides for achievements like forbidden honey and all shops in this mode?
Dulfy
Yes currently I am doing all the bauble/secret room achievements for world 2 so havn’t spent much time on tribulation mode just yet.
Jiuzi
Amazing job 🙂
Luthan
How many shops are per zone? And which shops do count? I got 2 from zone 1 and 2 from zone 2(missed a 3rd one). According to wiki there are 6 shops in zone 3 then it would be 11 in total… but I don’t know if everything at wiki counts as shop(the room where you get the moto skill for “free”?)
hiroscho
The room with the moto skill counts as shop.
kiter
Today i finished world 1 zone 3 and it didnt count for the achievment. It’s this a bug?
hiroscho
Were you standing close to the final chest when the timer ran out?
kiter
Well me and my friend were both on the platform.. was that not enought?
Sty
Just completed the world 1, zone 3 with guildmates and the achievement was properly granted at the end of the timer.
KINGRPG
I got King Zone T-3 coin, but still 2/3 Glutton for Punishment achievement! something wrong? (The bonus cart already destroyed)
Keiran
Does anyone have a shop list for World 1? I’m at 9/11 and don’t know which one I’ve not visited.
Eliath
I am at the same, and I’ve done very hidden shop and normal shop. I just ran my wife through all, and she is at 7/11. We did all except the two shops under the green waterfall in W1Z3 since it seems like they made the waterfall kill you now. Not sure what’s left.
MoldyChip
There are 2 in zone 1, 3 in zone 2, and 6 in zone 3.
Eliath
Was missing the elite skill and the trunk base. Thanks!
MoldyChip
I think the waterfall one in zone 3 is glitched, because I cannot get through because of the waterfall killing me. I was even able to reach the door but showed me dying as I was entering so it didn’t count.
shodannet
I had this problem but managed to jump in by doing this: when you land on the lilypad just in front of the waterfall, dont hold forward and jump; I pressed jump THEN forward and managed to get in clean. Every other time (over 30 deaths) I was always trying to jump whilst moving forward and would clip the top of the hidden area; I was even able to actually get IN and trigger the fade in/out animation but I still died
MoldyChip
I actually got it. I angled my jump to the right corner area of the door and then it didn’t kill me. It’s almost as if the door itself was killing me.
shodannet
congrats! Now you never have to do it again xD
Htuocles
I dodge-jumped from the pad into the shop. Took about 5 deaths to get it right, but finally landed inside.
Dogger
W1Z1 – Dropdown after first monkeys\ W1Z1 – Under First Boss\ W1Z2 – After bluewater lillypads\ W1Z2 – Dropdown from checkpoint before lillypads\ W1Z2 – Easy access Before lillypads\ W1Z3 – Under Waterfall\ W1Z3 – Burning Carpet shop within shop\ W1Z3 – Upper cave corner by cloud checkpoint\ W1Z3 – Tree trunk base\ W1Z3 – Big Tree middle after mushroom springs\ W1Z3 – Right Before King Toad
Akamon
any idea how to get the last shop (Right before King Toad) in TM? the last one i’m missing. : ))
Eliath
In the second picture in the Cloud save #4 to Checkpoint 4 section in Dulfy’s guide, continue jumping around the tree trunk base where the red arrows are on the right of the screen. You will jump to an almost submerged root, which will allow you to jump to the shop.
Keiran
Okay guys thanks for answers, weirdly I visited again the same shops and got 11/11. Was probably glitchy the first time..
Traveler
Film Dulfy time 5:07. There is an easier way, skip the stone.\
Stewart Middler
Wish I saw this before doing W1Z1…
Pebbels
I ran today all Zones in World 1 in Tribulation Mode. I visited every shop and now i am stuck at 10/11. It seems to be a bug that isn’t fixed yet. The patchnotes told us, they are working now, but i try and it is very annoying that i need to repeat.\ Did anyone got the points for 11th shop?
btw. every shop in world 2 works for me 😉
Htuocles
I have all 11. I think it’s 2 shops in 1-1, 3 shops in 1-2, and 6 shops in 1-3.
Pebbels
yeah, but the candle shop in zone 2 doesn’t count for me. when did you make your achievement?
Htuocles
I got credit for each shop I went in to along the way. I got 11/11 when I went to the last shop outside the checkpoint before Toad. Maybe you missed one?
Sykess
Will you b releasing a video guild for w2z3 like you did for w2z1-2?
Sykess
be*
Dulfy
If you mean W1Z3 then yes, it is uploading now.
Sykess
Yes I did mean W1Z3, sorry! XD
also thanks a bunch for the quick answer!
Dulfy
Alright, youtube tells me there are 2 hours left on the upload so check back then 🙂
Dulfy
Video is now up! 🙂
Sykess
Oh my! you’re awesome, actually coming back to tell me when it’s up!
Akamon
thanks, Dulfy for showing where traps are! sometimes watching video guides you see people running but you don’t really learn where traps are until you’ve hit them yourself. :DD having a visual aid like this helps as well.\ quick question, unsure if i’ve missed it, will you be adding guides for getting all the shops as well? iirc, i’m missing the last shot in w1z3.
Akamon
ah, so you’re reply below regarding achieves for TM. cheers, DUlfy!
Dulfy
Yup, I am just going to finish up my unfinished super weapon skins gallery and then I will be doing the shops and then go back and add written guides for w1z1 and w1z2 to show the traps. I made the videos back in a hurry but now I have a bit more time with finishing most of the world 2 stuff.
Xavier
Is there any logic to tribulation mode or is it all about doing it over and over so many times until you find a safe path? I tried it myself to begin with and died like 10 times before I traveled 10 feet… wtf…
Dulfy
Tribulation mode is all about trial and error and dying lots of times until you find the right path. Be prepared to die over 100 times.
Flarg
tribulation mode is about buy 600 gems and get the coin.. its all about money.. anet is every second thinking in how to make ppl to expend some money in the game.. nothing else..
RhapsodyBD
Tribulation Mode is definitely not for me xD I get irritated easily and lose focus, which makes me mess up easy jumps even more, I’m terrible at them as it is xD
Drake
How do i get the last shop in world 1, zone 2 (its the one that’s even hard to reach in infantile mode – you have to jump over the roots underground)?
Drake
Lol i DID NOT have to do it! I visited 2 shops in zone 1, 3 shops in zone 2 and 6 shops in zone 3. easy! im so glad i dont have to do zone 2 again till the very end! somehow you only have to do 11 of 12 shops to get the achievement!
Dulfy
That shop didn’t count for tough customer either. I got to it and my counter didn’t go up. There is also soemthing that instant kills inside the shop. I took 1 step and was dead instantly.
Dpaul
Super helpful so far, but one correction: you don’t have to go full speed all the way from checkpoint 3 to 4. You only have to run past 2-3 rocks at a time, after which you can stop and prepare for the next jump. Just don’t stop next to a rock!
Summarl
For Checkpoint 3 to 4 of Zone 1, you can dodge roll straight into the walls to evade the rocks. As long as you wait for endurance you can evade both of the first two rocks, pause on the tree, evade the third rock and pause in front of the last two before completing, for those who don’t enjoy the speed running.
thelafman
For the King Toad fight, you can kill the Monkey by throwing a Jewel Shard at him.
Officer Dk
Dulfy, for shop 4 and honeycomb 2, your guide says to go around first, but i found it is actually a lot easier if first you climb the tree and activate the first cloud save in that area, then jump down to do those, as you jump almost on top of them from there, and the save point makes for an easy run back if you die on the queen bee.
Miss Lana
This is exactly what I do. It’s so much easier to get to the shop and then to the Queen Bee (if you need/want both).
Officer Dk
Also, you forgot to mention shop 5 is the candle one before the acid water in zone 2.
Dulfy
Good eye, added
Officer Dk
Cool, but you wrote fourth shop again instead of fifth 😛
Geekfox
The longer arrow in picture #155 is pointing directly at a spike trap, and that killed me. Please revise.
Dulfy
Can you link which picture is #155?
Geekfox
Image #155 of 204 (gw2-tribulation-mode-world-1-zone-22):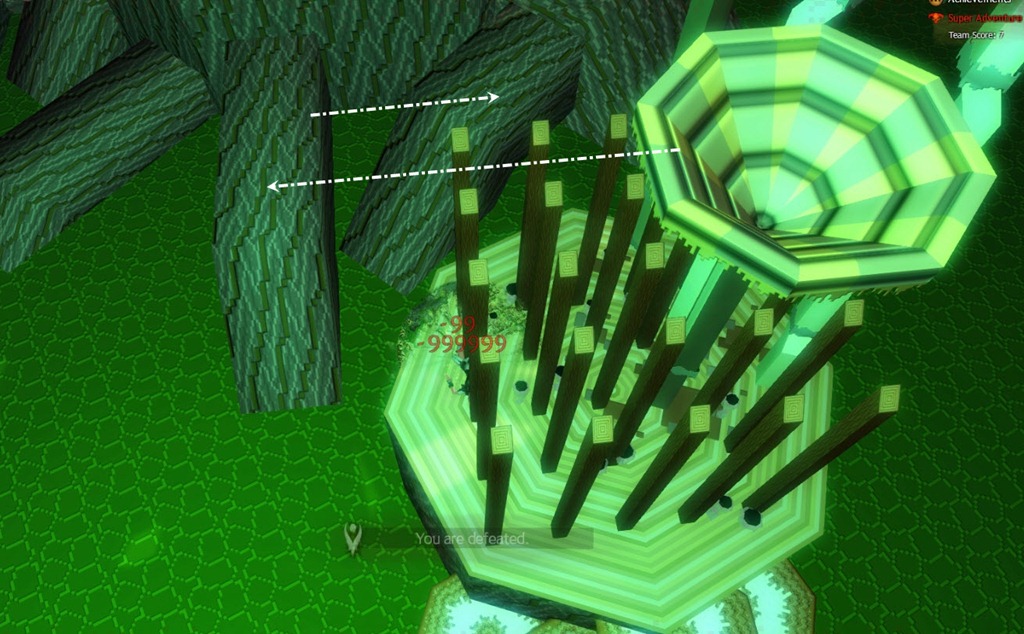
Ozoul
Nothing quite like struggling with a zone for over an hour then getting disconnected when the boss is almost dead…….
mszu
I wasn’t able to do the 2 methods for the first hard jump in zone 2, found a newb alternative worth looking at:\
Basically you jump to the very corner of the 2nd stone and wait, then the smashy rock shouldn’t bother with you, or at best be very late after you jump it.
ManMan
Another safety way is stand in the 1st stone and then do the dodge jump onto the samshy rock. You can just stand on the rock and the rock has no reaction.
Kate O-o
This seems to be patched now :(((
Kate O-o
or it works at random, I tried like 20 times, commented, tried once more and it worked
Durden
As stated under, you can kill the monkey during the boss fight by throwing two jewel shards at him.
Herosandwich
the first bouncy rock frustrated me until I figured out it was reachable from the first non bouncy rock. if you’re a jumping puzzle frequenter, it should be an easy jump to the edge of the bouncy rock from the first rock, then take a step and jump evade (space v) and you should land directly on the fern if you lined it up right. much easier.
Pingback: Lion's Arch Network • GW2 Super Adventure Box Back to School coverage guide | Lion's Arch Network ()