GW2 Point of No Return Living Story achievements guide. Achievement guide for all 3 story instances are now available.
Arcana Obscura Achievements
The achievements in this instance are best done with a party as the mobs do not scale in HP (tested up to 3 players) and this will make some of the achievement a lot easier. All 3 achievements can be done in a single run.
No Culinary Application – 10 pts
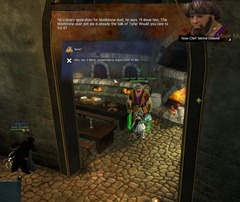
To get this achievement, you need to talk to Sous-Chef Seimur Oxbone again and ask him for the Bloodstone Pot Pie to consume. Consuming this food will reduce your healing by 50%. The effects of this isn’t too noticeable if you are in a group but if you are solo you can get in some sticky situations with your healing drastically reduced. You will need to complete the entire instance with this food debuff on to receive the achievement.
It’s All About Timing – 10 pts
This achievement is incredibly tough if you are trying to solo. You need to complete all 3 trials within 8 minutes and the waves of mobs takes a while to kill. It took me on average of 4- 4.5 minutes to complete the first trial solo, which leaves basically no time for the next two trials. Ideally you want a group of 2-3 players since the mobs do not scale in HP at all.
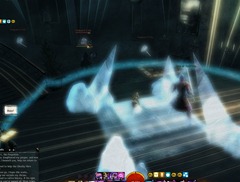
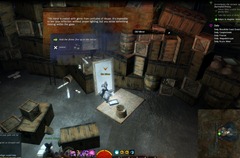
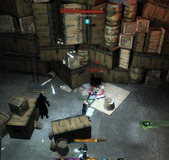
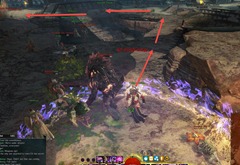
For the first trial, you want to keep mobs away from the throne area so that the red stays blue and the capture bar progresses. You can have players standing on the two sides where mobs spawn and engage them before they have a chance to run to the throne. Use knockbacks, pulls etc to drag mobs out of throne area if possible. The longer the circle stays red, the slower your capture bar will be and the less time you will have for subsequent trials.
The second trial isn’t really special, just kill the mobs quick and use reflects and AoE as much as possible.
For the third trial, only the instance owner can grab the Vision-Crystal Shards. What you want to do here to save time is to have the other party members distract all the mobs around the Vision Crystal while the instance owner grab the crystal and turn them in. As soon as the crystal is turned in, run to the next crystal location.
Distorted Reflection – 10 pts
Once you complete the 3 trials and obtained the torch of divine fire, go to the Old Mirror behind Ogden and interact with it while holding the torch. This will spawn a single doppelganger that your entire party can kill and all get achievements for it.
Pact Assaulted Achievements
Unlike the first instance, the two achievements in this instance are fairly easy to complete solo and can be done in the same run. Partying up may add to the difficulty of these achievements due to mob scaling.
Weed Killer – 10 pts
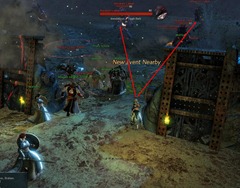
You need to kill four Mordrem lobbers outside the south gate during the south gate defense activity without getting killed (downed seems to be okay?). For this you can simply rush outside the gates, avoiding any big red circles and then just kill the four lobbers conveniently placed in an arc around the south gate. They are largely unguarded and may have some Mordrem wolves or thrashers nearby but as long you don’t run into them they shouldn’t bother you. If you are doing this in a group you can probably expect more mobs around the lobebrs which can make this achievement a bit more complicated.
You should have plenty of time to kill the four Mordrem lobbers before the gate is breached.
Lobber Dodger – 10 pts
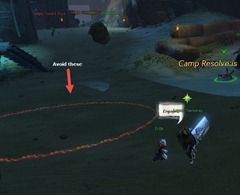
This is a trickier achievement that is much easier to fail. If you get killed or get hit by any of large red circles throw by the lobbers, you immediately fail this achievement.
There will be a couple of red circles placed near you immediately after you finish the conversation with Logan at the start of the instance so watch out for those right away.
You can expect a few rock circles on your way to the south gate but they are fairly easy to avoid as long you take your time. On your way back from south gate enroute to north gate I found myself getting hit by unexpecting rock circles quite a bit. What worked for me was taking a longer route to the north gate instead of the shortest route. This route seems to have less mobs and red circles to avoid overall.
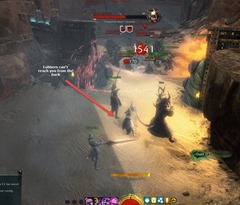
Once you arrive at the north gate, there is no need to rush out like you did at the south gate. Stay at a reasonable distance inside the gate and kill any Mordrems that comes through. The lobbers are in the back and cannot reach you if you stay inside the gate.
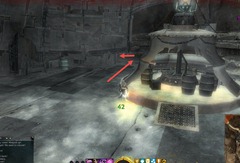
Finally, during the last part of the instance where you need to lit the signal fire with the torch, there is a route behind the tent that allow you to get to the stairs for the signal fire without going through any Mordrems.
Mystery Cave Achievements
The last instance feature some of the toughest achievements. It will probably take you a few attempts to get them all. If you fail the achievements, you do not have to restart the instance. Defeat Shadow the Dragon and there is a challenge mote that appears where you can restart the achievements without having to restart the instance.
I personally find it easier to do Rock Dodger and Shrubsplosives in separate runs so you just have to worry about rocks or bombs and not both in the same run. Smotherer Smiter is very easy to complete and can be done in either run.
The more DPS you have, the easier these achievements become. Ideally you want to finish off the dragon in two burn phases if possible. Also, make sure you have dodge food such as Orrian Truffle and Meat Stew. Use a Metabolic Primer if you have one to make it last for 12 hrs.
Rock Dodger – 10 pts
There are three types of rock you need to watch out for.
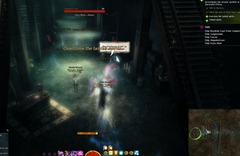
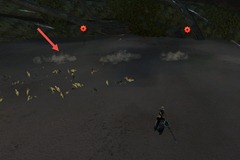
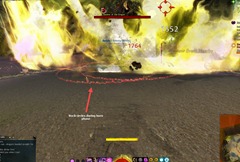
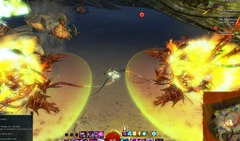
Traveling Rocks: These rocks appear during the fight where the dragon goes underground and you need to light a ring of divine fire. They are some of the hardest rocks to avoid as they don’t have a very clear telegraph. The way you can spot these rocks coming is to watch out for a line of dust forming. Avoid that area or dodge out of it immediately if you see it under you. Rocks will start rising from one end of the line and if you are in that end you have almost no time to get out.
The next set of traveling rocks is usually but not always diagonal to the last set of rocks. So you can sort of predict the general area where the next set of rocks is going to appear. Luckily these rocks seem to never touch the “orange gear icons” you need to light so you don’t have to worry about them hitting you while you are interacting with the ring as long you stand on top of it.
Burn Phase Rocks: These rocks show up as red circles during the burn phase after you have lit up the ring of divine fire. They are easy to avoid if you closely hug the walls of the room and just range down the boss during burn phase.
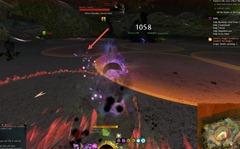
Post Burn Phase Rocks: These rocks shows up in several waves after you complete the burn phase. They appear as orange circles. Much like the burn phase rocks, you can avoid most of them by hugging the walls but some of them land close enough to the wall so you will need to be prepared to dodge at a moment’s notice.These rocks will appear in waves until all 3 Dragon Tendrils are killed and there might be an additional wave after as well.
Smotherer Smiter – 10 pts
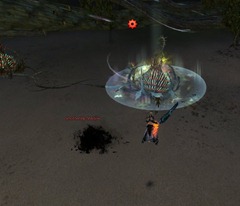
You only have to worry about this past the first burn phase as the Smothering Shadow do not spawn until then. Each time you light up a fire, a Smothering Shadow will spawn. You can only damage it when you step into the circle of light and gain that buff. The best way to do this is to step into the circle first and then use a range weapon to kill them (only takes a single hit to kill them). This is because killing them consumes your buff but since you are standing inside the circle of light, you will immediately regain that buff and can use it to light another fire without having to wait for another circle.
As long you kill the Smothering Shadow that spawns after each fire is lit, no additional ones will spawn until you light up another fire.
Shrubsplosives – 10 pts
The key to this achievement is know where to run between the pair of bombs. During the phase where you need to lit a ring of fire, four pairs of bombs will spawn. They will either detonate themselves after a certain time interval or you can explode them manually. The achievement require you to manually detonate every bomb without getting hit by the bomb and before the bombs self-detonate.
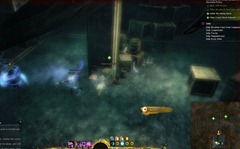
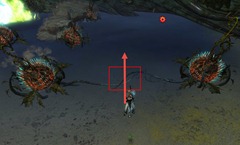
There is a circular structure in the vine connecting the pair of bomb plants you can step on without getting hit by the bombs while manually detonating them. I tend to step a little left of the circular structure (see arrow) and that puts me perfectly in the middle and out of the harm’s way,
A strategy I use is to look immediately for the white torch circle once the light fire phase of the fight starts. Grab the buff it gives you and immediately head to one of the orange gear locations to light that fire up. Right after, you want to go through all 4 pairs of bombs to detonate them and then look for the white circle again.
Repeat this until you just have one orange gear to light. For this one you can simply ignore the bombs and push the phase transition to burn phase as the bombs can self detonate in the burn phase without failing the achievement.
The second light fire phase after burn phase is a bit tricky as you need to deal with the Smothering Shadow as well. Depending on where the white fire circle is, I may get it after detonating all the bombs or in the midst of it. Likewise, once there is only one gear icon left, just light that one up and ignore the bombs.
The trick to this achievement is really running through a bunch of bombs until you get the hang of it.
Archived Disqus comments
Yuri
No Culinary Application, only the party leader can get it the rest can’t, you need to get food FIRST then join a party. Arcana Obscura Achievements is very easy, i agree but the pact assault and the Mysterious cave is bit harder to do
Cal
Wrong, when the party leader talks to the sous chef, everyone in the instance gets the food
Esmee
Hi, I helped 3 different friends with the instance, everytime they were the party-leader and asked for the food, I got it in my inventory aswell (despite having the achievement since the first time.)
Doghouse
When the leader asks for the food, EVERYONE gets it. You don’t get any indication that you’ve got it, and you don’t have to eat it if you don’t want to. But\ it’s there in your inventory all right. Open, eat and step through the fire.
VitalSuit
I got super lucky with the time one and managed to do all 3 in the same run. I had 10 seconds left for the 8 minute one.
VitalSuit
Solo’d btw, I never ran any of these with a group except for the Caithe’s Reconnaissance one due to it being bugged at the time.
Sequioa
Dulfy, i found a spot where the rocks can be avoided without doing much. It is above the topmost gear in the map. Our party have done it through that. Sadly, i do not have a screen shot of the locataion. 😀
The Spirit Molecule
Nice! Damn gurl u fast o/
Blind Drachen
I solo’d all the achievements and for it’s all about timing I would recommend that you kill all of the add except for one and let the NPC kill it slowly. Make sure it is outside of the circle and you can just stand inside the circle. Another group will not spawn until all of them are dead except the main one you have to kill. This way you don’t have to deal with 3-4 waves but rather 2-3 waves.
Esmee
I found these the perfect achievements. They’re very fun, I had a great challange doing them on my own! Yet it won’t be too much of a pain to help friends out since grouping up makes it so much easier. (E.g. the Dragon Spawn targetting the opener only, the mobs not scaling (atleast in the first instance) and the second instance can be done from a safe areas for the most part.
Like the update, though I found the story a bit lack-luster for a ‘finale’ but hopefully that’s just me. Can’t wait for the full guide to see what obvious things I’ve missed. Now time to hit the RNG farm of organs ._. got both the eye and kidney from the Huskbag though, yay!
Lord
Just because the final is just he beginning of the Dragon War.\ we should have more information at Pax South I think (on January 25th 2015)
Krystal S. S.
for the second trial:\ \~ even if you kill the mobs fast, they will still spawn quite often. what i did was leave one of the cursed hammers alive, took it to a corner and played ring around the rosie (ran around in circles while i chased me) while the bar for that trial went up. no other mobs spawned, and it finished a lot quicker.
RabidCoqui
Isn’t the second trial the one you go into the hallway with bookcases on either side? I thought that bar fills up by killing enemies.
Krystal S. S.
you’re right, i’m sorry. the First Trial, thank you.
Lazeer
Weed Killer is incredibly easy on a condition build, due to the husks being weak to conditions.
Bop-Louie
Incidentally it seems that grouping up makes the Pact assault achievements a lot harder. I tried in a 4-man party and there were just so many mobs we simply couldn’t handle it. Couldn’t take down the lobbers without being killed and couldn’t survive the assault of 30 wolves when it was time to break the cocoons.
I haven’t tried the last instance achievements yet, but I’m dreading the rock falling one, since there was no red circles to indicate where they would fall.
Neltisen
Ah well, still nomore achis. Here’s my way of doing Assault part yesterday:
We were initially a group of 5. finished on 3. Don’t know how tough could be solo, but it is doable (first try other 4 died and had to finish solo xD)
For first achievement you have to kill 4 stone-throwing mordrem. Yes, they respawn, but 4 is enough (even though you can kill more)
For second achievement, you have to avoid being hit by any of these falling rocks thrown by lobbers.
If you get downed, both achievements fail.
On start, head to south gates, take stairs to the left and jump over the fence (be careful of falling rock near the cannon).\ Aim for southern lobber (to the left). Initiate with melee, finish on range, from far away from south. After killing lobber, more mordrem will spawn. Run away to south not to aggro too many (let the pact fight mordrem). Kill aggroed ones.
Now here’s the kill order: kill menders first, especially when they are near lobbers. Then trolls on need (annoying, but if you stay away from swarms, they won’t aggro). Aim for other 3 lobbers, melee or range. Try to stay above half hp, if dropping lower, disengage and stay at range (root + torment + swarm can be deathly).
There’s no hurry in killing lobbers (they do 90% damage to breaching, killing them down slows down the process and gives more time).
After 4th lobber is down, run back to the camp, avoiding rocks from respawned lobbers. Stay at range, or even out of combat. Kill mordrem that manage to get close enough.
After breach you auto get first achi.
Now northern gate: just stay at range, near training dolls, kill by passers from range.
After breach, kill targets, save rooted guys, then killing other mordrem comes. Stay away from falling rocks (lobbers on south throw them, from the bridge, big aoe circles). When dropping life heavily, go far into the building (where’s torch later), and disengage. For final part, leader picks torch and light the signal fire. After that achi is done. Torch part can be tough, falling rocks, roots, conditions, a lot of mordrem around. It’s recommended that someone who already have 2nd achi to open instance then.
GL
Dulfy
Thanks for the write up, it does seem grouping up for the second instance makes the achievements a bit complicated to do.
Bjorn Tin
Heres a tip for the rock dodger achieve get a mesmer in your party and after killing the dragon once have the mesmer run out of the arena range and place his portal there then and only then activate the mote, now everyone will be in the circle get the mesmer then to use the portal again to port 2/3 people out first and the rest stays in to finish the fight. Then repeat this process with the remining members who havent finish it. When you get out by the portal try to stay as far from the arena as possible as i think rocks might still hit you if you get too close.
Lazeer
My advice for Shrubsplosives it to use a food that improves endurance gain, permanent vigor is also quite useful, blocks are as well.
Bop-Louie
I don’t understand how this works. It seems like the boss explodes the plants himself sometimes and you lose the achievement. I detonated two of them on my last run but I wasn’t anywhere near the two that exploded and I lost credit. What’s up with this?
Thanathos
As stated in the achievement text, they have a timer after which they explode, resulting in losing that achievement.\ I think this one is quite easy, you can simply pass two plant bombs (there are, everytime they spawn, four pairs, each pair connected by a plant string). So walk over that plant string (more or less in the middle) will result in exploding both, while out of their impact. Simply walk in a circle so that you pass all four pairs of bombs everytime they spawn.
yanshuly
i finished the story with my mesmer and then i started it the second time with my guard and i was able to do the “Distorted Reflection” on story and not on challenge mode
guest
done the same with the food achi too 🙂
Doghouse
Same here. Did it on a thief in her first time through.
Also note that, once I’d triggered the doppelganger, I was unable to complete the instance until I’d killed it. (Makes a vague sort of sense, I guess.)
Barbecow
You can do both Shrubsplosives and Rock Dodger with mesmer porting in/out. Whoever is in the circle explode all the bombs, you will have it without problem both achievement.
Guideranger .
For Shrubsplosives i pass in the middle where the branches/vines are forming an oval like shape and its exactly the middle of them. Also when i lit all the flames they exploded, but i didn’t lose the achievement, maybe because they didn’t explode from the timer, but not 100% sure if it always works.
Dulfy
Yup that vine loop is a good indicator of where to run 🙂
Alone
For rock dodger: take turns dying during first vine stage and wait out until the rest of your party kills dragon. It is cheap but it works (for now). Just don’t get hit by rocks before you die or while your downed.
Joanna Piekarz
Yep It works 🙂 We were trying stay out of circle (we got pull) and we tried portal(cant use in this instance)So I just did with my party. 2 died and 3 were killing dragon. Just die from poison vines and dont get hit before you are dead. Do it until you can they might fix it.
Ryan Hill
challenge mote missing again
Dulfy
Only shows up after you killed the dragon
Daniel
I can’t find the challenge mote, can anyone say where it is? I defeated the dragon, stood at the dragon head and listened to the pact members cheer at my fine success, but I couldn’t see a mote anywhere?
Daniel
Seems it doesn’t show up all the time, I restarted the instance and went through again, and this time it did show up after defeating _but not killing_ the dragon, in the middle of the big cave. Maybe the instructions about the challenge mote need to change to say that it will show up in the middle of the cave when you “defeat, but before you kill the dragon”.
loke
This is the safe spot our party used for Rock Dodger during Mystery Cave
The Spirit Molecule
THE most fun I had doing LS achievements so far. I got all of them 1st try in all 3 storymodes and then I just helped people for like 40 mins. Because it was fun. It was fun helping people. I never have fun helping people. I never help people. That’s how good this content was.
Ty Arena-chan desu desu kawaaiii supah awesome (@\^o\^@)/
Reji
thanks Dulfy! enjoyed these achievements too 😀 – Tiburron
s1n1c4n
You can get the achievements while dead as long as your party members do it for you.
s1n1c4n
Go in, let the vines kill you, then your party resumes the fight as normal. While dead you will not be able to be hit with rocks or bombs and you can all achievements. Be sure to remember that all bombs must be detonated rather than time detonation or no one is eligible for that achievement.
Erik Benefield
Dude ty so much! This worked and saved me so much time and agony!
Keorl
Best idea ever !!!! Started both accounts, let my ranger die (after I failed achievements with her solo), and killed the dragon with my elem. Soloing the upscaled fight with my elem was not that easy, but still much better than failing the achievements 10 more times with my ranger !
Adelas
Can confirm 100% that downed is okay with the lobbers, as long as you don’t truly die
AwesomeDeBawesome .
Small note on the ‘traveling rocks’: they will never line up near a divine fire spot, so you can be sure that you’re safe there.
Seraephus
Categorically wrong. They often seem to have an affinity for going directly through the divine fire. I’d screenshot it, but I’m never doing that instance again. Ever. *shudder*
Adhrael
If you really want to there’s a safe spot for the pact assaulted achievements. You can just wait there the entire instance and kill some lobbers with a long ranged weapon and still get both achievements. 🙂
oic
Shrubsplosives, just before you stomp the dragon, to the right of his head, theres an artifact I think. Anyone interacted with it? I noticed it after I stomped the dragon and couldn’t get to it
Martin
Here ya go 😉
Fabio Machado
I found out that you can blink out of orange circles when you are igniting the cogs and the cast still continues.
So, if you are in the middle of a cast, and a small orange circle appear (the undogeable head attack) or even a large circle when you don’t have braham’s deffense, you can blink away and still finish the casting. The circle will ignite just as fine.
Don’t know about other shadowstep skills.
Yasminis
Did not die, got all the achievements. Thank you Dulfy!
Nachitta
Someome Help me. Ring’s orange bar keeps restarting over and over. I Can’t complete the ring completion cause its always restarting.\ Example: Light 1 Ring = 25% Completion\ Light 2nd Ring = 50% Completion\ But when time goes on (10 secs) My first 25% restarts and the orange bar goes to 0% again.
At dulfy Video, the orange bar keeps always at the same %.
Man
You have to kill the Smothering Shadow who can eliminate your fire.
Check “Smotherer Smiter – 10 pts” for info about how to kill it.
Rinari
” Luckily these rocks seem to never touch the “orange gear icons” you need to light so you don’t have to worry about them hitting you while you are interacting with the ring as long you stand on top of it.”\ False. I’ve had the line of rocks hit me as I was lighting the fire on the side of the ring. Most of the time they don’t, but it happens.
Qriztina
Thank you so much for this guide! It took me and my boyfriend a few times to get the hang of “Shrubsplosives” but we did it in about \~4 tries after we read the guide. Helped a lot 🙂
tinnic
For the life of me, I cannot do Shrubsplosives! That’s the one I am stuck on! I get that and I’ll have finished my Luminescent armour set! T.T
Azsune
There is a bug with condition damage. As a condition Necro with Epidemic it spreads the dots from the tendrils to the boss. So it is possible to only have to do one burn phase and skip half the fight.
OgreMagi
Just did (It’s All About Timing) solo as a burning guard together with (No Culinary Application). It sure is super tough with 50% less healing. I made it with about 28 seconds left on the last crystal turn in.
Raz
I like how some of the post-burn phase rocks have invisible aoes.
Koxxar
It’s All About Timing Achi is very easy to do solo as a Warrior (Berserker). I’ve done the first trial in less than 3 Minutes.
Feralie
playing zerk staff ele you can do 50% of his hp in less than 5 seconds with glyph of storms (air) and overload air, frost bow 2.0
Melissa
Someone showed me a fast and easy way to get Rock Dodger in the Mysterious Cave. He activated the instance, and then told me to remove all my armor and die during the first jungle tendril phase. Then he soloed the fight and I got the achievement. Later, he and I tried helping another player get all three achievements in one go with her dying in the first round. It didn’t matter if we got hit by rocks. We still had to manually blow up the shrubs, but it didn’t matter if we got hit. And with two active people, it was easy to do Smother Smiter. So, if you just want to get the achievements, find another player or two that are willing to fight the dragon while you are dead in the ring. You should be able to get all three in one go
Erickson Nolasco
its so difficult doing 3 achievement at once. and everytime you fail you have to go throughout the cut scenes…
A Gamers Insanity
you can just beat the boss and use the challenge mote and do it again.
Henry Tran
the mystery cave achievements are easy af, just took me a good 30 minutes, didnt fail, just had to beat the dragon 3 times
Scutilla
Rock Dodger is absolutely infuriating. The divine fire and burn phases are easy enough once you learn the patterns, but the colored circles for the tendril phase do not match up at all with where the rocks land- you can be nowhere near a circle and get hit. You pretty much have to spam dodges and evade skills and pray.
foxinthewheat
For It’s All About Timing, there’s an easy trick. The first part is when you lose most of your time, but the next wave of enemies doesn’t spawn until the last one is gone. So let the first group spawn, kill all but one, and kite that one away out of the area you need to control and just let it hit you for a while without hitting back and the ritual will finish right quick