GW2 One Path Ends and Siren’s Landing Achievement Guide.
Contents
- 1 Where’s Balthazar?
- 2 Shining Blade Secrets
- 3 The Last Chance
- 4 Siren’s Landing – Jumping Puzzle/Mastery
Insight
- 4.1 Abaddon’s Ascent – 10 AP, 1 Mastery
- 4.2 Dive Master: Masted – 3 AP
- 4.3 Siren’s Landing Insight: Buoyant Bough – 1 AP, 1 Mastery
- 4.4 Siren’s Landing Insight: Kelp Rock – 1 AP, 1 Mastery
- 4.5 Siren’s Landing Insight: Dwayna’s Tears/Cliff’s Edge – 1 AP, 1 Mastery
- 4.6 Siren’s Landing Insight: Lava Leap – 1 AP, 1 Mastery
- 5 Siren’s Landing – Misc
- 6 Siren’s Landing – Collectibles
Where’s Balthazar?
Bloodstone Puzzle
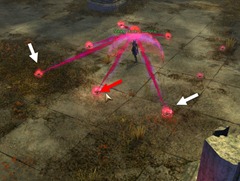
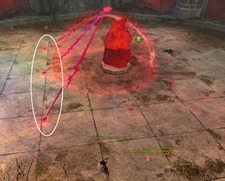
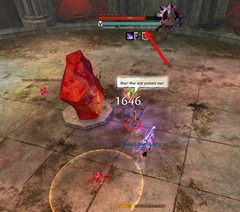
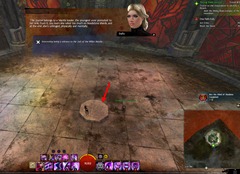
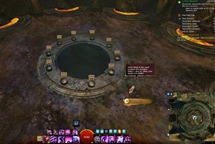
The way it works is that throwing the shard on the middle one (red arrow) activate or deactivate the two side ones (white arrows). To solve the puzzle, your goal is to make it so that only one row of three shards lit up and then throw the middle one to deactivate all three at the same time.
With Friends Like These – 1 AP
This is a hidden achievement. When you first encounter the Exemplar, overload her Bloodstone Prison by having all the bloodstone shards active on all the rows.
King Crab – 2 AP
There are two possible locations for King Crap
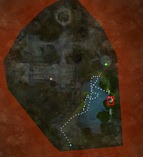
1. Go into the water at the very start of the instance and you might find him.
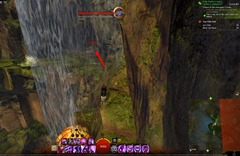
2. If he isn’t there, search for the waterfalls right below the entrance to the hideout. You have to use some bouncing mushrooms to get up there.
Not on My Watch/Cleaning Up the Mess – 2/3 AP
When you fight the second crystal guardians at the south room, kill the initiate first before he runs into the reinforcement room for Not on my Watch achievement. After you clear out the guardians, go into the reinforcement room just west of the crystal and clear out the initiates for Cleaning Up the Mess .
Block the Shock – 3 AP
Kill Justiciar Arya without letting her summon any unstable elementals. Basically during the fight, when she gains a breakbar, break the breakbar before she finishes summoning the elementals. Do this 2-4 times depending on how long the fast lasts. Make sure you bring some CC abilities as she does have a strong breakbar.
- If your class has weak CC skills, you can use the bloodstone shards lying around and throw it at her to break her breakbar immediately.
Into the Mind of Madness – 3 AP
Water-Damaged Letter
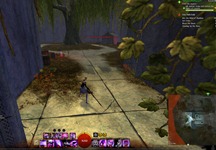
Outside the hideout in the water. Pretty hard to spot visually so just swim in the water and look for the interact button.
Initiate’s Journal
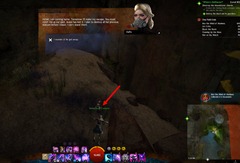
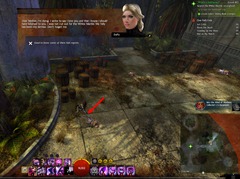
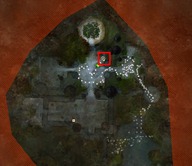
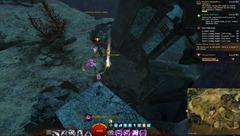
Outside the entry to the hideout, turn around and look at the mushrooms on the southern wall. Take that bottom bouncing mushroom and then run along the ledge outside the southern wall until you find a ledge below with spiders and a corpse. Interact with the corpse to get this journal.
Torn Letter
Found on a corpse in the first room of the hideout
Inventory Sheet
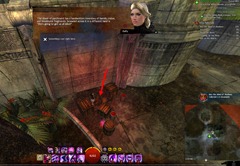
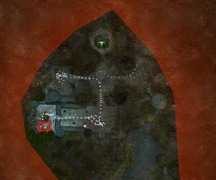
Found on a barrel in the main room of the hideout where the Shining Blade exemplar is held.
Burned Letter
Bonefire in the south reinforcement room.
Araya’s Journal
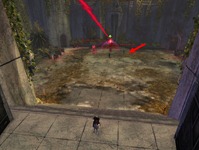
Finish the instance the journal is on the stone platform that used to be where the giant red crystal was.
Graffiti Artist/Art Critic – 1/3 AP
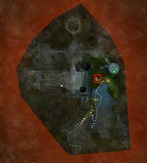
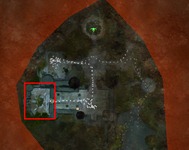
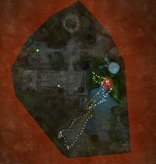
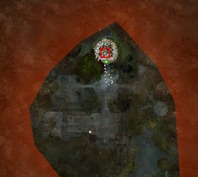
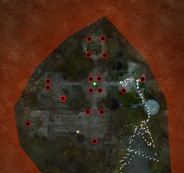
Destroy the statues in the hideout. Destroy at least one for Graffiti Artist and destroy all 17 for the Art Critic achievement.
Shining Blade Secrets
Hold the Line/Precision Blade – 2/1 AP
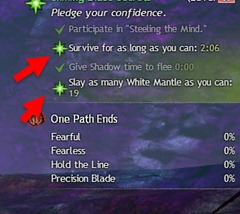
These two achievements can be done together and can be only done solo as players that are the not the owner instance can’t participate. You basically need to survive for 5 minutes and kill 50 White Mantle mobs. First couple waves are easy but as soon as Shadow leaves, the mobs hits much much harder . Each wave spawn 10 mobs. You can get downed but if you get killed both achievement fails. You can use the thingie on the top right to keep track of time/mobs.
A strat some players use is to bring a perm stealth thief build and just stealth rez the NPCs and let them do all the work as the mobs hit too hard from the third wave on. Anise is also invul to damage and you can drag the mobs to her to tank them.
Alternatively, it seems that the next wave of mobs won’t spawn if the previous wave is not killed so for survival for 5 mins you can keep the previous wave alive with 1-2 mobs and don’t revive the NPCs. For 50 mobs if you have enough AoE DPS you can try kill all 50 mobs before Shadow leaves and strength the mobs.
Fearful/Fearless/Two Sides, Same Coin – 2/2/1 AP
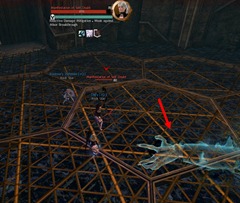
When fighting Self-Doubt, you can interact with the spirits that spawn around the room and get a Minor Breakthrough skill from them. Aim this at the Manifestation of Self-Doubt to knock it down so you can DPS it. Repeat until it is dead to get the Fearful Achievement.
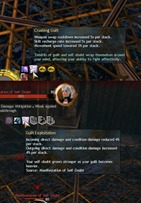
For the Fearless achievement, you basically can’t ask the spirits for help. You can only really damage the Self-Doubt when you break its breakbar. Additionally, the hands that come from the spirits give you and the Self-Doubt a stacking debuff/buff (dodging doesn’t seem to work in evading this debuff/buff). Each stack decrease the damage Self-Doubt takes by 4% and increase its damage by 4%. Your skill recharge and weapon swap cooldown are also increased by 5s per stack. There is no way to remove these stacks so if you screw up too much, you won’t be able to damage the Self-Doubt or heal yourself.
- Apparently Condi/Minion builds works better than others so you can try those if you are having trouble.
- Hold your attacks when the Self-Doubt is not stunned as doing so can cause it to build stacks of Dynamic Damage Reduction, each stack reduce the damage it takes by 5% (20 stacks means it is entirely immune to damage). Only use CC here and save your burst for when the breakbar breaks.
Past 25 stacks of stacking debuff/buff, you gain an alacrity buff for 5s every 20s and this also remove the stacks of that buff on Self-Doubt down to 1. So you can just kill the Self-Doubt then if you were having trouble previously. You skill CDs and weapon swaps will be on long CD but you damage will no longer be reduced significantly.
Fearful and Fearless can’t be done on a single run so you will need to do two runs of this instance for completion.
Student of Bartholos – 5 AP
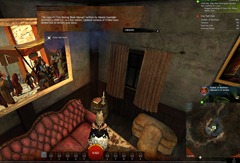
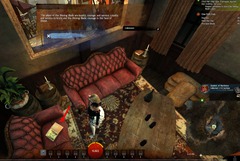
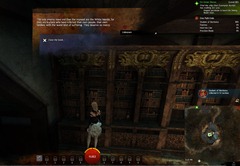
All the books can be found in the little house you can revisit once you finish the instance.
Section 1: Introduction
First floor, on top of a barrel in the corner.
Section 2: Being an agent of Kryta
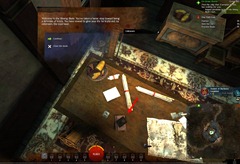
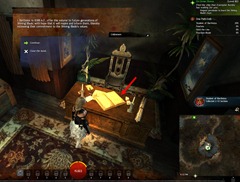
First floor, on the table with all the parchment stuff. Make sure to interact with the small book.
Section 3: Shining Blade Values
First floor, check the sofa next to the lore NPCs
Section 4: The History of Shining Blade
Second floor, check the bottom layer of the bunkbed.
Section 5: Evennnia
Second floor, check the chest between two bunkbeds.
Section 6: Our Patron Goddess Dwayna
Second floor, inside a chest.
Section 7: Zinn and the Shining Blade/Section 8: The Last Mursaat
Second floor, near the stairs. Check the drawers. Section 7 and 8 shares the same location so interact with it twice to get both sections.
Section 9: The White Mantle
Second floor, scan the shelves.
Section 10: Final Notes
Second floor of the house on one of the desks.
The Last Chance
Lightfoot – 1 AP
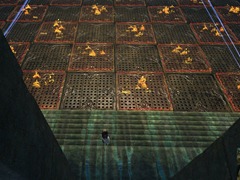
This is a pretty easy achievement, as long as you have some patience. During the Power the Crystal part, you have to cross to the other end and retrieve the power crystal. While you are doing this, you have to avoid the fire traps. The pattern changes with every power crystal you put in but overall it is still fairly easy.
A Quick Death/Dodger Danger – 1 AP
A Quick Death is to achieve victory within 9 minutes of starting the battle, not hard to do once you know what to do during the fight.
Phase 1
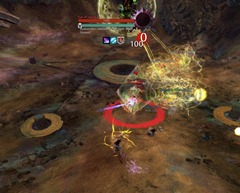
You need to drag Eye of Janthir into the path of the swirling Aspect of Lazarus and then use either CC or pick up a rock nearby to break its breakbar when an Aspect get close. This will cause the Aspect to emerge in humanoid form and attackable.
Do this for the first two Aspects and to finish up Phase 1.
Phase 2
For phase 2, you need to protect the NPC while she remove the shields from the Aspect of Lazarus. Defeat the Sparks that come near her and revive her if she goes down. Once she removes the shield from one of the Aspect, kill it and repeat for the next one.
Beware of the infrequent lightning attacks from Lazarus. He does cast it, usually when you have killed an Aspect. This is just a warm up before Phase 3 where this attack is much more frequent.
Phase 3
Phase 3 happens once you have defeat the final two Aspects. You have to damage Lazarus down from 35% to the final 3%. During this phase break his breakbar to stop him from casting and avoid the lightning circles for the Dodger Danger Achievement.
Phase 4
For the last 3% he is immune and continuously spam lightning circles so all you need to do is to pick up the objective on the ground and use it to finish Lazarus.
Siren’s Landing – Jumping Puzzle/Mastery Insight
Abaddon’s Ascent – 10 AP, 1 Mastery
This is the jumping puzzle. It isn’t very difficult and it is fairly easy to figure out where to go most of the time. There are two checkpoints you need to hit before reaching the end. Don’t port away after finishing the jumping puzzle as you will need to do the Dive Master achievement too.
Dive Master: Masted – 3 AP
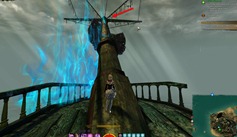
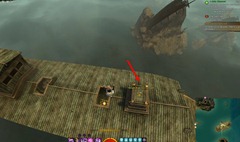
This Dive Master requires you to complete the jumping puzzle first as the diving goggle is on the ship at end of the jumping puzzle on the very front mast. All you need to do is hit the water, there is no bucket or anything to land in.
Siren’s Landing Insight: Buoyant Bough – 1 AP, 1 Mastery
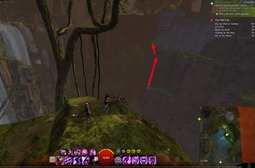
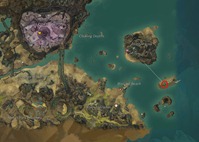
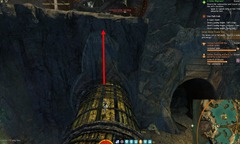
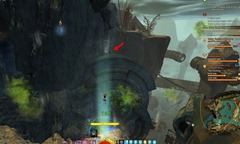
To get to this Mastery Insight, you can do the jumping puzzle and get to checkpoint 1 or close to it. That will give you enough height to glide to the Mastery Insight on top of this ship. Alternatively, if you don’t feel like doing the jumping puzzle, you can kill a nearby Ley line scavenger, get the organ, and hop on some crates near the ship and use the #2 skill to boost you to the ship deck. From the deck you can drop down below deck and use the bouncing mushroom to bounce you high enough to reach the mastery point.
Siren’s Landing Insight: Kelp Rock – 1 AP, 1 Mastery
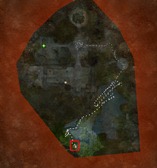
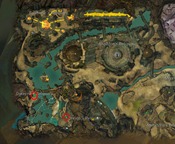
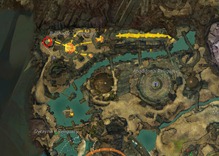
Go from Southeast Shrine waypoint and get up on the glass dome. If you want to unlock the Vista above too, fly towards Watchman’s Roost POI (tall tower) and use the updraft there to get you to the rock above.
Siren’s Landing Insight: Dwayna’s Tears/Cliff’s Edge – 1 AP, 1 Mastery
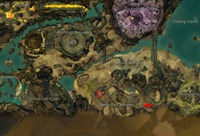
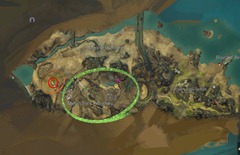
These are annoying insights to get due to the disappear updrafts. The skill set you get from killing scavengers helps a lot here as you can use the #2 skill to boost you higher. Start from Southwest Shrine. Dwayna’s Tear and Cliff’s Edge are on the same path and you can reach Cliff’s Edge from Dwayna.
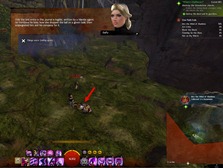
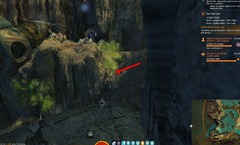
For Dwayna’s Tears you want to get on top of the pipe that is right below the Mastery Point by managing the updrafts and then shoot yourself up using the #2 skill. Make sure you don’t touch any of the Dwayna’s Artifacts while getting here as they override the scavenger skills.
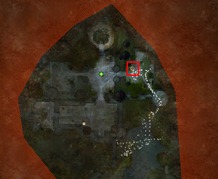
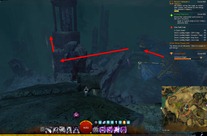
For the Clfif’s Edge Insight, it is a bit more tricky. You want to head south and wait for an updraft to appear and glide over the chasm to get to the southern cliffs with the scavenger. Once you land on the other side, kill the scavenger if necessary for the skills. Wait for this updraft to show up and then use #2 to boost yourself up to reach that updraft. Use that updraft to glide east across more updrafts that ultimately bring you to the top of the waterfall.
Siren’s Landing Insight: Lava Leap – 1 AP, 1 Mastery
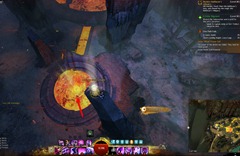
One of the easiest Insights to get. Run from Northwest Shrine waypoint and then leap into the updraft above the lava pool.
Siren’s Landing – Misc
Battle Orr– 1 AP
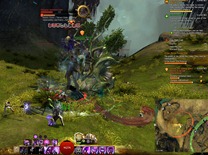
Champion Willowdread is an Oakheart that roams the area NW of Melandru’s Reliquary. From time to time, an event will pop up where Willowdread will battle a Champion Undead Giant. Help Willowdread defeat the giant and earn the achievement.
Echolocation – 2 AP, 1 Mastery
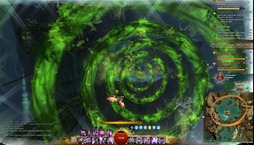
Echolocation involves the Unchained Wynern boss that spawns by Dwayna’s Reliquary after the pre-events are done. The Wyvern has an green poison ring attack it will keep spamming until its breakbar is broken. For this achievement you need to fly through the ring without getting hit but it is a bit wonky and you can get the achievement even if you touch the rings.
Feeling Beastly – 2 AP
Along the Merciless Shore is an event to escort Wrangler Winfred that starts from Camp Winfred. At end of the escort, the event to capture the garantuan beast will trigger and you can get your achievement here for capturing the grub.
Roll for Greed – 3 AP
You have to open 10 Chests in the middle of Abaddon’s Reliquary where you can drop down. You can open 2 per day (you pay 1.5 gold to open the second chest). Using alts will allow you to complete the achievement faster than 5 days.
Siren’s Landing – Collectibles
Collectible achievements can be found on this page .
Archived Disqus comments
Barbecoq
From reddit, they said you can break the breakbar on Arya with bloodstone shards (every 25%, depending on dps you can skip)
StoneyB
“King Crap” Love it!
LectroNyx
“king crap” i feel you, bro
Tyriel
You missed one statue in Art Critic achievement. This statue is at the first room that you have to enter with the Exemplar, on the bottom right corner
vEKU
Thank you for pointing it out. Here is an image of the exact location:\ http://imgur.com/7cZ5RJQ
Dulfy
Ah yes, thought I had that one marked on the map. Should be fixed now.
Michał Wardecki
Block the Shock – you can also throw crystals at her to break bar immediately. just a fun fact to make things easier
IslaRoses
This. My class has pretty weak cc (mostly soft cc) so the shards/crystals make it so much easier.
Zavos
For “Dodger Danger”, you can avoid all the lightning bolts during the final phase of the battle by hugging the wall 90 degrees to the left of the room’s enterence (don’t remember it’s cardinal direction).
david mcintyre
Might be off topic but “King Crap” might be the overall feeling here.\ 1.IMO the most underwhelming Leg was added today, how is that not a BLC skin??\ 2. IMO the leg sword is ok but too “shiny” and not enough substance to it.\ 3. If you would like ideas, such as when you have your Legendary hammer in hand called “BlackWave” you crush your enemies with fury and the force of the Sea.\ Thief Skill 5 unleashes a storm of black tentacles that rip your foe asunder. Or possibly Reaper Gravedigger can bring a pillar of death from above…My point is have some fucking imagination and fun with ANY Leg wep and the skills they provide. It is the little things in the game that we all love.\ 4. I haven’t even done the story yet and I hope it is good, I got disappointed with the new Leg’s and didnt even try the new fractal\~\~\~!
Biscuit
Anyone else got serious issues on the self-doubt fight? I can’t interact with the ghosts *or* evade the debuffs, and I just keep getting trapped in an endless nothing fight.
Kai
Same, I can’t evade them even those it says “evaded”
Skippy the Chimp
yeah, it’s a real biznitch
guest20151008
Just made a post about this. Helps if you have minions/pets. You do need strong cc to break bar though, and burst skills help to whittle down your shadow copy little by little. Mileage with different classes probably vary, but as engineer (rifle/turrets) was able to beat it even at 25 stacks of debuff.
PurpleHaze
Really have no clue about how to succes Hold the Line & Precision Blade…
FunkyStonky
Found hidden achievement, “WIth Friends Like These…”. In “Where’s Balthazar?” instance, when breaking out Exemplar from trap, activate all bloodstones instead of deactivating them.
FunkyStonky
Just checked, overcharging second trap, one with Justicar, gives no achiev. Instead damages him for around 9% HP, and starts fight like deactivating it would do.
Celty-san
yeah i found it by accident as well on my first run tbh i was just throwing bloodstone on random places
D4nnyus
Hold the line might be bugged, I killed 51 mobs and didnt get it.
guest20151008
For Fearless achievement, I wasn’t getting anywhere with my scrapper spec due to the long cooldown debuff. Its possible to back out towards the door you came in and get out of combat. The debuff still hits you but you can change traits and abilities. Switched to turret engineer with rifle and burst as much as possible after removing breakbar, before waiting for cooldowns. Might’ve been fortunate to also have Rune of the Ogre equipped which spawned an extra minion. Took a while but even at 25 stacks (max) doable without taking fatal damage. My doppleganger didn’t heal himself in combat. Also helping was the fact that you get a small alacrity buff after 25 stacks from the ghostly hands that shorten cooldowns.
Guest 9487
I am stuck on the blood stone puzzle. You said that you need to get the front 3 blood stones activated only. I have been trying that for 30 minutes and can not get it to do anything. How can I move past it?
Zaire Kelly
maybe just try hitting as many as u can really fast. I got it first time b4 i knew it was cheevo doing it that way. 2nd time thru took me longer, but then i was following directions 😀
Doghouse
Now hit the middle one of the three.
Craig Chopper Kreskay
i couldnt get Art Critic, seemed bugged. i destroyed all 17 statues, double checked and counted them. the cheev didnt trigger
godsie
bugged for me to done all 17 twice on different chars and still not got achievement
Dustin Fader
fearless: i used an elixer s and still got debuff hence… theres no dodging that shit
wQnxy
those hands is dodgeble..\ i am getting “dodge” text all the time but debuff still stacking
tom
somehow the Lightfoot is bug for me and i can’t the red line
tom
Nvm got my area of effect ring disable
MyMy
> There are two possible locations for King Crap\ nice touch 😉
Sheyz
Can you use potions like fire elemental while fighting self doubt?
Cloudy Sierra
Don’t know about host but I as party, was able throw rocks (all I had and only attack I could do as non-host)
DirtyGuap
For the “Storyteller: Grenth” achievement, “parable of the grenth page 5” is located/acquired by talking to the explorer at Hiffa’s camp.
Therris
I believe the parable is just lying next to the explorer, on the box/chest.
DirtyGuap
Could be. I was spamming F so it all kinda happened at once haha
Zaire Kelly
clean up the mess didnt work. R U suppose to do it at the very end or just after u kill the guardians?
Zaire Kelly
killed everything and still have the buff up
Zaire Kelly
okay that weird still https://uploads.disquscdn.com/images/185df15d5ebfadf9654cbdc2ec2fe137ad282a2bf9ec2e07155ae897e333b1aa.jpg have the buff up, but it’s checked off in my panel. hmmm
Dulfy
Yeah the buff still remains but achievement is granted
wQnxy
killed right after the 2nd guardian, got the acheivement
godsie
art critic bugged ? – done it twice all 17 statues on 2 different characters and still no achievement
Augusto Campos
me too
Dulfy
Hmm it is possible they bugged this achievement with the hotfix. I managed to get it before the hotfix
godsie
great! might have guessed
Sheyz
My GF has done it about an hour ago
wQnxy
same for me, done twice at the same character – still didnt get it..
Tsar CUBE
I think the art achievement can get broken if the enemy mobs break a statue themselves. I am relatively certain they broke one statue during a fight and I didn’t get achievement but on a second run through I made sure that only I broke them and this time I got the achievement.
Valandor
I noticed, that if you go downstate or die, you wont get any achievement. (You also loose the crowns above your spell bar; at least for me it works like that.)
Ares Zax
After failing to get this achieve on the first attempt, I got it on another character. There were only 2 differences between the runs:
1. I got downed once during the first attempt (stunlocked and bursted by 4 Volatile Bloodstone Elementals), but didn’t go down once during the 2nd attempt.
2. On the first attempt, I destroyed all 4 statues in the last room AFTER I killed the final boss. On the second attempt, I destroyed the statues after killing the Bloodstone Elemental guards, but before breaking the boss’s shield (so it was done before the instance ended).
Kaozelle
those boxes dulfy… not the waterwhatever ones… :p
Kaozelle
http://imgur.com/a/Jy1gH
Dulfy
Oops, corrected. Ty
Scutilla
I am completely stuck on phase 2 of the Lazarus fight. No matter how quickly I kill/immobilize sparks, she goes down before she can finish her spell. Is there something I’m missing, or am I just playing bad?
Dulfy
That is okay, just revive her and she will continue casting.
Scutilla
I realize this, but no matter how many times I revive her she never finishes the spell if I can’t keep her alive for X amount of consecutive time. Not to mention she revives at about half health so every attempt after the first is that much harder.
Away a lot this week so I haven’t been able to give it a second go yet, when I get back I guess I’ll just try (gasp) mixing up my build, or do it in a group.
Dulfy
Ahhh, you will need to have a build that can kill the sparks then as they spawn.
Scutilla
The Thursday night update severely nerfed that part of the fight, now she has much more health and the sparks respawn less aggressively. Was able to pull it off no problem.
Cloudy Sierra
Hold the Line/Precision Blade can be done multi person. Even though restricted in attacks, you get an aoe bomb for skill 1 and 2. 2 does chill
T1125P
Just to be clear there are a total of 7 mastery insights on this new map?
Soulridden
Hold the Line can be done by standing on the other side of the map for 5mins, Anise is basically invul so she can tank the mobs for 5 mins np, Also its not the 3rd wave that gets strong, mobs start getting strong when shadow leaves so a good strat for Precision Blade is bursting the mobs and killing 50 before shadow leaves ( seems to be much easier ) .
Arrakis
Agree. Did it just now. Basically avoid groups coming to you so Anise can tank and her alone. Killing 2 groups took her 7 minutes.
Manuel
Thanks for the tip. My max was 30 before mobs just killed me. I’ll bring my Elementalist next time and will try to nuke all the mobs with AoE in under 2 mins. 😀
Clayton Frommel
got killed@4mins anise ran over and hid by me. 🙁
Michelle
When I was trying to do fearless the boss kept healing itself (was using minions)
John Dough
Just dodge that attack. MM necro works wery well with only 2 minions (blood fiend and wurm).
Kitty
The student of Bartholos is bugged, it seems. I could interact with all of them, but only given credit for 6 of them. Another person in my party was given 7 of 10 for credit, and someone couldn’t get the achievement to work at all. Hopefully this is fixed soon!
wQnxy
got all 10, no problems here..
Nick Birkholz
Bugged out for me at 9/10
Manuel
For the FEARLESS achievement:
Just let yourself get 25 stacks of debuff. Every other ‘stack’ after that gives you an Alacrity buff for 5s every 20s instead while your ‘Evil Link’ counterpart only keeps 1 stack of buffs total. So even though your abilities are still on long cooldowns, the enemy will start taking 96% damage from your attacks.
I did it on my condi mesmer and my phantasms/clones killed him while my healing signet’s passive ability was more than enough to keep my health at 100%. The Fearless achievement is pretty easy but simply takes a bit of patience. 🙂
Dulfy
Thanks for that, let me add it to the guide.
Nemeke
As a thief, try using Shadow Refuge and gaining distance from the enemy Self-Doubt. When my invisibility dropped it had de-aggroed and didn’t attack me, but the ghostly doubts kept debuffing me. Should allow you to set other skills for the fight itself once you hit 25 stacks.
Doghouse
I did it on a MM necro build. Successfully killed Self-Doubt and got the achievement, but the instance bugged out at the next step – my “dead” SD was up and running around trying to attack me again, even as I left the area. And the “oath” sequence got as far as me standing n a circle, but wouldn’t then move on. Had to kill the game in the end.
Nadeshiko
It’s true that they give you alacrity when reaching 25 stacks, but this still isn’t enough to do enough damage and survive throughout the whole fight. Self-Doubt is simply doing too much damage and the tiny bit of alacrity doesn’t help with this amount of debuff stacks. And when I’m standing away from Self-Doubt to wait for my skills, it regenerates health immediately. If people can really do it that easily I’m definitely missing something what hasn’t been explained yet.
Manuel
As a condi mesmer (Dire gear) I could easily keep my health at 100% with just the passive ability of the healing signet (Signet of the Ether) while my clones/phantasms kept ‘Evil Link’ busy. Didn’t even have to pay attention to the fight except summon another phantasm when one finally got off cooldown again or dodge at random times for the clone on dodge trait. 😛
However a friend of mine had a lot of issues and kept dying. I think he was on a zerker thief. So maybe being too squishy is the issue?
Nadeshiko
Hmmm, possibly. Guess I’ll have to try out different classes until it works somehow. Tried it with (zerker) thief earlier too but it didn’t work out. I only get it down to like 30-40% but holding out longer is impossible. Sadly I don’t have a mesmer. I’ll try it with necro later though! But a passive healing skill sounds definitely useful.
Sylvia Lea
Did this using a mesmer PU Condi Roamer build without having to heal once. Just switched blink with Phantasmal Distortion. Thanks for the tip Manuel! My A/T SB Condition ranger build didn’t quite hack it on this one.
Arrakis
Thank you. I did it today on condi mesmer, very easy but time consuming. 🙂
Bacon
http://i.imgur.com/opmzSL2.jpg\ You can roll the chests again on alts but she makes you pay for both rolls.
DD
“Lightfoot – 1 AP\ This is a pretty easy achievement, ……..”
Easy? EASY? That’s one hell of an achi! One error and I must restart the instance…
IslaRoses
It’s easy if you’re patient. I wasn’t and got nervous and botched it by moving a bit too quickly. :/
Flipr
Well, you can stay in the middle of your empty square, wait after the next one burns off, and move when your square turns red.
Justin
It is actually really easy!! Place the first power source, then the pattern changed to alternating straight lines. During this step, bring ALL the power sources over. Then plug them in skipping the more annoying patterns!
nyanekooo
Or get in a party, and let ur party members do the work. Even if they get burn, u still get the achievement
Raizel
Have you any suggestion for Hold the Line/Precision Blade? I’m playing a warrior but I can last only for the first 3 min roundly 🙁
KINGRPG
I think the mob scale might be bugged on the 4th-5th wave
Here is a way to get those achievements. Don’t forget to use the special skill to review NPCs, cuz you can stand behind the NPC to avoid range attack. You can run around the huge flower in the center, use it as a big shield. https://www.youtube.com/watch?v=cMBU8ox6MkM
wQnxy
if anet thinks ill gonna do story at multiple characters and wasting horus of time for some fcking 1-2ap and then going to buy next expansion – they are so wrong..
jaime
You need a class that have aoe, high amount of toughness, and good healing to get precision blade while other hold the line u can just let the npc kill some mob for the first phase while you stay far away until 5:01 but first phase are weak npc mob you may end up in the second phase
Raizel
I only have warrior. Is there any way to get that achi on warrior???
IslaRoses
Yeah. I made a half assed attempt on my 12500 hp Ele, and couldn’t make the full 5 minutes just because things got a bit too crazy and I wasn’t as sharp as I needed to be (and I was still using the special action to try to res when it was applicable).
brownbaby
how can one do it with a ranger
nyanekooo
as somebody else suggested, try to make anise aggro to white mantle. It challenging to get this right as, if u hide too far away, anise will follow u after one wave ends. As 1-2 white mantle are left on that wave, i stay near the gate to prevent her from following. Position urself away from the gate as soon as the last one dies.
CLAUDIA NANCE
https://uploads.disquscdn.com/images/05464792a1f63b601f3f134967d1765ce311e2c2bdc9309d4c61e4e41f3ef9c1.jpg I’ve got the three lights going from the bloodstone trap to the three dots on the floor. They are in a straight line. But the exemplar isn’t making any move to leave the trap. Is there something else I should do or have done. Thanks for your help!
Doghouse
Hit the middle one to toggle the last three out
Aiko
I had the same issue so I tried overloading the trap. Basically throwing bloodstones as fast as you can onto the seals until it overloads, and it worked plus hidden achievement.
Flipr
As Dulfy said, hitting one rune will cause it and its two neighbours to flip.\ The goal is to set all runes either on or off. As noted, the final move is always\ in the middle of three adjacent remaining runes. Row,file or corner doesn’t mind, the frame could be a circle instead of a square.
Here is an example with 1 rune flipped at the bottom left. The rune to hit is marked with + :
X X X X X X +X X O O O O Pattern: hit neighbours, then opposite (distance 4)\ X _ X X _ X+ X _ O O _ O\ X X O O O X O O O O O O\ +
After some tries, you can ponder your moves outside the room (no attacks, no reset).
Doghouse
Bloodstone Puzzle: The description above is misleading.
The objective is to deactivate ALL of the runes. The penultimate step is to get a row of three.
Every time you hit a rune, it also toggles the two either side (active go inactive, and vice versa). Once you have only a row of three left, hit the middle one, and it will toggle the other two off as well.
(I’m not convinced it’s necessary for the three active runes to be on the one side, as the description above suggests. A corner one plus the two middle ones either side of it ought to work the same – and that ought to be a reachable configuration as well. But I haven’t tried it that way yet.)
CLAUDIA NANCE
Thank you so much for your help! I do remember causing all the runes to go inactive, but I suspect it wasn’t immediately after having the 3 runes in a row. Again, thank you!
IslaRoses
Yeah, it just means you need three runes activated in sequence, in a row or a corner, in order to throw a shard and have it not activate anything else (thus completing the puzzle).
Doghouse
Yes, as you’d expect. I made a point of doing a corner plus the middles either side of it, and that definitely also works.
Andy Williams
King Crap. lol
Keira
https://uploads.disquscdn.com/images/efb0d86217cbd9c1e4606d52eeb6beda354e899fca1af265942c0d283dd6aeca.png XDDDDD
Ardenwolfe
Bless you, Dulfy!
DirtyGuap
Has anyone been able to complete “Battle Orr”? I have been sitting here for about 3 hours waiting for a spawn and still nothing.
Biscuit
Imma punch whoever designed this jumping puzzle. Not cause it’s bad or anything, but goddamn, I have *never* had my acrophobia twigged this bad by a video game, like, ever. One or two more checkpoints to spare the falling and dying would have been nice.
VOjta Šostok
Precision Blade as Thief – Staff skill 5 on top of them. Fully sigin and zerk. Killed 4 waves – 40 down under 2 min. Last wave is hard so I used Fire Elemental Powder and Turret Seed. Probably wasnt necessary. Last wave started with blade storm elite skill and who survived then back to staff skill 5 and stomp them all. Easy to do and after that you can just die 😉
Andre
staff??da fuk?
Hemmer van Ukzahn
This works great BUT you have to be careful not to be specced into getting Fury, in my first attemps the wells kept corrupting my fury into blindness and I missed half the time. 😐
Clayton Frommel
last chance pretty easy as in you can easily fuk it up. having to fight thru trash mob over n over is srsly annoying, just to get to that step.
Hemmer van Ukzahn
Tried Fearless with a necro MM/Condi hybrid, took ages until I failed, switched back to normal condi dps with corruption skills and absolutely demolished the boss in a very short time. Can recommend.
DirtyGuap
I’m gonna have to agree. I tried the same thing and my minions where building up the debuff so quickly it instantly mitigated anything I did. What did you do to keep him stunned?
Hemmer van Ukzahn
Chill, cripple, warhorn offhand and shroud #5 helped a lot. And a little blind from dagger #4 maybe.
But for the most part I didn’t focus on stunning him, the good thing with condi necro is that you do a lot of damage per hit, without minions he always had very few\ stacks (due to my increased cooldowns on everything including autohit)\ but died quickly due to the bleeding stacks.
Answerer
Got any other suggestions? I tried that, but by the time the boss is down to 40% all my skills have half an hour of cooldown.. so at some point I had no choice but to wait until the boss slowly caught up to me
Daaw Daw
when he gets 25 stack,he get reset to 1 and never gona stack again,you get quickness every 10 sec or so which gona decrease cd for about 20 sec.
Hemmer van Ukzahn
Only did it the once and admittedly my condi necro is built for raid dps, so no idea how this strategy plays out with more rounded stats.
My setup was roughly this IIRC: http://gw2skills.net/editor/?vRAQRBLRtG2JNiQzNY1NgjNA/NYBXwivifxxI0VLA0Ci2adgRAA-TxRFQBKZ/h+p+jveCAjUJY70P0QlfA4kAQKAIWDA-e
Darak
Hum, I see section 8 of the book of Bartholos is not mentioned, for the reference that section is on the second floor in the drawers to the right of the stairs just under the painting. Can’t miss it there’s but one painting in that area.
SUPER GOD
Just a tip for the lightfoot for speeding it up. Get the first orb as normal, then take the remaining 3 orbs across while the pattern is the cycling row (easiest with engi rocket boots, elixir h, r and b) without placing them in the holders and you can skip the other 2 patterns.
PurpleHaze
well Precision Blade is bugued, i actually made it 4 time, never got the achievment… i’m kinda fed up
owlmind
I killed 54 white mantles and didn’t get the achievement 🙁
Kyte
I don’t know if this is relevant but I was tracking the Precision Blade achievement, killed 55 White Mantle and didn’t get the achievement. When I untracked the achievement and killed them again it gave it to me. So might be a bug? Not sure if you’re tracking it or not.
Suan
did 50 both with tracking and not. Did not get it. Do we get this achiv the moment we hit 50 or at the end of the mission?
Kyte
It triggered for me the moment I killed 50 White Mantle (albeit with a slight delay). To be honest, I basically led them all to Anise and she killed all of them but it still added to my counter and I still got the achievement.
KINGRPG
try take some dmg by yourself
Kyte
Why? I got the achievement regardless. Lol.
DirtyGuap
I am having the same issue. I managed to kill 58 and I didn’t get credit =X
Alfa Q
If you are having trouble with the Dodger Danger AP, you can easily get it by getting killed by the fire floor in one of the rooms with the elemental champs before the boss fight. Remain dead (don’t get rezzed).
Once the boss reaches 50% health you will be auto rezzed for some reason. Just chill out in the room till your teammates kill the boss. You will still get the achievement for avoiding all the lightning!
Yeah Bash TV (Yeah Bash)
Hey man!How to do it exactly? You need to kill champ before u get special skill to unlock the door.And ur ally npc would not fight boss untill u there.
Alfa Q
You can’t do it alone. Need to do it in a party.
Seph91
For Fearless achievement I found guardian healway build is the most chillax way, heres the link:-https://www.youtube.com/watch?v=GOCnXmNa1A4&feature=youtu.be
nadrian3k
Thank u very much for this. I was just about to give up. Really badly designed fight.
mikegonzalez2k
Healway Build\
Cleric Armor / Weapons\ Soldier Trinkets\ Valor/Honor/Virtues
Javier Patag
I’m pretty sure Justiciar Araya tries to summon Bloodstone Elemental Maulers at 75%, 50%, and 25% of her health. I also recommend just using unstable bloodstone fragments to break her defiance bar as a single one is enough as compared to other CC effects, including hard CC. In fact, you can knock her down even while her break bar is grayed out.
kayeferr
Student of Bartholos….the desk that book 2 is suppose to be on is not in the house were do i get it I found all the others but I am missing no. 2 Please help
KiLLi4N
It is in the house. I was also missing book 2. There are two books lying on top of each other on the table. You actually have to click the right one before using it. One of them if you click it will have a special action (F) called “Check book” and the other one “Thumb Through”.
louve loki
hey, yes, the best is to just jump on the table and do all “F” that may appear when ure “on” the books, it should work. https://uploads.disquscdn.com/images/ea5a9c3ac6edf5d9d1fb4e74f7ccbd48e486516f47bcb0910a59b0f97f269e86.jpg
kayeferr
Thank you KiLLi4N that worked
Darkye Rhiadra
I imagine this might be patched at some point. But anyway, here’s how I did the Hold the Line/Precision Blade (it so happened I was on a necro, but this had no impact so any class will do this way):\ I killed the first 2 waves, and by the time the last mantles were dying the 2 min timer was done.\ Before the 3rd wave spawned (after what’s his name escaped and mobs suddenly become insanely strong) I ran to the opposite side of the room.\ I slowwwwly moved closer to them until Anise agroed the mobs.\ I immediately retreated back as far away from the mobs as possible, and on the opposite side of the room from them.\ Anise agroed them, like I said, but the mobs didn’t agro me.\ At this point I just waited out. It took Anise about 9 minutes to kill 50 mobs. I got the 5 min achievement the moment the timer hit 5 min and the kill one the moment Anise killed the 50th mob.\ Not exactly “glamorous” but hey, got the job done without the hassle some people are having what with the mobs being absurdly strong.
Darak
Thank you for this tip it worked perfectly, you just have to be careful to not go too far from Anise so that she doesn’t run to you but otherwise she indeed stays at the front and takes all of the aggro while being effectively immortal for that fight.
nyanekooo
Thanks for this great tip! I was getting tired of retirying.
Ares Zax
I’ve tried this method several times, but it’s fairly inconsistent. The problem is that around the 4th or 5th wave, Anise stops remaining stationary and runs back to my side. The White Mantle patrol around the room, but occasionally move in unexpected directions (and the camera constantly zooming in thanks to the crowded scenery doesn’t help). All together, it’s extremely difficult to get Anise to aggro onto the guards without them spotting you as well. Once they see you, they ignore Anise and focus all attention on you.
Does anyone have a tip for getting her to properly stay put throughout the whole process?
Ares Zax
FINALLY got Precision Blade! For those of you having trouble getting Anise to fight the White Mantle without getting aggro yourself, and you’re not a Thief who can perma-stealth, here’s an additional tip. Go buy some of these:
https://wiki.guildwars2.com/wiki/Ash_Legion_Spy_Kit\ https://wiki.guildwars2.com/wiki/Order_of_Whispers_Spy_Kit
If Anise happens to leave the spot at the front and follows you around, try and position her so that she’s spotted by the Whtie Mantle first as they patrol around the room. Just before they come into range, use the OoW Spy Kit. That one only grants 3s of Stealth, but it allows you to move. As soon as Anise gets attacked, run farther away from the Mantle and then use the Ash Legion Spy Kit. Unlike regular stealth, where the Mantle will continue to hunt you down as soon as stealth wears off, the Ash Legion Spy Kit gives you Camouflage (which is 10s of stealth, but you can’t move or else it ends prematurely), which it seems does break the Mantle aggro properly.
In the end, this was my experience:
1. I fought and killed the first two waves of White Mantle normally.\ 2. The third wave spawned with just 4s to go on the Shadow timer, so since they hadn’t acquired the extra damage buff, I also killed them normally.\ 3. When the 3rd wave was down to just a couple of Mantle, I went around and ressed as many of the NPCs before the 4th wave spawned. (This is what seems to make Anise stand still, but it only works for ONE wave, from my experience. Anise seems scripted to go run to your location once she’s out of combat.)\ 4. Let Anise aggro the 4th wave while you stay safely up the back of the room. Keep a close eye on how many Mantle are left as she kills them.\ 5. Once Anise is down to the last 4th wave enemy, move up closer to Anise so she will stay more or less in her spot near the front so the 5th wave will spot her immediately on spawning.\ 6. When you hear the Mesmer shatter noise that indicates the 5th wave is arriving, that’s when you use the OoW spy kit and do what I outlined in the 3rd paragraph above.
ghost
the most trolling and annoying achevents in GW 2 history …
Akopito
tried it like 4 times , but it works, what i did is i didnt fight the whole 2nd wave, i let Anise fight them till Shadow escape, and just stayed on the opposite gate, when Anise done killing all 2nd wave mobs, Anise just stand there near the spawn location and didnt follow me, soo i just stayed at the gate AFK and let all mobs aggro Anise… (sometime in my last attempt Anise keeps following me and just one shot me everytime 4th wave spawn but the final attempt Anise didnt followed me and stayed there near the spawn location)
TheBladeRoden
Another helpful thing for Fearless is to use skills and foods that give you regeneration, such as Tropical Peppermint Cakes
RabbitUp
Dodger Danger achiev: Stand on one of the orrian arches in the room, at the very top with your back against the wall. You will avoid both the lightning and the necro shotgun, just range Lazarus to death.
Mathiadon
This worked perfectly, and I was only like 10 seconds away from beating it in under 9 minutes as well – P/P Thief. (would have easily made it if I did not forget how the fight works)
John Doe
Can someone say exactly where to stand? I’ve tried multiple arches and sides and Lazarus just ports to me and starts hitting me with his shotgun attack.
Ares Zax
To avoid his lightning, you can stand atop the broken head of Abaddon’s statue. The lightning never strikes there, however Lazarus will still teleport to you in that spot. If you’re tanky enough, you can just fight him there in complete safety from the lightning. Otherwise, you can kind of hug the walls where the lightning strikes don’t really go, although it’s a bit more risky.
Git Gud
OMFG what dev thought it would be fun not having a challenge mote in the Hold the Line fight…
mikegonzalez2k
Found a trick for HOLD THE LINE.\ I used a stealth thief and let Anise kill the mobs.\ Do not bother rezzing anyone, just hide in the back and stealth as needed.\ Eventually Anise (Kiera) will kill all the easy mobs and the harder ones come.\ At that point she will follow you.\ The room is a circle so run clockwise around the perimeter.\ Don’t go too fast as you will notice that the harder mobs will will path around it clockwise.\ Basically you keep running in circles until the 5 min timer passes and you get your achievement.
Quest
https://uploads.disquscdn.com/images/03f01ed29f481f2838c5953c2a86fac903ead624cff16cde5e1bbb5c27f6238f.jpg
If anyone’s having a hard time with the bloodstone puzzle / “with friends like these” achiev, here’s a quick guide.
saito-shimizu
search “eil” on youtube and watch these archivement
saito-shimizu
Doghouse
From the entrance to the room, number the glyphs as shown below,
1 2 3\ 8 x 4
7 6 5
Numbers 1, 2, 5 and 7 should initially be lit.
To turn all the glyphs OFF, hit numbers 2, 4, 5 and 6.\ To turn all the glyphs ON, hit numbers 1, 3, 7 and 8 (“With Friends Like These” achievement).
The order you hit the glyphs in doesn’t matter. And if you SHOULD accidentally hit the wrong glyph – just hit it a second time to cancel out the mistake.
Doghouse
Oh, and the final puzzle is exactly the same – just rotated 90 degrees. In both cases, if you stand so that the 2 adjacent glyphs are furthest from you, the numbering will be correct.
Rectar
I try to make images\ http://i.imgur.com/kfG9zzM.jpg\ http://imgur.com/RWb9kaX
kayeferr
Is there any hidden achievements?????
Slaver
Cleaning Up the Mess, is it bugged? i killed the initiates in the 2 rooms, before they call reinforcement, but the achievement disappeared?! any1 have the same issue?
mikegonzalez2k
Here is a quick solution for the bloodstone puzzles.\ My numbers are from the perspective of as you enter the room\ 123\ 456\ 789
First Bloodstone\ 6 8\ 2 9
Second Bloodstone\ 4 2\ 1 8
These will clear all lines… NOT overload… that is a different solution.\ These are just the most simple solutions for clearing them.
Doghouse
In each case, the overloads are simply the OTHER four glyphs.
Araki
lol king crap
BrotherHolmes
I want to see all the new backpacks. Is there a page with pictures of all of them?
Jesus Christ
For the “Roll for Greed” achievement, having alts/other characters doesn’t help anymore, as the maximum amount of chests you can open per account is 2. I just tested this, did all the Hearts on one, opened two chests, did all the Hearts on another, couldn’t open any chests at all.
Jafar Berg
How to cheese Hold the Line achivment.\ I found this blind spot, mobs will circle around the map after killing all NPCs and if they see you they will hit you, using a stealth will make you survive for atleast 1 min Before next time being busted. thats enough time for your stealth to reset for use.
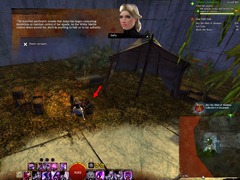
once you made the jump, spam forward towards the rock wall or you will fall down (took me 2-3 attemps to get up here). so as soon as you enter the instance go for the jump 🙂
1. jump on the highest of the 3 boxes.\ 2. jump glide to the sun cover on the tent entrance\ 3. jump up to the tent\ 4. if not pleased, procced one more step higher to where I stood
enjoy
https://uploads.disquscdn.com/images/3e0018803b38baf00c0b5947625fb8452badeb33f3805c58e0d763d6c9c7577a.png
Jafar Berg
step by step, how to do the jump
https://uploads.disquscdn.com/images/c7ce91b0d57c931f1fedfef05d5defc7fae87b619e3eaadc54d7f636304029a1.jpg https://uploads.disquscdn.com/images/fae79f96d68685428bdac11c656410e77a302a3492316e5173c0930a19d100ec.jpg https://uploads.disquscdn.com/images/a6243a9b6139d6baaee1581bda2051ccabf52c97e73bcee3ade7808943d47fe3.jpg https://uploads.disquscdn.com/images/f1acbd2789c95956d6bdf3a89737f365d813c5879c9b81736f0aeef6ba74d4a7.jpg https://uploads.disquscdn.com/images/d13fd0ac923e9da9048bd1be8692da79083235841d241d43980b4b12dfa67348.jpg
Henry Tran
youre free to ignore 7 achievements to get the mastery if that’s all you need, i didn’t even bother with the hard story ones
Mad
For anyone attempting Fearless – do it on Mes. Pretty much nothing else works. Mes with Torch, healing signet, talent that makes illusions give you regeneration, and with new mirage specialization – regeneration/protection on dodge. You basically stand there, cast torch phantom until you have three (Manifestation will kill them sometimes, and sometimes it will ignore them). Those phantasms hit rarely (which means there will be no buff blocking damage.. or it will be around 13-16 stacks, not 20) and hit with burn, which means damage is.. decent. When you have 3, he hits you slower than your signet can heal you.. and you can basically leave your PC. 😛
Yomi
Basicly it can be done by any condi-prof with strong condi like burning or bleeding. You start with full-cast to reach as many stacks as you can then just maintain it on your enemy, this let you deal damage even without breaking hisher CC-bar. I did this achi in 2-3 mins with my viper reaper.
Chell
“Pretty much nothing else works” Wrong, you’re just bad. Condi builds do it easily, I did it on my condi ranger, and there’s plenty of people saying condi Reaper – especially MM – is good. Food that restores health each second is good too.
☽Shiryō☾
For Battle Orr achievement – is there any prerequisite for the Champion to spawn? I read it was supposed to be a random spawn but I’ve been here for 3 hours already and nothing’s happening.