GW2 Aetherblade Retreat dungeon guide with detailed walkthroughs and explanations of boss walkthroughs. Aetherblade Retreat is a new dungeon released with the Sky Pirates patch.
Navigation
General Information
Getting there & Rewards
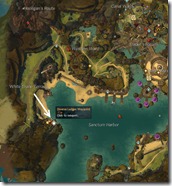
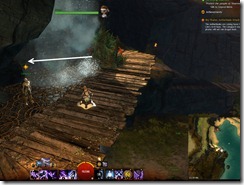
The entrance to Aetherblade Retreat is located on the west side of Lion’s Arch. It is located right under the Diverse Ledges Waypoint behind a waterfall. (Jump down to the planks below from that waypoint). You will definitely want a full party of 5 players due to the difficulty. The dungeon will upscale players to 80 but it might be tougher with low level players.
This dungeon will only be here until July 9 and will be removed once Sky Pirate content is over.
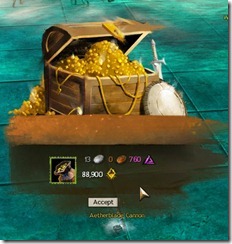
Every time you complete the dungeon, you will get a Bag of Coins containing 1 gold. This is intentional due to the difficulty of the dungeon.
What to bring
Make sure you have some abilities that grant you stability and conditional removal as the mobs there love to do knockdown or put 20 stacks of bleeds on you. Having a guardian/elementalist may also help to lessen some of the damage.
There are some Inquest mobs inside the dungeon as well so if you have potions that increase/lessen damage from Inquest bring them as well.
Trash mobs
The trash mobs in this dungeon are no push over so you should get familiar with them and know what to kill first in a pinch. When dealing with trash mobs, group them up if possible (i.e. Mesmer focus #4) so you can kill them all at once with AoE attacks to make the run faster.
| Name | Abilities | Comments |
|---|---|---|
| Aetherblade Grenadier | Throws Grenades | Their grenades can be reflected back to do damage to them. |
| Aetherblade Thug | Immobilize, Knocksdown, Buff Allies | This guy brings the pain. Try kill him first if possible as his every attack is a knockdown. Stability helps here. |
| Aetherblade Thumper | Protective Shield, Dazes, Heals | Will block a lot of your attacks if the shield is up. Put poison on him to lessen his heals. |
| Aetherblade Swashbuckler | Bleeds, Throws Dagger | This guy will put 20 stacks on you in no time. Have cleanse ready. |
| Aetherblade Striker | Lighting Attacks, Stun | These guys put down a lot of lighting fields that will stun you. |
| Aetherblade Taskmaster | Confuses. Blinds | Watch for their confusion and make sure you don’t kill yourself with it. |
| Inquest Extinguisher | Chills, Remove Conditions, Knocks down | |
| Inquest Grenadier | Conditions, Bouncing Bombs |
Dungeon walkthrough
Underwater Mines
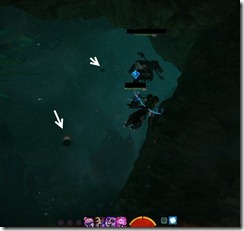
You will encounter a small underwater portion with some mines. There are no enemies here so take your time in getting through the mines.
Once you emerge from the water, you will be greeted with a welcome party of 2x Aetherblade Thugs and 2x Aetherblade Swashbucklers. Time to test out your stability and cleanse.
Laser Walls
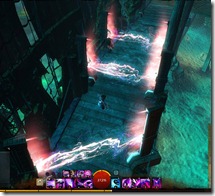
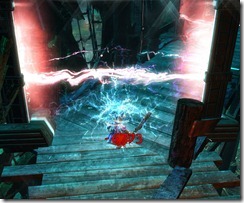
This area is filled with laser walls that open and close. Getting hit by one of those will stun you and cause you to get downed (and possibly dead if there are no group members behind you to revive you). Take this part slow. Wait before each laser wall if you need and only go through it after you see the laser wall goes down.
After each set of laser walls is a small house with consoles inside you can use (the first one need 3 players to click at once) to deactivate the previous laser walls to make running back easier if you wipe.
Breach the gate
After passing through the Laser walls, you will need to fight off waves of Aetherblade mobs so you can breach the gate. This encounter also teach you some of the end boss mechanics. Don’t bother attacking the two Aetherblade Thumpers up top, they are immune to damage.
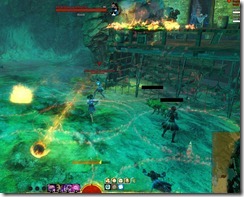
After every wave of Aetherblades you defeat, the two Thumpers will fire their cannons, filling the ground with red circles that you need to move away from. I personally find the best way to avoid them is to stand your ground and sidestep to a safe area next to the red circle. If you spam dodge blindly you can dodge into another circle and take the damage anyways.
If you really have problems dodging the circles you can stay back a bit as the cannons usually don’t hit there as long as other group members are near the gate.
Once you kill the final wave the two thumpers up top will jump down and you can kill them to open the gates.
Mid-Boss – Champion Frizz
Achievement : if you complete this fight, you will be automatically rewarded the Equipment Failure achievement.
Achievement : if you don’t hit any of the laser walls, you will get the Faster than Light achievement.
Frizz is an interesting boss fight with lots of moving and gets harder as the fight progresses.
Important tips
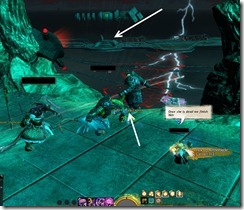
- You can avoid the laser beam by standing on the very top of the stacked crates but you can’t avoid the laser walls so you will need to run around. This is especially important when Frizz spawns both Laser walls and beams near end of fight as you can’t outrun both.
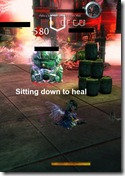
- Kite the golems around, if they get hit by the laser beam, they block everything for a short interval. If they get hit by the laser wall, they gain Might stacks and will sit down to heal.
- Golems will pull you and sometimes this can pull you right into a laser beam. Try have some sort of stability or time your dodge.
- Golems will also place stacks of confusion on you so make sure you are watching your debuff bar and don’t autoattack yourself to death.
Phase 1: 100-75%
Kill the trash mobs accompanying Frizz and you can bring him down to 75% to trigger the next phase.
Phase 2: Laser Beam
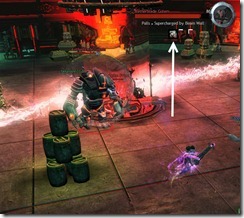
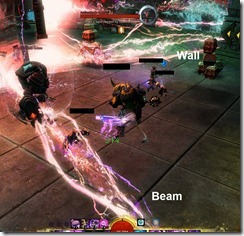
Frizz will activate his laser beams which will rotate around the room and also spawn a Aetherblade Golem that will run and chase you around. If these laser beams touch the Golems, the Golems will get a buff that cause them to block all the attacks for a few seconds.
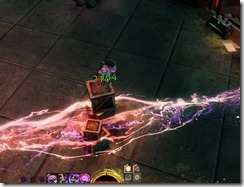
You can avoid the laser beams by jumping on to the very top of the stacked crates. Getting hit by a laser beam won’t kill you but will do quite a bit of damage.If everyone stack together at the same crate, you can quickly melee down the lone golem while taking no damage from the laser beams.
Phase 2: Laser Wall
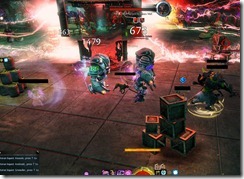
Once you killed the Aetherblade Golem, Frizz will change the Laser Beam to a Laser wall and activate two more golems. There is no avoiding them this time by standing on top of the crates so you will need to keep moving around. If these Laser walls hit the golems, they will gain the same buff that allowed them to block all attacks. In addition, they will gain 5 stacks of Might and sit down to heal. Be sure to interrupt them when that happens. Watch out for the pull/confusion from the golems as they can pull you to a laser beam and kill you instantly (try dodge it). If you have a high DPS group, you can try have everyone stack together and melee the golems as much as possible before the wall arrives.
Phase 2: Laser Beam + Wall
Once you kill these two Aetherblade Golems, Frizz has one last trick up his sleeve. He will now throw out both Laser beams and Laser wall at once, with different rotational speeds. This forces you to run on top of the crates to avoid the beam while running away from the Laser wall. Note that you really have to stand on top of the crates. Standing behind them won’t save you from the laser beam as the beam pass through it.
Phase 3
Surprise!
More Trash
Once you get pas Frizz, you will be facing a bunch more trash packs before you can get to the final boss fight. These trash are quite nasty as you often get Aetherblade Strikers, Thugs,and Taskmasters in the same group. They will do some nasty combos of stun, knockdown, and confusion.
There are also groups of Inquest mobs that will try gang up on you but they are not as bad as the Aetherblades.
Mini – Jumping puzzle
**Important** Try have only one player do the jumping puzzle and get the console at the top. Kiel appears to bug out sometimes if everyone does the jumping puzzle.
You will come across a locked door pretty soon and the only way to get across is via a jumping puzzle to your right with steam plates that will bounce you up (those not wanting to do the jumping puzzle can wait at the door with Inspector Ellen Kiel)
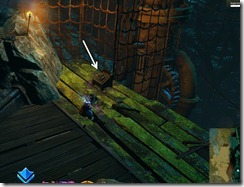
Once you are at the top, you can use this console to open the door below.
Final Boss – Mai Trin and Horrik
Achievement : if you complete this fight, you will be automatically rewarded the Cornered, Caught, Collared achievement.
Achievement : if you complete this fight within 15 minutes, you can grab Horrik’s Aetherblade cannon and put it on the nearby docked Aetherblade Airship to shoot down an escaping airship for Unfriendly Skies achievement.
Achievement : if you salute Horrik during the fight (or his corpse) , you will get the Don’t be Rude to the Brute achievement.
Achievement : If you avoided all of Horrik’s circles while fighting him, you will get the Personal Space achievement.
You will be fighting Mai Trin and Horrik initially and Horrik alone once Mai Trin is defeated.
Important tips:
- Do not kill Horrik first, he will respawn instantly when you kill him. You won’t get to fight Horrik once you defeat Mai Trin
- You can, however, damage Horrik to very low HP so they once Mai is defeated Horrik can be killed quickly.
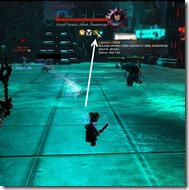
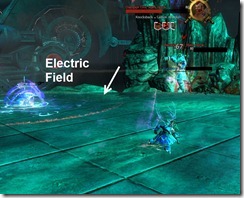
- Mai Trin has 10 stacks of buff (Captain’s Shield) that reduce the damage she takes from players. Only way to remove that buff is to let her get hit by electric field from Horrik (for each second she stands in the electric field circle, 1 stack of her shield gets removed). Stack on Mai Trin so Horrik aim those field at you and hit Mai instead. .
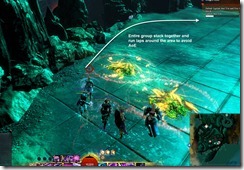
- You can expect cannon phases at 75%, 50%, and 25% of Mai Trin’s HP. These phases get longer and the AoE circles land faster as Mai Trin’s HP decreases.It might be best to have the entire group bunch up together and run laps around the fight area. This seems to avoid most of the AoE circles.
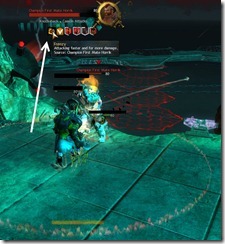
- Once Horrik is alone, he gains a stacking Frenzy buff that increase his damage output so you will want to kill him ASAP (i..e soft enrage).
Phase 1: Mai Trin (100-75%)
A lot of players will initially try and kill Horrik. They will learn pretty quick that is the wrong thing to do as Horrik respawn instantly and at the same time restore Mai Trin’s Captain’s Shield back to 10 stacks. You can however get Horrik’s HP to a low threshold so once Mai Trin is defeated you can kill Horrik quickly.
Mai Trin has 10 stacks of Captain’s Shield. At 10 stacks, this basically reduces any damage done on her to null. You can remove a stacks of that shield by having Horrik’s electric field hit Mai Trin. For every second Mai stands in that electric field circle, 1 stack of her shield gets removed. To do so effectively, you will need to have everyone stacking on Mai Trin as Horrik aim these electric field at players and try to keep Mai Trin inside the circle as much as possible.
- If you have immobilize skills, try use it on Mai Trin once she is inside a field so maximize stack removal.
After you remove some stacks of Captain’s Shield, Mai Trin starts to take damage from your attacks. Mai Trin loves to use shadowstep and port around party members (putting cripple + stacks of bleed on them at the same time).
- Shadowstep seems to the furthest group member so keep this in mind if you are low on HP as the shadowstep can literally one shot you.
Once you get Mai Trin to 75%, she will become immune to damage and start to call down the AoE circles from the Aetherblade thumpers up top.
Phase 2: Mai Trin 75-50%
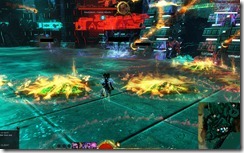
At 75%, you will be automatically assaulted by AoE circles from Horrik and the thumpers. The cannon assault lasts around 50 seconds and pretty much cover the entire fight area. You will need to avoid these circles as best as you can . We find it best to have everyone group up and run laps around the area together . The AoE circles seems to be aimed at players so if everyone bunch up and run together they will outrun the circles before the cannon attacks land.
Once Mai Trin get down, you can damage her until 50% to trigger phase 3.
Phase 3: Mai Trin 50-25%
At 50%, Mai Trin and Horrik will once again become invulnerable to damage and port up. The cannon assault this time lasts for around 1 minute and 20 seconds and the thumpers fire faster.
Phase 4: Mai Trin 25- 0%
At 25%, you will get the 3rd cannon phase which lasts around 1 minute and 50 seconds.
Phase 5: Horrik
Once Mai Trin surrenders, you will need to fight Horrik. Horrik gains a stacking Frenzy buff that increases his attack speed and damage the more stacks he has. If you have already damaged Horrik while Mai was around, Horrik should die pretty fast and you don’t need to worry much about his buff.
Note: I was told that the cannon AoEs are timed and occurs at 45, 90 and 145 seconds but this did not seem to be case.
Rewards and achievements
Guaranteed Rare & 1 gold
- Defeating the final boss will give you a guaranteed rare from the boss chest and 1 gold for completion every time.
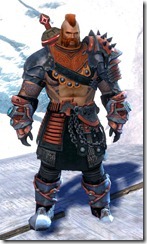
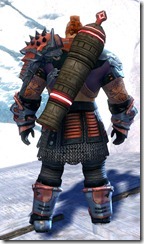
Chance at Monocle from last boss’s chest (exotic, berserker stats, tradeable)
- All three armor types, identical appearance & stats
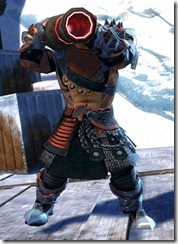
Chance at Infinite Aetherized tonic recipe from random drops (Transforms you into Horric)
- Tonic is tradeable and you can jump with it.
- Artificer: 50 Pile of Incandescent Dust, 50 Charged Lodestone, 50 Aetherized Tonic (drops from the dungeon), 50 Jug of Water
1) Equipment Failure – Leave Frizz crushed in his lab
- This achievement is obtained for killing Frizz, the midboss in the dungeon. This is a guaranteed achievement that everyone will receive on their first run through the dungeon as long as they can make it to the mid-boss.
2) Faster than Light – Complete Kleptotronic Advanced Designs without being hit by lasers
- This is a skill based achievement, meaning that not everyone will be able to get it on their first run.
- This achievement is either for not getting hit by any of the laser beams/walls during the Frizz fight.
- For Frizz fight you can avoid the laser beams by standing on the very top of stacked crates (you still need to run away from the Laser walls).
3) Personal Space – Avoid area attacks while fighting Horrik.
- What you need to do is avoid being hit by Horrik’s cannon fire during the barrage phase of the final boss battle.
4) Don’t be Rude to the Brute – Show respect by saluting Horrik
- While fighting Horrik and Mai Trin or Horrik alone, do a /salute on Horrik while having him targeted. If you don’t think you can type out /salute while during combat. Just type out /salute before hand in the chatbox and then just press enter and up arrow to salute him quickly during the fight.
- You can also /salute his corpse or salute him while he and Mai are in a conversation at the very start of the fight.
5) Unfriendly Skies – Use Aetherblade weaponry to bring down the pirate airship.
- You must defeat both Mai Trin and Horrik within 15 minutes. If you have achieved this, you can grab the Aetherblade cannon that drops off Horrik and put it on the Aetherblade Airship docked nearby. You have to do this on your first attempt. If you wipe and start over, you cannot get it even if you see a timer on your screen (cannon cannot be placed on the airship)
- If you finished the fight within 15 minutes, you should see another Aetherblade Airship leaving (should be a timer on top right of your screen) and you can use the cannon you just attached to the docked airship to shoot that one down to get the achievement.
- Again, this is a skill based achievement, something you may not get within the first run.
6) Cornered, Caught, Collared – Capture the criminal behind the Dragon Bash crime.
- You will get this achievement when you defeat Mai Trin and Horrik. This is an automatic achievement that you will get when you complete the dungeon for the first time.
7) Question for Mai – Talk to Mai Trin
- Note: This achievement is currently not yet available.
- You can complete this achievement once you have defeated Mai Trin and Horrik in the Aetherblade retreat dungeon. Mai Trin is located in the Fort Marriner cell.


Archived Disqus comments
Buubis
That was fast. The patch isnt even out.
Pingback: GW2: If You Can’t Beat Them… | Why I Game ()