Guild Wars 2 Ascalonian Catacombs dungeon guide for the explorable mode, which is available to characters level 35+ and rewards 30 Ascalonian Tears per run. There are three paths: charr, human, and asura, with the charr path being considerably easier than the other two and a good option if you are looking to farm Tears. Note that this guide currently covers only the Charr path but writeups for the Human and Asura will come shortly.
The Ascalonian Tears are used to purchase level 30 rare dungeon armor and level 60 exotic armor and weapons. In addition, the tears are used for the crafting of some of the legendary weapons and provides an incentive for level 80 players to run the dungeon.
Keep in mind that all the fights up to and including Lieutenant Kholer are identical between all three explorable modes. It is only the fights after Kholer that are unique between the paths.
Navigation
- Picking the path
- Mini boss encounter – Graveling Burrow (shared)
- Mibi boss encounter – Spider Queen (shared)
- Graveling packs (trash)
- Bonus event – Cave Troll (shared)
- Boss – Lieutenant Kholer (shared)
Charr (Detha) path
Picking the path
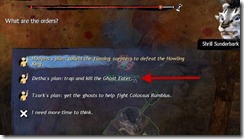
The 2nd option – Detha’s Plan – trap and kill the Ghost Eater is easiest path of all three. Hodgins (human) and Tzark (Asura) paths are considerably harder due to the wonky hitbox on the graveling burrows, which cause melee characters to miss a lot of their attacks. You also need good group coordination to kill the burrows in a specific manner. In terms of Hodgins and Tzark, we found the Hodgins path to be slightly easier of the two. Once you get past the first boss encounter in Hodgins’s path, the rest of the dungeon is fairly easy and the final boss is a huge push over.
All three paths differ past the Lieutenant Kholer encounter, each having an encounter that reset if you fail it.
Mini boss encounter – Graveling Burrow
This should be fairly self-explanatory but may catch new groups off their guard. Once you have picked your path and head down the stairs nearby, your group will be presented with a Graveling Burrow at the buttom of the stairs that will keep spawn Graveling Hatchlings unless you destroy the Burrow.
Everyone should head to the burrow and then stack together so that you can use your AoEs to damage the burrow and the hatchlings at the same time.
Mini boss encounter – Spider Queen
| Mechanics | Strategy |
|---|---|
| Spiderlings | Funnel them to the staircase if possible so you can AOE them down quick. Watch out for the lethal fire trap at the bottom of the stairs. |
| Poison Spray | Dodge the overlapping red circles, melee characters have an easier time. Use conditional remove skills as necessary as poison make your heals less effective. |
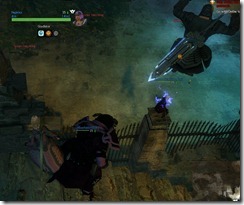
Once you made past the traps in the room after the burrow, you will encounter another staircase that leads down to a room full of spiderlings. It is recommended that you do not take the stairs and instead jump off to the sides as there is a fairly nasty trap at the bottom of the stairs that tend to one shot players and anyone trying to revive them.
You have a couple of options for dealing with the spiderlings. You can fight them in the big room down below by having everyone jump off the sides into the big room. This might be a viable strategy for some groups but we found it was a bit messy as all the spiderlings are spread out and there isn’t a lot of places to hide in the room from their poison attacks.
What worked for us is to have someone with long range aggro the spiderlings while standing on the top of the stairs. This will draw them to the stairs and essentially funnel them into a tight column that allow group members to AOE them down rapidly. It essential to not go down the stairs too much as you will be in range of the fire traps and risk getting one shot.
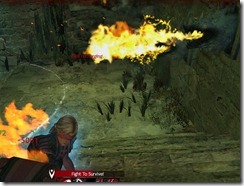
Regardless of what you do, make sure to kill the traps on the walls in the spider room that spews out fire . You don’t want to deal with the Spider Queen and the traps at the same time. They tend to be on the right wall (as you face the Spider Queen) and we just kill them in a counterclockwise direction.
After you killed a batch of spiderlings, the Spider Queen will spawn. It is time to jump down into the room and mop up any spiderlings that are still alive. From personal experience, I had a harder time dealing with the Spider Queen as a ranged player as her red poison circles were hard to dodge since they are often overlapping and cover a large area. Instead, if I were next to her and in melee range, I could simply run through her to the other side to avoid her poison spray.
Graveling packs (Trash)
This is a fairly difficult trash pull that a lot of groups tend to have difficulty on. You have a group of 4 graveling mobs: 2x Scavenger, 1 Howler and 1 Breeder. Typically people tend to focus on the Graveling Breeder first as it spawns hatchlings. However, we found that it was a lot easier to kill the Scavengers first as they have a knockdown that will essentially pin party members down to the ground and kill them unless they can break out using a CC breaker.
Do not fight the Graveling in the tunnel as it is filled with traps that will instant-gib unsuspecting melee players. Instead, pull them back close to the entrance of the tunnel so that they are in a tight column for AoE and well away from the traps at the back.
For the traps after the graveling packs, have one skilled person run up the tunnel and take a left after they reached the top to use the lever to turn off the traps for the rest of the group. Having the entire group running through the tunnel can be dangerous as there is a higher risk of someone getting killed by the traps.
Bonus event – Cave Troll
Cave Troll is a random event that tend to occur right before you fight to Kholer but it is entirely random (sometimes the Cave Troll can spawn where the Spider Queen is, making the fight a lot harder and other times it may not trigger at all).
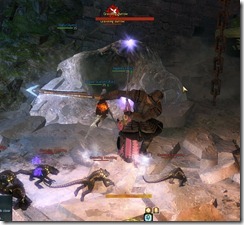
The big thing with the Cave Troll is his massive knockdown, which can be blocked or avoided if you dodge out of the red circle in time. The knockdown area is a lot bigger than the circle, so you may need to get well out of the range of the circle to avoid it.
Boss encounter – Lieutenant Kholer
| Mechanics | Strategy |
|---|---|
| Adds | Adds can be avoided since Kholer has a longer leash range. |
| Pull (on average one pull every 20 seconds) | Either use pillars to LOS his pulls or use skills that allow you to block attacks or give you stability (immunity to crowd control). |
Lieutenant Kohler can bring the pain to unprepared groups. He comes with two adds that can be avoided since the adds have a shorter leash range than the boss . Have your group position well away from the stairs and have one person pull the trio and then run back to the group. The NPC (Detha) will likely engage the trio on the stairs, allowing you to tag Kohler and lead him back to the group while the two adds reset after they have killed Detha.
The mechanic that Kholer uses that devastates groups is his pull, which has an animation preceding it. Kholer will bring up his sword into the air as if he is charging up for an attack right before he pulls you in.
Once you are pulled in, you will most likely go immediately into the downed state with cripple, vulnerability and poison conditions applied on you. Luckily, there are a couple ways you can avoid his pull .
1) Block: a lot of classes have skills that can block attacks. These skills are perfect to counter Kholer’s pull. Mesmers for example, have the Illusionary Counter skill from the scepter, which can be timed to block the pull. Guardians and Warriors have groupwide Aegis skills (i.e. Virtue of Courage) that can be timed to protect the group.
2) Projectile reflect: The pull counts as a projectile attack and can be avoided if you have abilities that reflect projectiles. Guardians and Mesmers are well equipped to handle this as well (i.e. Feedback from Mesmer).
3) Stability: Stability makes you immune to crowd control skills, which includes Kholer’s pull. Mesmers have Mantra of Concentration that can be used for this if you are not using a scepter.
4) LoS: You can play hide and seek behind the stone pillars. If you see his pull animation, sidestep behind a pillar and come out to DPS once it is safe.
Once you got the pulls down, the boss isn’t hard at all.
Boss encounter – Defend Detha from gravelings (Charr path)
| Mechanics | Strategy |
|---|---|
| Graveling Swarm | There are 5 traps you can use to kill the gravelings, practice and have a rough idea where the traps will sprung. Gravelings will take damage only if the trap is activated while they are running through the area, activating the traps before they get there does nothing. |
| Graveling Breeder | Killing her will end the encounter, have a beefy character (i.e. guardian or warrior) stand in the middle and just kite the Breeder in the trap area until it dies from the traps. |
This is probably the easiest and shortest boss encounter in this dungeon, assuming you know what you are doing. There are 5 traps that can be activated to fight against the graveling swarm. We typically have 4 people on the traps (one person handle both traps on one side, the trap in the front is typically more useful) and have 5th person stand in the middle of the room to bait the Graveling Breeder (that 5th person should typically be beefy like a guardian or warrior).
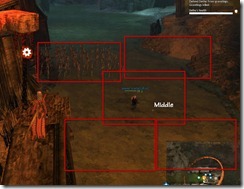
The idea here is to kite the Breeder in a circle around in the trap area while the rest of the group utilize the traps to kill off the gravelings and the Breeder . Keep in mind that traps only damage mobs if they are activated while the graveling are running over the trapped area. Activating the traps before the graveling get there does nothing. The picture below illustrate the rough area each trap covers.
Boss encounter – Defend Detha and her traps (Charr path)
| Mechanics | Strategy |
|---|---|
| Three wave of adds | One wave spawn for each cannon/mortar being repaired. Killed the ranged adds first (i.e. elementalists, rangers, and necromancers) as the melee ones can be cripped and chilled to rendered useless. Note that if you wipe, it doesn’t reset the repair progress but you may face more than one wave of adds. |
This encounter basically test your ability to manage waves of adds while the NPC repairs the mortars. You get three waves, one for each mortar being repaired. The mob composition of these waves are random but you can expect at least 4-5 mobs with a variety of melee and ranged. Note that you can use the Frost Mortar Cannon even while the NPC is repairing it and it applies Chill to mobs, which decrease their movement speed and casting speed by 66%.
As always, kill the rangers/elementalists first as the melee mobs like warriors as can chilled and crippled and kited around.
Boss encounter – Ghost Eater (Charr path)
This is a rather easy fight but can take a while since the boss has a lot of health. You have three mortar cannons to play around here. Ideally ranged characters should stay on the mortars as they can get off the mortars and do some DPS as well. The only exception is maybe the Frost Mortar Cannon as you will want one person to be on that mortar full time to apply Chilled to the boss and the adds that he spawns. Melee characters can run around kiting the boss in a circle within range of all three mortar cannons.
- Frost Mortar Cannon: Applies Chilled (-66% movement speed and casting speed), should be utilized full time.
- Explosive Mortar Cannon: Applies Burning
- Shock Mortar Cannon: Applies Vulnerability (lowered defense) and Weakness (50% of non critical hits are glancing blows (50% less damage).
The boss will spawn little adds called Ectoplasmic Ooze that doesn’t have a lot of health and should be killed by AoEs from the mortars or you can target them individually to kill them. If left unattended, you risk them running around damaging players on mortars and finish off any downed players.
Archived Disqus comments
Yraen
Regarding Lt. Kohler, my group found that the easiest way to avoid the pull was to simply use the dodge ability that everyone gets. It requires paying attention, but if you dodge as his arm drops from the initial animation, you’ll evade it every time.
We weren’t able to go any further after him since our instance bugged and nothing else happened 🙁
Caleb Kester
How long would you say the average run takes?
Ursoc
Our group started with Rumblus, but after looking around on the internet, it looks like the other paths might be a little easier. We ran into the buggy hit boxes on the Graveling event, and it really screwed us up.\ Great guide by the way!
Sao-Link
When fighting Lt. Kohler an easy way to live through the pull was to have our rogue remove the stacks that protect him against CC with head shot, then I as a mesmer interrupted him during the pull with either distortion or mantra of distraction as both can be used while stunned. He pulled everyone in, but couldn’t cast his whirl.
Gunit Charrdian
The best way I’ve seen to deal with Lt. Kohler is to have him fight the cave troll, if he spawns. You can pull him down to the troll and then jump off the edge into the water and he will fight the troll. Then you just jump in right before he dies and finish off the troll who will have a little less that half life.
Dulfy
indeed, seen that strat used a couple times. Only issue is sometimes we can’t seem to spawn the cave troll 🙁
Francisco Lizardo
hardest dungeon i believe so far
jacob
A little tip: if the troll spawns right be4 the liutenant just let them fight (troll is WAAAY stronger) and enjoy the show 😀
Ulfras
The dungeon has changed can you update your guides?
Anony
I’d love to see this updated to reflect the changes made to the dungeon since then.
will
u need to update your guide s the ghost eater has changed
Samedi
So this is out of date now, and amusingly people often tend to avoid path 2 since the changes. However, not too much has changed here IME, it’s mainly the spider queen and ghost-eater that trip people up.
-For the spider: before it spawns, stack in a corner where you will be able to LOS it. The little space next to the stairs is good for this but if you find another one, fine. One person aggro’s spiderlings, then draws them back, stacks, and everyone kills them. 1st person usually goes out again because there are probably some of the little bastards left, and after repeating the process with those the Queen spawns (DO NOT go out a second time if it’s already spawned and noticed you). If it’s not already aggressed as it spawned, get its attention (careful here that if it fired at you, the AOE wouldn’t land where you stack. It will spread through the fence in the place I mentioned, for example, and screw up your plan) and then go stack so it gets LOS’d and runs to you. NOBODY MOVE. No movement skills, no strafing or walking, no getting pulled by anything, just stand where you are: it won’t fire any AOEs if people are close to it and not moving. If it does fire them though, you just have to run because otherwise you all die – probably you all die even if you run, but whatever.
One exception I’ve noticed is that if you stacked in a corner, you can dodge into it without triggering the AOE (important: not just a wall that you will slide along, but a corner so you don’t move AT ALL and just do a somersault in place) and this allows you to do things like use the guardian’s dodge-heal without getting your team a horrible poison-AOE-induced death.
-The ghost-eater cannot be harmed while it’s a ghost, and the traps now make it mortal. Do not stand in the ghost-eater’s AOE attacks.
Traps are powered by oozes. Oozes spawn (at the ghost-eater) when you attack the ghost-eater in ghost form, and oozes are moved by using the bundles nearby. One person must LIFT the ooze, then another PULLS it and it will move toward that player. When an ooze is under the effect of LIFT in the trap’s range (I think you see this on the floor but I’d estimate it at about a 600 radius of the trap) it will be consumed and the trap’s indicated charge level will increase.
Beware of spawning too many oozes, because the ghost-eater does occasionally eat them: this heals it. Since you won’t harm it in ghost form anyway, stop attacking it when you have oozes around and get them into traps. Once a trap is fully charged, it will activate when the ghost-eater is in range, transforming it to its normal state and allowing you to harm it for a while. Then it will become a ghost again. I think you will need to use a different trap the next time, or perhaps they have a cooldown, but anyway it’s usually been convenient for us to lead it to a new one. I’m not sure if you can kill it outright after one trap, but if you’ve all got high DPS you could always give it a shot, since returning to ghost form seems to be timed rather than linked to its HP.
A relatively easy way to complete this is to use the pillars near each trap to LOS the ghost-eater until it reaches the range of the trap, BEFORE you actually charge it, so just do this as soon as it exists. When you attack the ghost-eater and spawn oozes, some should be in range of the trap already because they appear near the creature, and a mere LIFT will have the trap consume them and gain energy. Cuts down on quite a lot of ooze-moving.