A comprehensive guide for GW2 Guild Rush, a component of the new Guild Missions introduced with the February update.
Navigation
- Basics of Guild Rush
- Bear Lope
- Chicken Run
- Crab Scuttle
- Devourer Burrow
- Ghost Wolf Run
- Quaggan paddle
- Spider Scurry
Basics of Guild Rush
To be able to research Guild Rush, you must have Guild Bounty and Guild Trek unlocked in addition to Politics 6. It costs 80 Guild Merits and 50k influence to unlock and the research time takes a week but you can speed it up by using extra influence.
There are 6 known locations for Guild Rush. Once you have built a Guild Rush and activated, you will be given one of the six locations randomly. You have 5 hrs to locate that location and have a Guild Officer to activate the Guild Rush at that location. Once you activated the Guild Rush at the given location, any player that touches the banner will be transformed to an animal specific to that Guild Rush location.
You have 30 minutes to get 15 guild members from the start location to the end location to receive 15 guild merits for completion. It doesn’t need to be 15 different people – you can have the same 5 players run through the rush 3 times each for example.
Players who made it to the end of Guild Rush within the 30 minutes (regardless of how many people completed the rush) will get a weekly reward chest in addition to the treasure chest at the end of the rush. The reward chest appears to be on a weekly reset (resets on Saturday evening daily reset time) and will reward players with 1 Guild Commendation, 2 rares, and 50 silver. The treasure chest appears to be on a daily reset but give the same type of loot as jumping puzzle chests (i.e. blues and greens).
Tips for Guild Rush
- Spam skill 1 whenever it is off cooldown as it reveals traps (red circles on the ground)
- It is super helpful to set up group of non-transformed players as “escorts ” that will defend transformed players attempting the Guild Rush from nearby mobs or go up ahead to clear mobs.
- Transformed players can be buffed with swiftness, aegis, regeneration, and can be healed by non-transformed players.
- Use your minimap to help you navigate through the Rush. Blue flags on your minimap will tell you where to go next.
- Small red circles are spike traps that will activate once. If someone ahead has trigger them, they will not harm you when you pass over them.
- Large red circles are rock traps. These rock traps are highly lethal but you won’t get hit by it if you move past them fast enough. Make sure to never follow someone when passing through these rock traps as you will get hit by the rock traps activated by the person before you.
Bear Lope (Lornar’s Pass)
- Objective:* Rush the depths of Posternus Caverns. *
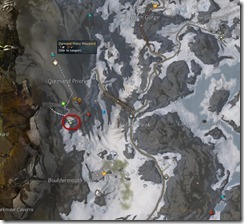
- Location: Lornar’s Pass NW corner, just south of Durmand Priory Waypoint
- Average completion length: 3-4 minutes.
| Button | Skill | Description | Cooldown |
|---|---|---|---|
| 1 | Search | Search for area traps | 6 seconds |
| 2 | Eat Leftovers | Consume a leftover to regain health (1k HP) . Removes 1 condition. 3 charges | 10 seconds |
| 3 | Snowball | Roll yourself in a ball of snow. Increases health and grant immunity from crippling. | 45 seconds. |
For this Guild Rush, you are transformed into an adorable bear cub and must navigate through the depths of Posternus Caverns that is filled with Frost Bats, Ice Wurms, Cave Trolls, Grawls, Fleshreavers and Ice Imps. This is a rather long rush compared to some others and some areas are quite difficult to pass through without “escorts” to help clearing them.
The cave itself is divided into 6 sections, each section guarded by a different group of mobs. It is very helpful to have “escorts” clear the mobs at the Cave Trolls, Grawls, Fleshreavers as these areas tend to have a high density of mobs and filled with traps. Snowball comes in handy in the Ice Wurm area and the Cave Troll area as these mobs do knockdowns that you become immune to in Snowball form. You only get 3 charges of Eat Leftover so use it carefully.
Frost Bats
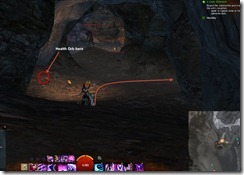
This section of the cave is rather easy and is there to get you adjusted to the whole cave. This area is rather trap heavy but there is a health orb at the end of the Frost Bat passage to refill your health if you get hit by traps or the bats. Don’t waste your Eat Leftover or Snowball here.
Ice Wurm
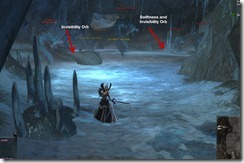
This area is fairly difficult to navigate but thankfully there are orbs that grant you invisibility and swiftness in the area. You can either grab the first invisibility orb on the left and use Snowball once invisibility wears off to trek straight through the wurm area or you can go diagonal and try to reach the second invisibility and swiftness orb (you may need to dodge some attacks).
Ice Wurms will throw rocks at you, which is quite lethal if two lands on top of you or if you get hit by the rock from the Champion wurm.
Cave Troll
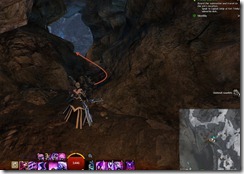
Cave troll area is after the Ice Wurms with some harmless grubs in between. Make sure you take a right turn to enter the cave troll area and not go straight ahead and bump heads with the Champion Cave Troll.
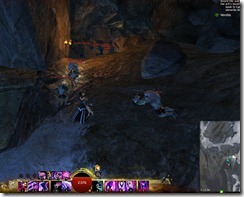
The entire cave troll area should be cleared if possible to keep troll attacks to a minimal. The worst section is the narrow corridor near the end of the Cave Troll section. This area is heavy with traps and if left uncleared will give a rough time to anyone due the combination of traps and troll attacks. It is best to use your Snowball here if the area is not cleared to get through this passage.
Grawl & Fleshreavers
Grawl and fleshreaver area is dense with mobs and it can be a pain to avoid all of their attacks. It is therefore recommended that you keep the their population low to ensure safe passage.
Do not forget to take a 180 turn near the end of the grawl area to enter the fleshreaver area! If you exit the cave here, you will lose your transformation and fail the Guild Rush.
Ice Imp
The Ice Imp area is mostly the home stretch. The area is largely devoid of traps and the Ice Imps are few in number and easy to avoid.
Chicken Run (Fields of Ruin)
- Objective: Rush through Flameroot Caverns
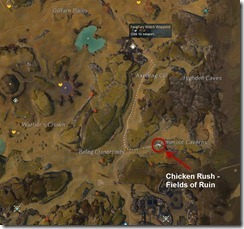
- Location: Fields of Ruin SE corner.
- Average completion length: 2-3 minutes.
| Button | Skill | Description | Cooldown |
|---|---|---|---|
| 1 | Search | Search for area traps | 6 seconds |
| 2 | Run | Run as fast as you can and gain health (swiftness for 4 seconds) | 20 seconds |
| 3 | Throw Feathers | Hide yourself in a flurry of feathers (stealth for 4 seconds) | 30 seconds. |
For this guild rush, you are transformed into a chicken and must navigate through the Flameroot Caverns.The caverns is roughly divided into 3 area: Harpies, Breeze Riders/Drakes, and Separatists. With the chicken transformation, you gain swiftness and invulnerability for a few seconds with the #2 skill and you can get past sticky situations with stealth from #3 skill.
Harpy area
The harpy area is fairly easy to pass. The initial tunnel section has few mobs so all you need to watch out are the traps. Once you get to the open area, you get two group of harpies. I usually hug the right wall and just run past the first group of harpies near the nest. For the second group of harpies, you will want to use #2 to gain a speed boost and then use stealth granted by #3 to get past them if needed.
Breeze Riders/River Drakes
This area is fairly simple to get through. When passing through the gaps guarded by the River Drakes, make sure to press #2 if possible to gain swiftness as there are rock traps in that gap that you can avoid if you run past it quick enough.
Separatists
The tunnel leading to the Separatist area has two traps so make sure to use your #1 skill and not get hit by the traps. If you hug the right wall, you won’t aggro the Separatist Marksmans but there is a trap near the corner of the room that you will hit if you are not careful.
For the next part, it would be super helpful if “escorts” clear the Separatists as the there are quite a few of them and the corridor guarded by them is filled with traps. I try to stealth as much as I can getting to that corridor and then just use the swiftness + invulnerability granted by #2 skill to get past that corridor as quick as possible.
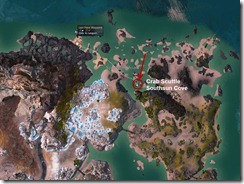
Crab Scuttle (Southsun Cove)
- Objective: Rush across Driftglass Springs
- Location: North portion of Southsun Cove
- Average completion length: 4-5 minutes
| Button | Skill | Description | Cooldown |
|---|---|---|---|
| 1 | Search | Search for area traps | 6 seconds |
| 2 | Threaten | Raise your claws in contempt. Grants speed boost. Confuses and provokes target | 5 seconds (0.75s cast time) |
| 3 | Crab Shell | Block Incoming attacks for a short time | 15 seconds (0.5s cast time) |
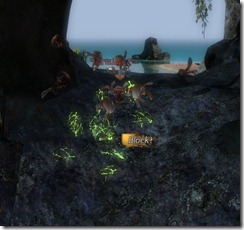
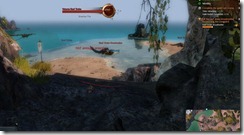
For this guild rush, you are transformed into a crab and must traverse across Driftglass Springs while avoiding Reef Riders, Crabs, Reef Drakes, and Karkas. This is one of the guild rushes where “escorts” cannot protect transformed players the entire pathand players must traverse certain sections of the course by themselves.
Your #3 block skill will be your friend, especially against those Karka Hatchlings that will attach themselves to you and explode. If you don’t block their explosion, you will likely die from the impact. From time to time, if I see Karka hatchlings are getting closee, I will stop, spam my #3 button and let them kill themselves on my block.
Reef drakes can be a bit problematic as well. They have a pretty nasty tail swipe and there is usually a Reef Drake Broodmother near the start that can pull transformed players in. It is helpful to have escorts to engage the Reef Drake Broodmother so she doesn’t pose a danger.
About 2/3 of the way into the Guild Rush, you will encounter this area filled with Burrowed Wurms. They cannot be attacked and must be dodged. Players doing “escort” can’t do much here either as they also get downed if they get hit by the wurms. Watch for their tunneling wave and don’t get hit as it will likely one shot you. At the end of the Burrowed Wurm area is a little tunnrl that you can press F to enter.
After you get past the Burrowed Wurms, it is a glassy area filled with young karkas and traps. Use your #1 skill and don’t fall into holes on the ground. It is mostly a home stretch at this point but beware of traps.
Devourer Burrow (Diessa Plateau)
- Objective: Rush through Spider Nest Cavern
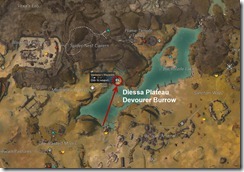
- Location: North section of Diessa Plateau
- Average completion length: 2-3 minutes
| Button | Skill | Description | Cooldown |
|---|---|---|---|
| 1 | Search | Search for area traps | 6 seconds |
| 2 | Play Dead | Trick your enemies by pretending to be dead. The skill can be canceled by movement. (4.5s channel) | 30 seconds |
| 3 | Burrow | Burrow yourself into the ground, hiding yourself from foes (1.5s cast time, 8s invisibility) | 45 seconds |
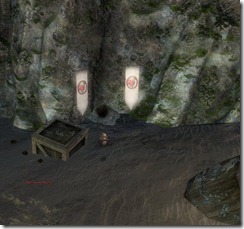
Devourer Burrow has players transformed into a devourer and rush through Spider Nest Cavern located on the north section of Diessa Plateau near Manbane’s Waypoint. This is a relatively short rush with a low density of mobs but a high density of lethal traps. Take your time and proceed slowly as there are traps pretty much every turn.
Most of the mobs you will encounter outside the cave are bears while spiders, bats, and oozes rule inside the caverns. Spiders are for the most part quite harmless as they have a long wind up attack that is quite easy to avoid. What will get you are the traps, especially the big rock traps. Go slowly and use your #2 skill a lot. If your #1 skill is not up and you are chased by enemies, press #2 to play dead while waiting for your #1 skill to come up.
Unlike the smaller circle spike traps, which are survivable if you hit it with full health, big circle rock traps will pin you down and kill you right away unless you dodge out of the circle. Your options are to either 1) avoid it if you can spot it before hand 2) dodge through it if you scanned it while running on top of it or 3) Use the #3 skill if the first two options are not available. #3 skill does have a short casting time that immobilize you so don’t expect to survive if you use it on top of a rock trap. In addition, you are also immobilized for a short duration when you emerge from the invisibility thingie so make sure you don’t end up on top of a rock trap.
Escorts can clear the cavern of mobs and give swiftness/aegis/regeneration to transformed players to help them get past traps if necessary.
Ghost Wolf Run (Harathi Hinterlands)
- Objective: Rush through Bonerattler Caverns
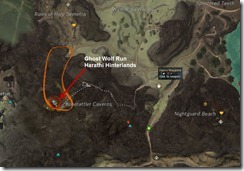
- Location: SW corner of Harathi Hinterlands
- Average completion length: 3-4 minutes
| Button | Skill | Description | Cooldown |
|---|---|---|---|
| 1 | Search | Search for area traps | 6 seconds |
| 2 | Ghost Leap | Leap forward and gain regeneration (1.25s cast time) | 10 seconds |
| 3 | Ghost Howl | Grant Aegis and swiftness to up to three nearby allies (5s duration on Aegis and Swiftness) | 30 seconds |
Ghostly Wolf Run is a fairly enjoyable Guild Rush that have players transformed into a ghost wolf and run through Bonerattler Caverns located on the SW corner of Harathi Hinterlands. Unlike other Guild Rushes, this one encourage players to travel in packs as the Ghost Howl buff affect nearby allies and give out very handy buffs.
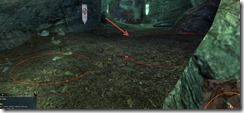
As usual, you will encounter spike traps and rock traps but the Ghost Leap and Aegis from the Ghost Howl give you quite an edge against those traps. For a longer leap, try pressing #3 first to gain swiftness and then #2 to leap.
The first section have you traverse a room full of bandits and traps which is pretty much the only hard room to navigate if the bandits are not cleared.
After the bandits, you need to traverse through a waterfall and go up the ramps. This section is mostly devoid of mobs and the traps are far in between that it is quite an enjoyable trek. De beware of a rock trap at the very top, next to the vista.
Once you get down from the ramps, you will need to get through a tunnel filled with bats. Ideally, this section should be cleared as well to ensure a smooth sailing to the chest.
Quaggan Paddle (Frostgorge Sound)
- Objective:
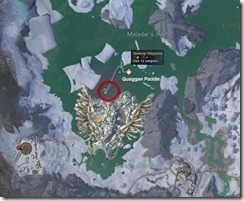
- Location: SW of Twoloop Waypoint
- Average completion length: 2-3 minutes
| Button | Skill | Description | Cooldown |
|---|---|---|---|
| 1 | Dart | Dart forward, gaining aegis for 5s | 20s |
| 2 | Purge Conditions | Purge your conditions and gain health for each one purged (500 health per condition) | 15s |
In Quaggan Paddle, players are transformed into a cute quaggan and must paddle their way through treacherous waters filled with jellyfish, skelks, ice wurms, sea urchins and deadly mines. The rush itself is fairly short and easy but many things inside the rush can kill you with one hit if you are not careful.
Your #2 skill only heal you if you get a condition but each portal you pass through will also heal you for +400 HP each and increase your maximum HP by a small amount.
The initial onslaught of jellyfish seems to be easy to avoid but you will quickly encounter the nasty ice wurms and their special ice “rock” attack that will force you to start over if you get hit by it. If you have players helping to clear, kill these ice wurms if possible.
After this little section of ice wurms, you will encounter a long stretch of minefields. If you or anyone near you hit one of these minefields, you will die and be forced to restart the rush. Spread out so that other people screwing up on those mines doesn’t bring you down with them.
Inside the minefield is another section containing Ice Wurms. The combination of Ice wurms and mines can be quite lethal so make sure there is someone clearing out those ice wurms if possible. Do not swim too high up or you will get a debuff and be forced out of the rush.
After you pass the minefield, rest of the rush is fairly easy. There is are a few avoidable mobs but you may get unlucky and have an event starring near the chest.
Spider Scurry (Dredgehaunt Cliffs)
- Objective: Rush the catwalks of Dostoev Sky Peak
- Location: Middle of Dredgehaunt Cliffs, NW entrance of Dostoev Sky Peak
- Average completion length: 2-3 minutes
| Button | Skill | Description | Cooldown |
|---|---|---|---|
| 1 | Search | Search for area traps | 6 seconds |
| 2 | Web Decoy | Create a clone of yourself at target position on traversable terrain. Can be used to distract foes (900 range, 1s cast time) | 25 seconds |
| 3 | Leap | Fire a web to pull yourself to a target area on traversable terrain. Can be used to pull yourself onto raised platforms. (900 range, 0.5s cast time) | 4 seconds |
Players are transformed as spiders in Spider Scurry and must traverse through the catwalks of Dostoev Sky Peak while avoiding the army of dredge that is camped up there. Unlike other Guild Rushes, this one features quite a bit of vertical and freeform movement and has a certain “Spiderman” feel to it.
The catwalks can be a quite a confusing place to navigate. Be sure to follow the blue flags on your minimap and I will also point out the paths you need to take here. It is very helpful to have “escorts” clear the dredge on the platforms you need to traverse to enjoy a safe journey. If you like the extra challenge though, leave the dredge alive and they will give you a good thrill.
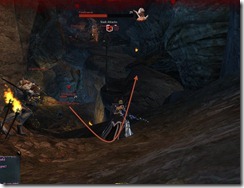
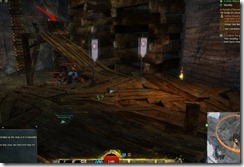
Once you are inside the cave, you need to take a left on the first opening. Beware of the numerous traps here. This will lead you into the huge open area where the catwalks are. From here, you need to look up to your right and leap to the platform above you. Make sure to leap on the platform here and not walk up here as otherwise you drag up quite a few dredge with you and make it difficult for any players attempting this after you.
There are numerous dredge here that your “escorts” will hopefully have cleared. Otherwise this area can be a pain to navigate with all the traps and dredge around. Your goal here is navigate to the end of the this platform and then leap up to the platform above. There are usually 2-3 dredge mobs along the way that may hinder your path.
Once you are up, you must zig-zag through an army of dredge and their turrets. I personally didn’t find it hard to avoid all of them since most of them have a long charge up attack that can be easily avoided but I would suggest clearing this place beforehand as it can get messy with all the dredge attacks.
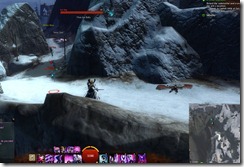
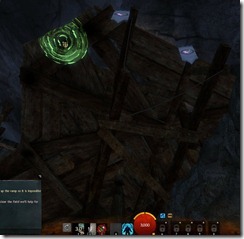
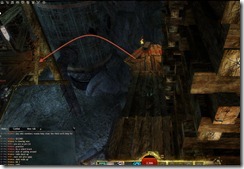
If you keep following the planks, you will soon see a corner with a chest on it. From here, you need to make a leap to the next platform using your leap #3 skill.
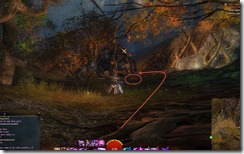
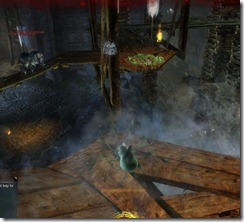
Then leap to the next platform a bit higher. Make sure to take a left after you leap over. You may want to use your #2 skill here to make a clone to distract the nearby dredges.
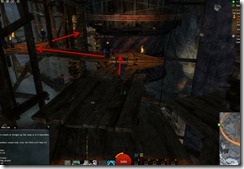
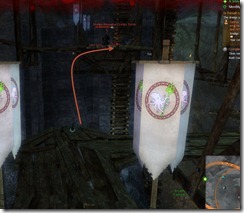
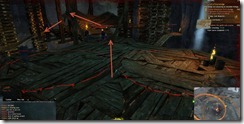
This will lead you to a giant platform guarded by a veteran dredge. He is quite harmless and easy to dodge. Follow the arrows and then take the exit to a ramp that leads down.
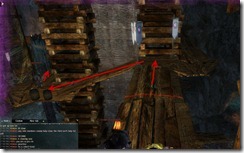
Follow the ramp down abit and then you need to make a giant leap of faith from this ramp to the ramp near the chest. It is a very long leap but you will make it! The chest is waiting for you at the end of the ramp.


Archived Disqus comments