GW2 Conjured Amalgamate Mythwright Gambit Raid Guide.
General Info
| Conjured Amalgamate | - 52.290.000 hp , hitbox 1670 |
| Conjured Greatsword | - 63.096 hp, hitbox 140 |
| Right Arm | - 5.976.000 hp, hitbox 500 |
| Conjured Shield | - 63.096 hp, hitbox 140 |
| Left Arm | - 5.976.000 hp, hitbox 500 |
| Conjured Warrior | - 557,766 hp, hitbox 160 |
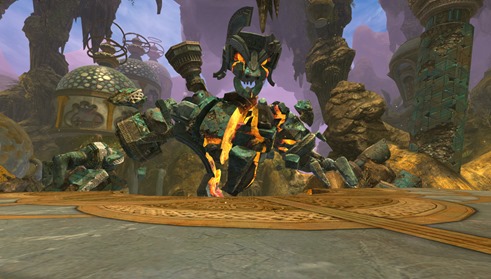
Conjured Amalgamate is the first boss of the Mythwright Gambit raid wing and features add control, special action key usage, and orb collecting phase much like the Keep Construct boss.
Class Composition
Power DPS is favored on this boss as the damage modifier from the orbs scale with power damage. Having someone with AoE knockback (i.e. Holosmith’s Holographic Shockwave) helps greatly with the Conjured Shield adds.
You will need two DPS players responsible for picking up the swords and two support characters responsible for picking up the shields.
Short fight TL:DR
Stack to kill right arm & adds. Dodge pulverize attacks. Designated players pick up sword and shield orbs as they spawn. Use swords for DPS & shields to protect from thunderclap and rotating junkwall Repeat for left arm & move to the right side of the platform if needed. Repeat for regenerated arms.
Videos
Condi Banner Warrior Regular
Holosmith Challenge Mote courtesy of Kevin
Mechanics
Fight Sequence
- Right Arm: Pulverize –> Swords –> Pulverize –> Shields–>Pulverize –> Swords–> Thunderclap –> Pulverize –> Shields –> etc
- Orb Phase –> Junk Wall
- Left Arm: Pulverize –> Swords –> Pulverize –> Shields–>Pulverize –> Swords –> Pulverize –> Shields –> etc. No Thunderclap but has Falling Debris attack
- Orb Phase –> Junk Wall x1 or x2 (if you push boss to 25% quick enough, there is only 1x Junk Wall).
- Regenerated Left Arm & Right Arm: You can engage both arms at same time if your group is coordinated. Beware of Thunderclap & Falling Debris
- Orb Phase –> Junk Wall (hopefully the boss is dead by then)
Pulverize
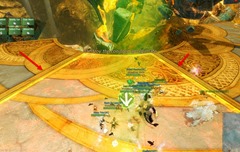
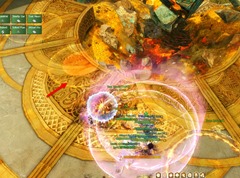
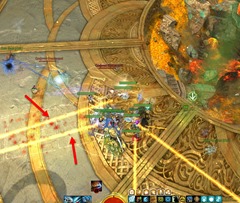
Pulverize is the slam attack from Conjured Amalgmate’s arm. It is a very visible telegraphed attack that is easily dodgeable or blocked. It does \~9k damage if not avoided and knocks the player back. The platform where the Pulverize attack occurs will be telegraphed yellow shortly before the hit lands so you have ample time to dodge or avoid it. Right after the Pulverize attack, the arm will be vulnerable to damage for a short duration and spawn Conjured Greatswords and Shields.
Conjured Greatsword and Shields
Conjured Greatswords or shields spawn with every Pulverize attack. The Pulverize attack will spawn one sword or shield initially but more will pop out as you hit the arms. You will get 5x Conjured Greatswords with the first Pulverize, 5x Conjured Shields with the second, in an alternating fashion.
You can spawn two waves of Greatswords initially by standing on the left arm first to trigger the fight and then move to right arm to damage it. This will give you more Fractured stacks to use to quickly burn down the Right arm.
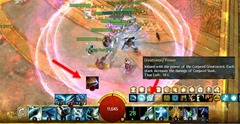
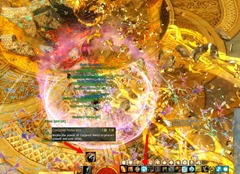
Greatswords can be pulled together and cleaved down. Upon their death they will spawn a green circle, the first person to step in that green circle will gain the Greatsword Power special action skill (offensive) and each additional greatsword they step through will increase the effectiveness of this up to a maximum stack of 10. You will want power DPS to grab these greatswords as the damage is increased with power modifier.
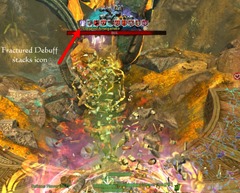
The Greatsword Power special skill should be used on either the boss or his arms and not wasted on the Conjured greatswords or shields. The skill is a ground targeted damage skill that also applies the Fractured debuff to the boss and his arms. Each stack of Fractured debuff increase the damage your group deals to the boss by 50% per stack up to a maximum of 10 stacks (500% damage bonus). If you see the boss or the arm already have 10 stacks of the Fractured debuff then you may want to hold off on using Greatsword power. However, this special action skill only lasts for \~25s so you don’t want to wait too long and have it fade out.
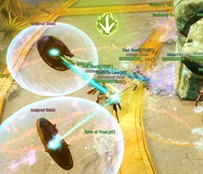
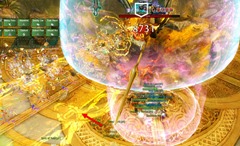
Conjured Shields are like Greatswords except they spawn with a CC bar and are immune to damage until this CC bar is removed. Holosmith is very handy here as they can use their Holographic Shockwave to instantly remove the CC bars and then these can be pulled into the group and cleaved down. Defeated Shields drop green circles that give players the Conjured Protection special action key and this skill can be stacked much like the Greatsword Power. For each stack you have, it will reduce the incoming damage to everyone standing inside the shield when it is deployed by 10% up to a maximum of 10 stacks. Multiple players using shields will have the damage reduction stack additively and Conjured spawns cannot enter the shielded area. Generally your healers should be grabbing these shields and coordinate between themselves on when to use their stacks so they don’t drop everything at once . Much like the Greatsword Power buff, these have a \~25s duration and the spawned shield bubbles only last for a short duration as well.
If you have a Greatsword Power or Conjured Protection special action, you cannot gain the other special action skill. You must either continue to stack your current skill or use it in order to be able to gain the other (or let it fall off).
Conjured Warriors
Conjured Warriors spawn if you fail to clear out the Conjured Greatswords or Shields from previous Pulverize and they merge with Greatswords/Shield of the next Pulverize. These are especially deadly because they have increased HP, apply the Fractured debuff to your group members (increase your damage intake by 50%), and have a CC bar that make them immune to damage until it is broken. You should never see Conjured Warriors until last phase of the fight when the DPS is focused on burning the boss. You can temporarily ward off these warriors by dropping Conjured Projections on the group as the shield bubble will prevent the warriors from entering and meleeing the grouip.
Thunderclap
Thunderclap is a special attack with no telegraphed warning and only occurs when the boss has both arms. It generally occurs after 3x Pulverize attacks . There is a short audiable charging up sound before the boss claps both his arms together and deal massive damage to the group. To mitigate this, healers and everyone with Conjured Projection special skill must use it before the clap animation occurs (you want to have at least 5x shields stacks) or the clap may down the group (Rebound & Spirit Rezwill also work here). The Tunderclap cannot be avoided using evade/block etc.
Orb Phase
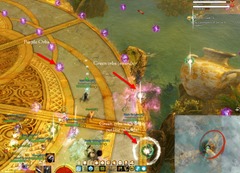
This orb phase is a bit similar to the orbs on Keep Construct. It occurs right after one of the arms is killed. There are three types of orbs: purple, green and green with white outline.
Purple orbs just deal damage to you and should be avoided. Regular green orbs will give the Greatsword Power skill when collected. Ideally you should have two power DPS players who are good at grabbing the orbs to grab all of them. Green orbs with a white outline give the Conjured Projection skill when collected. Your healers should be grabbing these. Rest of the players can throw their Greatsword Power on the boss to deal some damage on the boss unless your designated players aren’t great at getting all the orbs (if the boss gets any shield orbs, it will be invulnerable to damage until a Greatsword Power skill is used to break the shield).
Both sword and shield orbs spawn in diagonal patterns, so it is very easy to collect all of them. If your party fails to collect any greatsword orbs, the CA will gain a damage buff in the burn phase. Similarly if you fail to collect shield orbs, he will gain an incoming damage reduction buff in the burn phase.
Burn Phase/Junk Walls
Right after the orbs phase, the burn phase occurs and the group should go all out DPS on the boss. This phase is actually two sections with a general burn phase and another burn phase on the Amalgmate’s head. Killing one of the arms will remove 10% from the boss’s HP so you start your burn at 90%. You want to stagger your Greatsword Power skill here to maintain 10 stacks of Fractured on the first burn phase and then have another 10 stacks ready for the subsequent burn phase on the head. If you fail to grab all of the shield orbs in the orb phase, the damage reduction buff the Amalgamate gains will count against any Fractured debuff you apply to him (i.e. if the boss gains 3x shield orbs and you apply a 7 stack Fractured debuff, the boss will only take a 4 stack Fractured debuff).
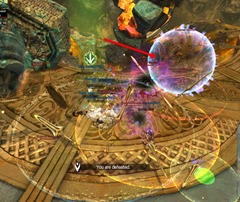
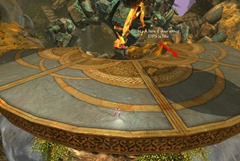
While this burn phase is occurring, a Junk Wall attack occurs similar to the Flame Wall on Sabetha but less deadly. This rotating wall sweeps from one end of the platform to another. If you engaged the Right Arm first, it should rotate from the left to right (as you are facing the boss). It cannot be blocked/evaded and will instantly down you and applies a ticking AoE after. You can mitigate the damage from this Junk Wall by using the Conjured Protection buff collected during the previous orbs phase.
Falling Debris
The Falling Debris attack occurs instead of Thunderclap when the Amalgamate only has one arm. It spawn orange AoE circles on the ground that can be avoided or blocked/evaded with dodge.
Second Burn Phase/Junk Wall
How you handle this part will depends on your group’s DPS. In this second burn phase after both arms are killed, two Junk Walls spawn with a bit of delay between them swinging in opposite directions. If you can DPS the boss to 25% quick enough, the second Junk Wall won’t spawn and you can simply stand in the middle of the platform. However, if the group DPS is low, you will need to move to the right hand of the platform (facing the boss) so that you drop your Conjured Projection shields right before the first Junk Wall coming from the left hits and this shield will also stay long enough to project you from the second Junk Wall swinging from the right.
Regenerated Arms
After the second burn phase the Amalgamate will regenerate both arms to 50%. Here depending on your group’s coordination you can either engage both arms at the same time (thus spawning more Conjured Greatswords for more Fractured stacks) or handle it one arm at a time. .
The strategy here used by organized groups is to engage both arms to spawn twice as many Conjured Greatswords, kill off one arm to trigger the orb phase and then use the Greatsword stacks to quickly kill off the remaining arm. Remember that killing off each arm takes 10% HP off the boss. So if the boss is already at 25% then he will be only at 5% and can be quickly finished off.. If you take too long to kill off the remaining arm, the Amalgmate will regenerate another arm and prolong the fight (watch out for another Thunderclap).
Challenge Mote
The Challenge Mote version of Conjured Amalgmate isn’t too different from the normal mode except for higher HP on the boss, arms and the addition of Conjured Scepters that will Scepter Beam random players in the group. These beams tick fast damage and can rapidly down and kill a downed player. The laser beam damage can be mitigated by having everyone stack on top of each other or using reflects. Sometimes these beams can line up with the orb phase so you will need to watch out if that happens.
Acknowledgements
Special thanks to sK for the raid carry and Rubik for writing the initial draft.
Players interested in getting started in raiding may check out the GW2 Raid Academy Discord [US] (not affiliated).
Archived Disqus comments
DrS Idlev
It appears that the every punch will initially only spawn one sword or shield and the remaining spawns are triggert by hitting the boss. Three hit on the arm will result in 4 sword/shields and no hitting will result in only one sword or shield. Also it might be worth noting that the GS can and will move towards players.\ In the first phase you can attack both arms but not at the same time. The spawning of the swords and shields is per arm. So If you trigger the left arm first, by standing in it you will get swords you can use on the right arm for the next punch, which will give swords again.\ I haven’t tested any of this in a full squad (3man group), but I’m confident, that it will work the same way.
Dulfy
Cool thanks I will add it to the guide