GW2 Dhuum Raid Boss Guide in Hall of Chains. Initial draft written by Rubik.
Contents
General Info
- Enrage Timer: 10 minutes
- HP: 32 million (40 on CM)
Class Comp
Different groups run different comps for this boss. You generally need to run at least two Power DPS to deal with the Enforcer mobs that spawn earlier in the fight as they take extra damage from Power classes.
You need at least three players to do the green circle mechanic. These players need to be on a good mobility and non-squishy class. If you are having DPS classes doing this then you can use the two healer setup. If you are having the healers and off-tank chrono doing it then you will need three healer setup.
Finally you will need a kiter for Dhuum’s Messengers. This is usually always a healing class since they will need to be able to heal themselves away from the group.
Having a personal condi cleanse and a stun breaker will be useful. One of Dhuum’s attacks applies a very long lasting fear that can be deadly if you don’t have a stun breaker and failed to avoid it.
Videos
Non-green
Green
NPCs & Adds
Reapers
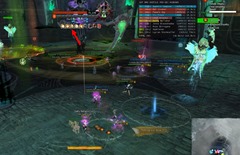
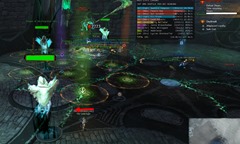
There are seven Reapers of the Underworld located around the fight area in a circle. They will begin the ritual to summon Dhuum so you can defeat him. They must be protected at all times as the fight fails immediately when one of them dies. They spawn from the circular pads in the area and you can pre-mark these pad locations with icons to make it easy to reference the reaper locations. Each have a visible health bar above their heads and they can be healed if they take damage.
Dhuum’s Enforcers
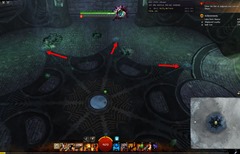
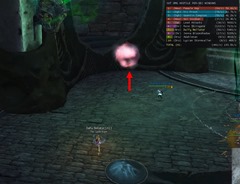
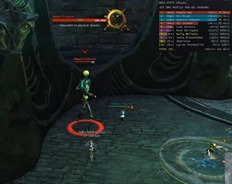
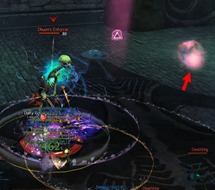
Dhuum’s Enforcers are large skeletons that spawn at the the four corner of the room in a clockwise pattern starting at the SW corner (right of the entrance). You will see a large orb floating slowly from Dhuum’s Throne. Once that orb reaches its destination, an Enforcer will spawn from the orb and start walking towards the nearest Reaper. These Enforcers are vulnerable to physical attacks so having at least 2-3 Power DPS for this fight is highly recommended. These champion Enforcers can not be hard CC’d, but they can be immobilized or chilled while they are walking to their targeted Reaper. If an Enforcer makes it to a Reaper it will deal significant damage to the Reaper, so these mobs should be a priority for your team if they spawn.
The Enforcers will not attack you except at the start of the fight where the Reapers havn’t spawned. They have a fast telepgraphed front cleave attack that can instantly down you. When they start to hit the Reapers they hit in an AoE in front of them so be careful not to get hit as it can deal \~5k damage.
You usually only have to deal with the Enforcers at the first 2 minutes of the fight as they should stop spawning once Dhuum comes down unless your orb person screw up and didn’t get a big orb.
Dhuum’s Messengers
Dhuum’s Messengers are Flesh Golems with an aggro mechanic that requires a kiter. They spawn in a similar fashion to the Enforcers but instead spawn from the smaller orbs that comes from Dhuum’s throne towards the center of the room. Each Messenger have a very high damage aura around them that can down a player in 2 ticks and they will go towards the Reapers if not kited.
To kite them you will need a kiter to attack them from ranged. They will aggro the first person that attacked them and remain aggroed on them until they despawn \~20 seconds later. If a non-kiter accidently get them first, they will need to kite it away from the group until it despawns.
The Messengers spawn at a fast rate at the initial 2 minutes of the fight. Once Dhuum comes down the Messengers spawn at a much slower rate. The kiter can then go around to heal the Reapers/group and participate in the Dhuum fight while keeping an eye on the Messenger spawns.
Deathlings
Deathlings are tiny spiders that spawn near the middle of the room and pick a Reaper to attack. They do not deal significant damage to the reapers and your team can easily cleave them down while moving past them or while a player is handling a specific mechanic and passing by. Although they will not attack you, like the Enforcers, if you stand in their AoE cleave range in front of them, multiple Deathing attacks can kill someone standing in the wrong place. Deathlings are vulnerable to condition damage like Enforcers are to power damage, but they have low health and can be easily taken care of by power classes too.
Mechanics
Green Circle/Orbs
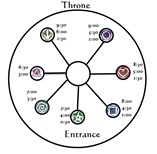
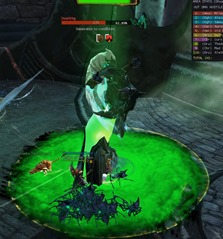
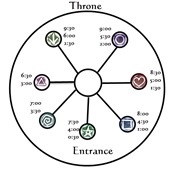
Starting at 9:30 on the timer and every 30s, a Reaper will have a green circle undernearth them that lasts for 5 seconds. One player need to stand on the green circle when it disappears or that Reaper dies and the raid wipes. The player that is inside of the green circle gets transformed into a spirit orb and is shot up in the air.
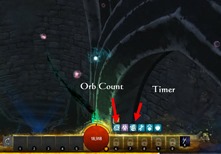
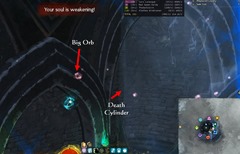
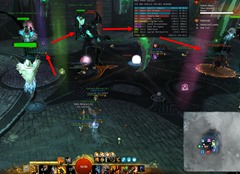
The player that is shot up in the air have 15s to collect 5 orbs or they will die (it takes 4s to get shot up so you only have 11s to collect orbs). You can see the timer and your orb count on your buffbar. The red orbs will start spawning at the outside of the arena and move in towards the center. You can move quite quickly to reach the red orbs around you, but be careful as the center circle of this part where the orb disappears will instantly kill you if you travel too far into it (appear as a white misty cylinder). There are two type of orbs: small and big. You must try to get 1 big orb everytime you go up as that will stop the spawning of the Enforcer below. The only time you can skip a big orb is if you are running out of time and it is either grab a small orb or you die to the timer. If you go clockwise in the air you should always see a big orb somewhere. If you failed to grab a big orb you will need to inform your group so they can be prepared for an Enforcer spawning.
When the player finishes collecting 5 orbs and are teleported back to the arena, they are given a debuff for 60s, and if that player tries to stand in another green circle while having this debuff, they will instantly die. This means that you will need a minimum of 3 players to rotate through the green circles to cover every one.
The green circles spawn in clockwise fashion around the room starting at the Reaper to the left of Dhuum’s throne (if you are facing him). That Reaper is typically marked as arrow symbol with squad markers. Then you simply mark the Reapers in a clockwise from that one (arrow –> circle –> heart –> square –> star –> spiral –> triangle).
| Time | Marker | Player |
|---|---|---|
| 9:30 | Arrow | Player 1 |
| 9:00 | Circle | Player 2 |
| 8:30 | Heart | Player 3 |
| 8:00 | Square | Player 1 |
| 7:30 | Star | Player 2 |
| 7:00 | Spiral | Player 3 |
| 6:30 | Triangle | Player 1 |
| 6:00 | Arrow | Player 2 |
| 5:30 | Circle | Player 3 |
| 5:00 | Heart | Player 1 |
| 4:30 | Square | Player 2 |
| 4:00 | Star | Player 3 |
| 3:30 | Spiral | Player 1 |
| 3:00 | Triangle | Player 2 |
| 2:30 | Arrow | Player 3 |
| 2:00 | Circle | Player 1 |
| 1:30 | Heart | Player 2 |
| 1:00 | Square | Player 3 |
| 0:30 | Star | Player 1 |
Bolded times are bit tricky since the Soul-split attack 5s before the timing so you don’t have much time to get to the reapers.
Affliction
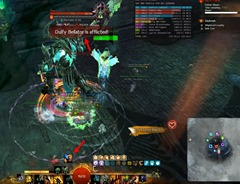
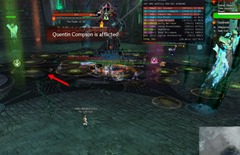
Roughly every 10 seconds, a squad member will be given Affliction. This message appears on every player’s screen and the targeted player will have both a ring of green flames around them and a timer above their head. The Afflicted player will be given a special action key that will allow them to detonate the Affliction before the timer.
When the timer runs out or the player hits their special action key , a powerful room wide AoE pulse will go out that does 0 damage to the Afflicted player, but incredible amounts of damage to nearby players. In order to not kill your squad members, the Afflicted player should be 1500+ range minimum from the rest of the squad, preferably on the other side of the arena if the group is low on health/struggling to heal. A good way to tell if you are far away enough is to use the fog of war in your minimap. If you don’t see any blue dot inside your vision, you can safely detonate with the special action key.
After you get the Affliction, you will get a debuff for \~30 seconds that prevents you from getting it again. The main tank cannot get Affliction so there isn’t a tank swap mechanic. Players with Affliction will have it removed during the Soul Splitting attack and the player returning from the orbs mechanic cannot get damaged by the affliction for a few seconds.
Soul Splitting
There are two forms of Soul-Splitting attack. The first one is entirely avoidable while the next one is room wide and unavoidable.
Avoidable Soul Splitting
Everyone except the tank need to stack right behind Dhuum. When Dhuum turns around and disappears into the ground, he will target one player and reappear undernearth their feet at their current location with a circle AoE attack. If everyone is stacked, they can all run out immediately when Dhuum appears and avoid the Soul Splitting easily by double dodging.
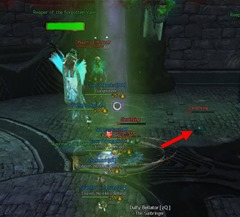
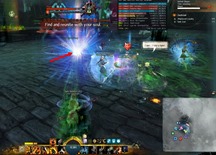
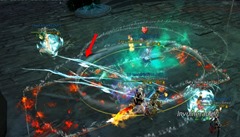
If you don’t dodge out when the inner circle reaches the outer circle, Dhuum will split you from your soul and you will need to locate your soul within a few seconds or you will be killed. You will be knocked back \~1000 range from your body and need to run back to the large beam of light indicating where your body was.
He leaves behind a greenish AoE field that instantly down anyone stepping on it and will steal all the boons of the players who got by the circle attack. The person who lost their soul can run over the green AoE to get their soul back (as long their soul isn’t on top of the AoE).
Unavoidable Soul Splitting (Greater Death Mark)
At set times, Dhuum will disappear into the ground and teleport to the middle of the room. When this happens, everyone need to to put your back close to the wall of the room and face Dhuum. Dhuum will unleash an AoE attack that will soul-spit everyone. If you put your back close to the wall, you will only be knocked back a certain distance and can easily get back to the the beam of light. Dhuum will also applies 6 stacks of Torment to everyone and this can be group cleansed if everyone is stacked together. Make sure you also have a personal cleanse if you are somehow far away from the group. Right after this Soul-Spit attack, Dhuum will start sucking people into him. As long you are close to the wall and not near the center you should have enough distance to not get sucked in.
- This attack occurs roughly at 6:25, 5:05, 3:45, 2:25, 1:05 in the timer. Sometimes it can be delayed a bit due to Dhuum finishing up an animation
Players can apply protection right before this attack happens to reduce the damage and Druids can bring Guard to lessen the damage for your squad. This attack will also steal all the boons from everyone so you will need to reapply might/fury and strip Dhuum’s boons he stole from the squad.
Shackles
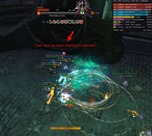
Starting at 60% of Dhuum’s HP, Shackle mechanic will occur. Two players will be selected (the two players are likely the two players whose hitboxes are closest to each other at that moment) to receive shackles. You will see a red text message – Your Soul has been shackled to another! if and only if you are one of the two players being shackled. There will also be a bright chain animation between the players.
When this happens, both players need to run away from each other to break the chain (\~1200 range). Otherwise the chain will tick continuously damage and down both players. This mechanic doesn’t have much warnings and it doesn’t tell you who you are shackled to so you will need to pay extra attention and call out when you get the shackle. If a shackled player downs or dies, the other player will still take damage until they move far enough away and break the shackle
The shackles seems to occur every 5% past 60% and sometimes can sync up with the Soul Split mechanic. If this happens it can be quite deadly as the shackles will deal continuous damage as you try to get back to your light.
Dhuum
Dhuum becomes active at 8 minutes left on the timer. Tanks usually tank him in a corners of the room in a counterclockwise fashion.
His auto attack is a large sweep that hits in front of him in a large cone as well as spawns AoE circles around him. The sweep is easily avoided by standing behind him (everyone but the tank should do this) and the AoEs are simply side-steppable or tankable, as they do relatively low damage (also applies a poison debuff).
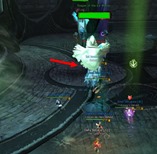
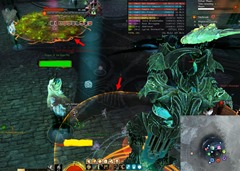
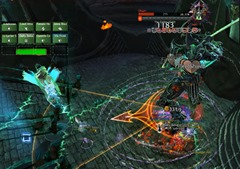
His second attack is an animation where he will turn round towards the center of the room and slam his scythe down. The area his scythe touches will be telegraphed by a glowing orange AoE. Any player that stacks properly behind the boss will not have to worry about this attack, as it hits really far away from the boss. It is likely intended to serve as another mechanic for the Messenger kiter. This attack will cause glowing green vines to radiate from the area hit by the scythe. The vines will place a long lasting fear on the players hit by it and you will need a stun-breaker to break out of it. The fear is very deadly as you can get feared into AoEs or into the throne that instantly kills you.
Past 30%, Dhuum gains a new attack that is easy to avoid. Dhuum will turn around and target a player, then use a cone AoE pull onto them, like the Reaper GS skill 5. This cone is easily side-stepped to the left or right, but the cone on the ground is much smaller than the actual area where you will get pulled/hit. To avoid simply just stand to the side.Vines will also radiates from this attack to the entire fight area.
10% Phase
When Dhuum reaches 10%, the fight timer get reset to 1:45. Everyone will be lifted up in the air above and everyone need to collect 5 orbs. You have plenty of time to grab orbs so make sure you not rush it and fly into the center of the room where the white pillar of death resides. Once you grab 5 orbs, you will be teleported down to the middle of the room inside a protective bubble holding Dhuum’s body.
Wait for everyone to finish grab their orbs and then 7 players (non-squishy players ideally) will run out to each of the 7 Ethereal Seals and interact with it. They will run back to inside the protective bubble and then everyone will get a few seconds to DPS Dhuum before he goes immune and you need to repeat this again. You will take damage outside the bubble so you will want to do and run back quick. You don’t have to interact with the seals all at the same time so you can just run out, get the seal and then run back.
With good DPS you should only need to repeat this once to kill Dhuum.
Acknowledgements
Special thanks to Sick Kents [Sk] and two [NA] lads for the kill and Rubik for writing the initial draft of the guide.
Players interested in getting started in raiding may check out the GW2 Raid Academy Discord (not affiliated)


Archived Disqus comments
Razyiel
Wow, that fight sounds quite exciting!\ Looking forward to try it out by myself \^.\^
As always, many thanks for your work and effort 🙂
Alot
Agree. Only successfully finished about half the raids but this one does seem very exciting for some reason.
Trillium
Probably because we’re facing a decent supernatural threat for once, not some bandits and cultists.
Alot
That’s probably it. There seem to be actual steaks this time.
Though it might also just amuse me that the reapers get health bars above their heads – a feature dedicated healers have been crying for on allies for ages.
Alot
Which begs the question, if a condi necro takes part in this raid should the “Dhuumfire” trait have any effect against Dhuum and should necro’s be locked out of using that trait after successfully killing him?
Razyiel
That is such a fun meme question xD
Is has to be double the effect just because he won’t be aware of beeing beaten with “his own” Skills\^\^
Alot
Like beating down Balthazaar with the Balthazar brand sohothen -.-
Which reminds me, I really need to start making my list for next year’s April fools patch note run.forgot half my jokes by the time this last one came around.
Trillium
Doesn’t anyone killed by Dhuum get automatically perma-banned? =D\ Was so in GW1, AFAIK.
Harjabit
https://www.youtube.com/watch?v=9B6bZSpQHxU 😀
Alastor999
I just have one question…. does he still speak in the third person and IN ALL CAPS!?!?
Radon
I checked videos of kills and it seems Shackle mechanic appears every 30 seconds.
Bobo Chan
ALL MUST END.
Thetruthísntalwayspopular
The catching of the orbs seems really fiddly. I can tell I wont enjoy this fight.
Shu Bi
interesting. they use a guy who is a dick to new players trying to learn to write their raid drafts.